

Catalog · How the catalog works
an-mc-pmsm-s32m276

This example demonstrates a sensorless Field Oriented Control (FOC) implementation for Permanent Magnet Synchronous Motor (PMSM) control using single shunt current sensing on the NXP and S32M276 microcontroller.
Anyone may press Interesting, signed in or not. It helps others find this project.
README
NXP Application Code Hub

AN14482 3-Phase PMSM Field-Oriented Control Solution
This example demonstrates a sensorless Field Oriented Control (FOC) implementation for Permanent Magnet Synchronous Motor (PMSM) using single shunt current sensing on the NXP S32M276 microcontroller.
The demo is based on the AN14482 3-phase Sensorless PMSM Motor Control with S32M276, more details about the implementation can be found in the application note.
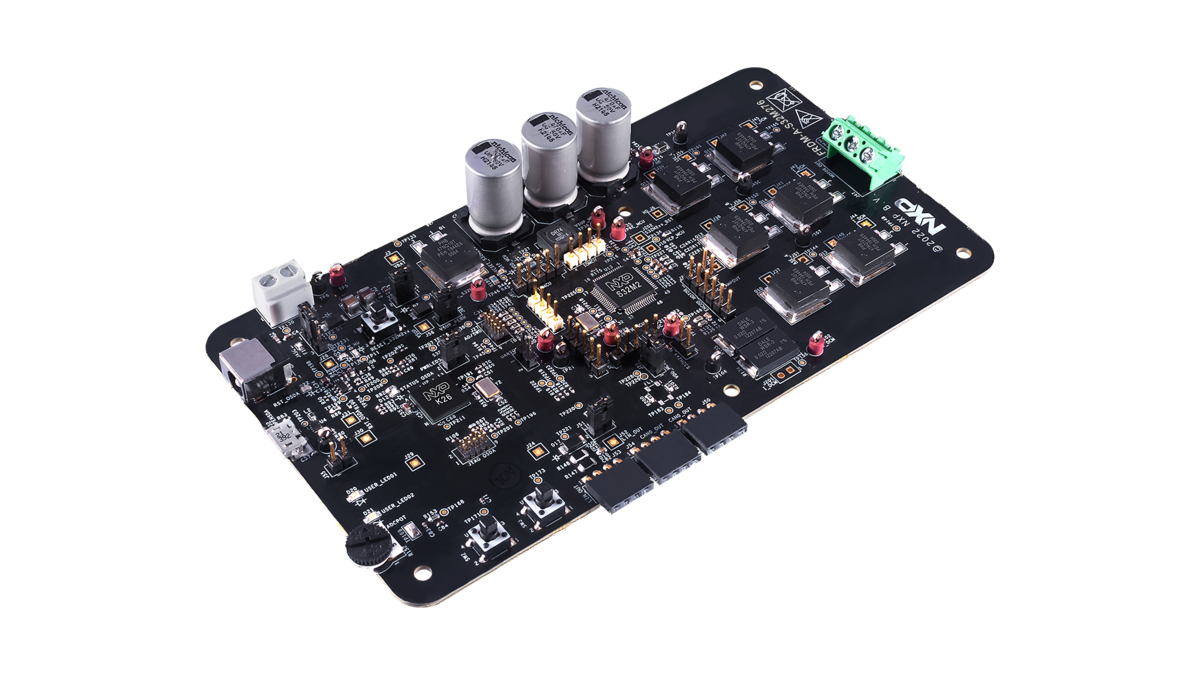
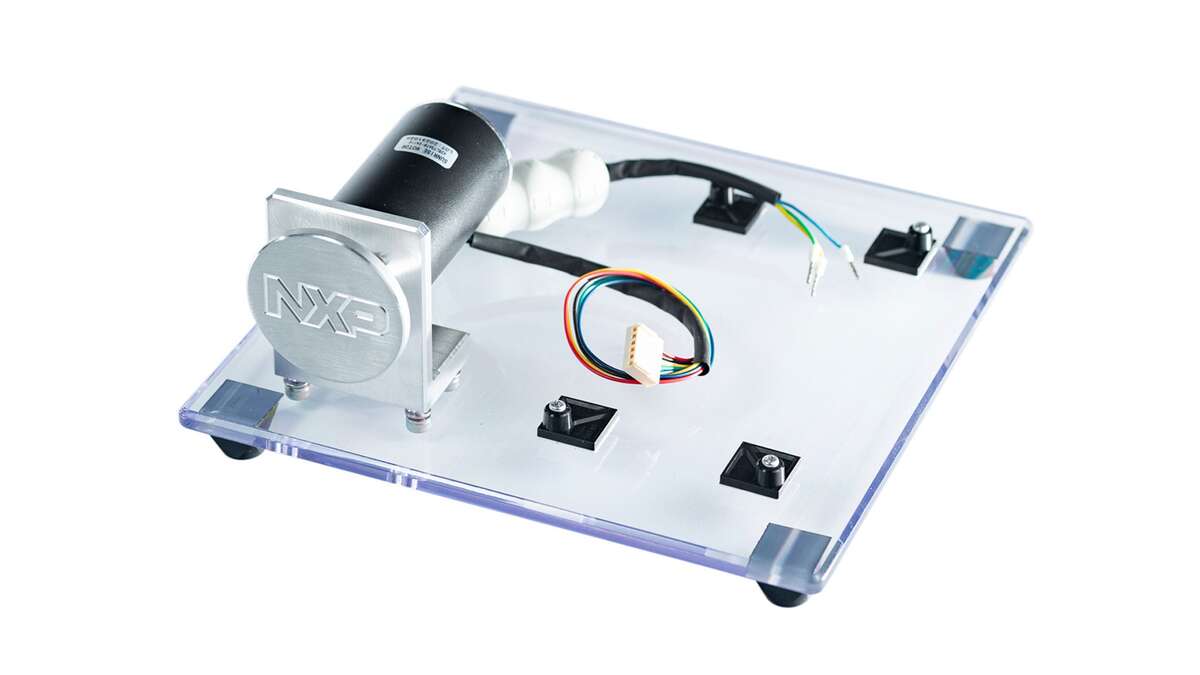
The complete setup with FRDM-A-S32M276 EVB, Sunrise motor is pictured below:

Boards: FRDM-A-S32M276
Categories: Motor Control
Peripherals: BCTU, eMIOS, ADC, PWM, SPI, UART
Toolchains: S32 Design Studio IDE
Table of Contents
1. Software and Tools
This example was developed using the FRDM Automotive Bundle for S32K3 + S32M27. To download and install the complete software and tools ecosystem, use the following link:
- FRDM Automotive S32K3 + S32M27 Board Installation Package
- Automotive Math and Motor Control Library (AMMCLib) Rev 1.1.45
- FreeMASTER Run-Time Debugging Tool
2. Hardware
- Personal Computer
- 12V Power Supply
- micro-USB cable
- FRDM-A-S32M276
- Sunrise Motor from BLDC-KIT
3. Setup
3.1 Import the project to S32 Design Studio IDE
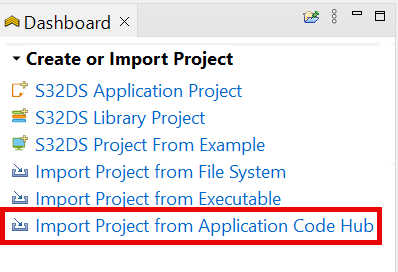
- Open S32 Design Studio IDE, in the Dashboard Panel, choose Import project from Application Code Hub.
- Find the demo by searching: an-mc-pmsm-s32m276
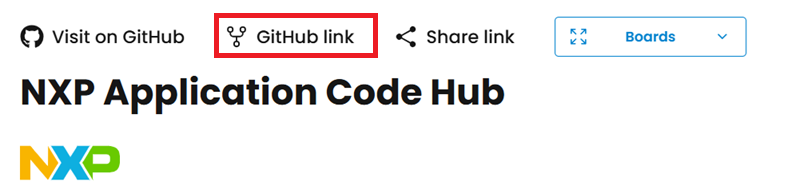
- Open the project, click the GitHub link, S32 Design Studio IDE will automatically retrieve project attributes, then click Next>.
- Select main branch and then click Next>.
- Select your local path for the repo in Destination->Directory: window. The S32 Design Studio IDE will clone the repo into this path, click Next>.
- Select Import existing Eclipse projects then click Next>.
- Select the project in this repo (only one project in this repo) then click Finish.


3.2 Generating, Building and Running the Example
-
In Project Explorer, right-click the project and select Update Code and Build Project. This will generate the configuration (Pins, Clocks, Peripherals), update the source code and build the project using the active configuration (e.g., Debug_FLASH). Make sure the build completes successfully and the *.elf file is generated without errors.
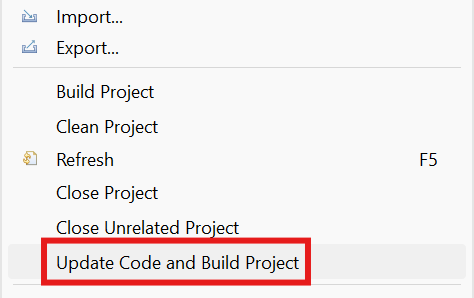 Press Yes in the SDK Component Management pop-up window to continue.
-
Go to Debug and select Debug Configurations. There will be a debug configuration for this project:
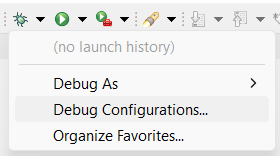
Configuration Name                  Description
-------------------------------     -----------------------
$(example)_debug_flash_pemicro      Debug the FLASH configuration using PEmicro probe
Select the desired debug configuration and click on Debug. Now the perspective will change to the Debug Perspective. Use the controls to manage the program flow.


3.3 Connecting the Hardware
- Check the location of User Buttons, LEDs, 12 Vin DC power, micro-USB connector, Motor Phases, Hall connector JP1:
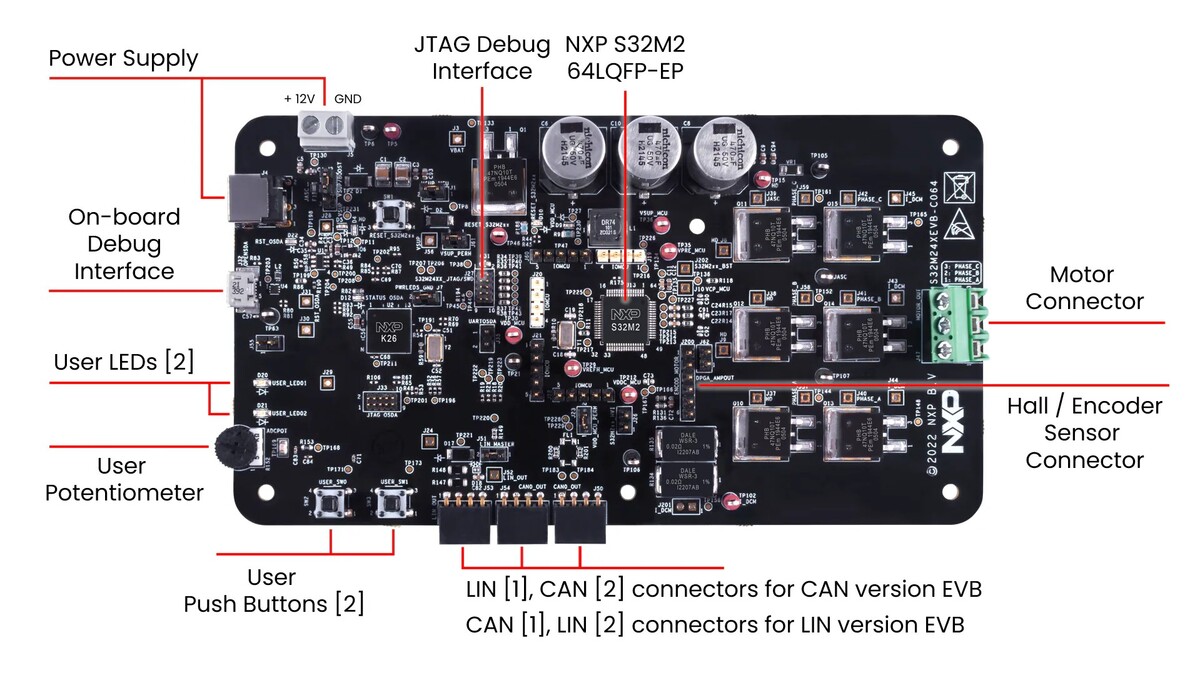
- Connect 12V DC power supply to the board via the 12V power connector.
- Plug the micro-USB cable to the board for debugging and communication.
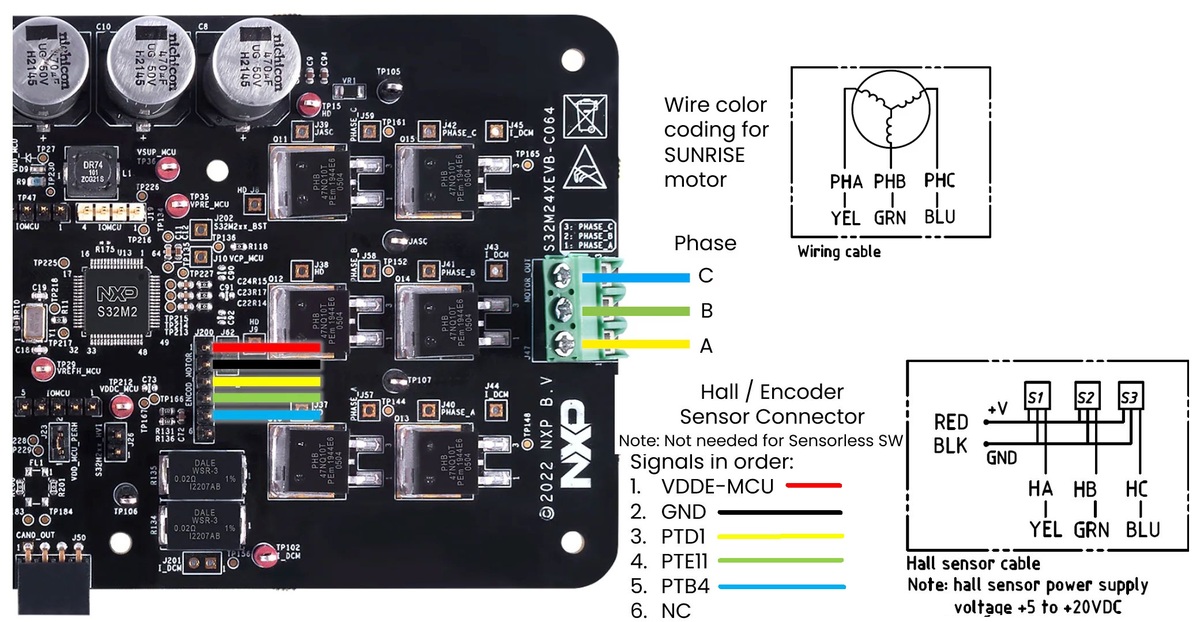
- Insert the motor phases (A,B,C) to the J47 Motor_Out on the board.
- Plug-in the Hall sensor connector to J200 on the board. See details in 3.3 Plug in the Encoder/HALL Sensors


⚠️ Safety Warnings
IMPORTANT - Read before starting the motor:
- Ensure motor is mechanically secured before testing
- Keep hands and loose clothing away from rotating parts
- Verify correct power supply voltage (12V DC, max current rating)
- Ensure proper ventilation - motors can overheat
- Use emergency stop procedures when testing
- Disconnect power before making hardware changes
- Never exceed motor's rated speed/current specifications
4. Results
- Open FreeMASTER Run-Time Debugging Tool and establish a connection to the target board via micro-USB cable.
- Open FreeMASTER_control/S32M_PMSM_Sensorless.pmpx project file in FreeMASTER.
- Click on "GO" button to establish communication with the target board: https://github.com/nxp-appcodehub/an-mc-pmsm-s32m276/blob/HEAD/images/FreeMASTER_Connect.png
- Go to App Control Tab and Press "ON" button to start the motor, set the Speed_Required value to the desired motor speed (1000RPM): https://github.com/nxp-appcodehub/an-mc-pmsm-s32m276/blob/HEAD/images/FreeMASTER_Running.png
- Observe the motor iABC current waveforms in real-time on the FreeMASTER: https://github.com/nxp-appcodehub/an-mc-pmsm-s32m276/blob/HEAD/images/FreeMASTER_Waveforms.png


5. FAQs
Common Issues and Solutions
Does FreeMASTER connect?
?????? NO ??? Check USB cable, COM port, firmware loaded
?????? YES ??? Is "Fault" displayed?
    ?????? YES ??? Check fault code in FreeMASTER ??? Faults & Trips tab
    ???   ?????? Overcurrent ??? Reduce current limit, check motor wiring
    ???   ?????? Overvoltage/Undervoltage ??? Check 12V supply is within range
    ???   ?????? Ia, Ib or Ic ??? Check that motor phase connections are correct
    ???   ?????? AEModule ??? Check gate driver supply voltage and Status0 value
    ???   ?????? FOC ??? Verify motor shaft is free to rotate
?????? NO ??? Check "ON" button pressed, Speed_Required > 0-
After loading the project, there is a message "NXP GCC 10.2 compiler not found":
- Right-click on the project and select Quick Fix to install the required compiler:
https://github.com/nxp-appcodehub/an-mc-pmsm-s32m276/blob/HEAD/images/S32DS_Qfix.png
- Alternatively, navigate to S32DS Extensions and Updates > NXP GCC 10.2 > Install and add the NXP GCC 10.2 compiler:
https://github.com/nxp-appcodehub/an-mc-pmsm-s32m276/blob/HEAD/images/S32DS_GCC.png
-
After loading the project, there is a message "Path to collateral manifest does not exist ${S32K3xx_AMMCLIB}"
- Install AMMCLIB from S32DS Extensions and Updates > AMMCLIB for S32K3xx/S32M27x > Install
https://github.com/nxp-appcodehub/an-mc-pmsm-s32m276/blob/HEAD/images/S32DS_AMMCLIB.png


6. Support
Project Metadata
Questions regarding the content/correctness of this example can be entered as Issues within this GitHub repository.
Note: For more general technical questions regarding NXP Microcontrollers and the difference in expected functionality, enter your questions on the NXP Community Forum
7. Release Notes
| Version | Description / Update | Date |
|---|---|---|
| 1.0 | Initial release on Application Code Hub | February 27th 2026 |
| 1.1 | Updated to support AMMCLIB v1.1.44 | May 11th 2026 |
| 1.2 | Updated to FRDM Automotive S32K3 + S32M27 (RTD 7.0.1) | August 27th 2026 |