

Catalog · How the catalog works
OpenCV-Android-Firemonkey

OpenCV for Android Firemonkey (Delphi only)
- ★ 21 on GitHub
Anyone may press Interesting, signed in or not. It helps others find this project.
README
OpenCV Android Firemonkey
OpenCV v4.2.0 (framework for computer vision) for Android Firemonkey
Prerequisites
Development environment
- Delphi Rio (with Android SDK, Android NDK and JDK 1.8.* configured)
Getting Started
Download and unzip the archive or clone repository in the folder of your choice.
https://github.com/CarlosHe/OpenCV-Android-Firemonkey.gitAdding OpenCV to your IDE
Step 1 - Open your Delphi.
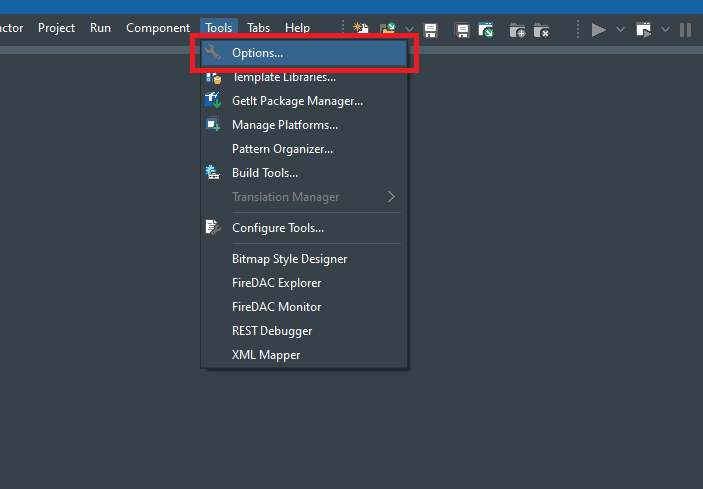
Step 2 - with your IDE already open, go to the IDE options in the tools menu (Tools -> Options...)
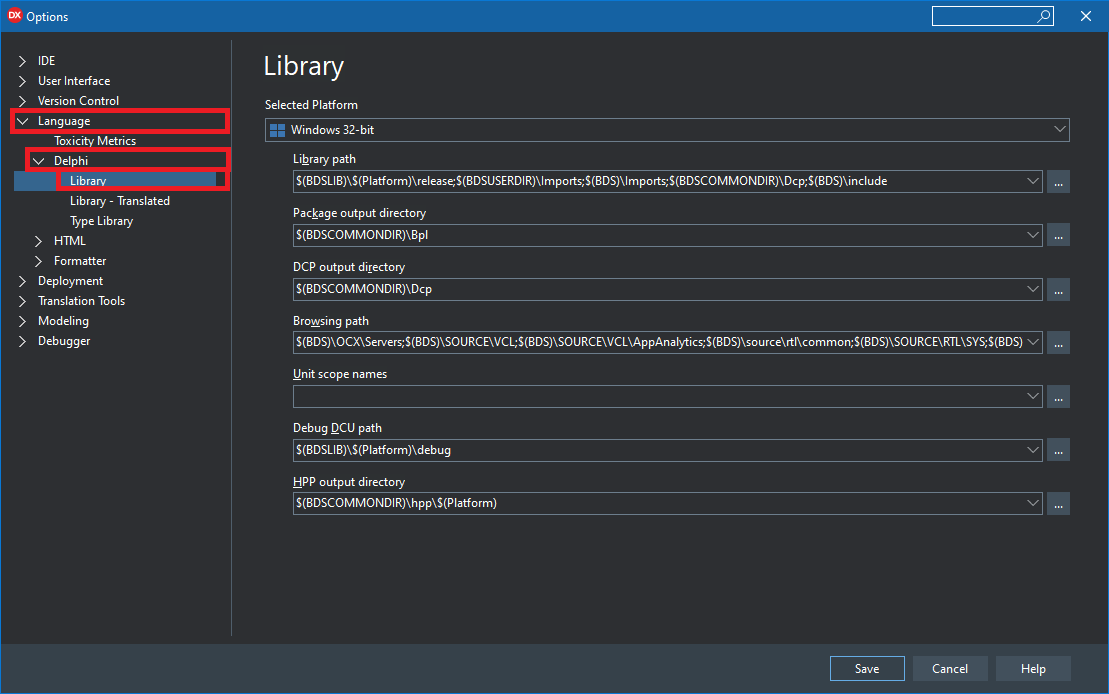
Step 3 - with the Options window open, navigate to Delphi Library using the left side menu. (Language -> Delphi -> Library)
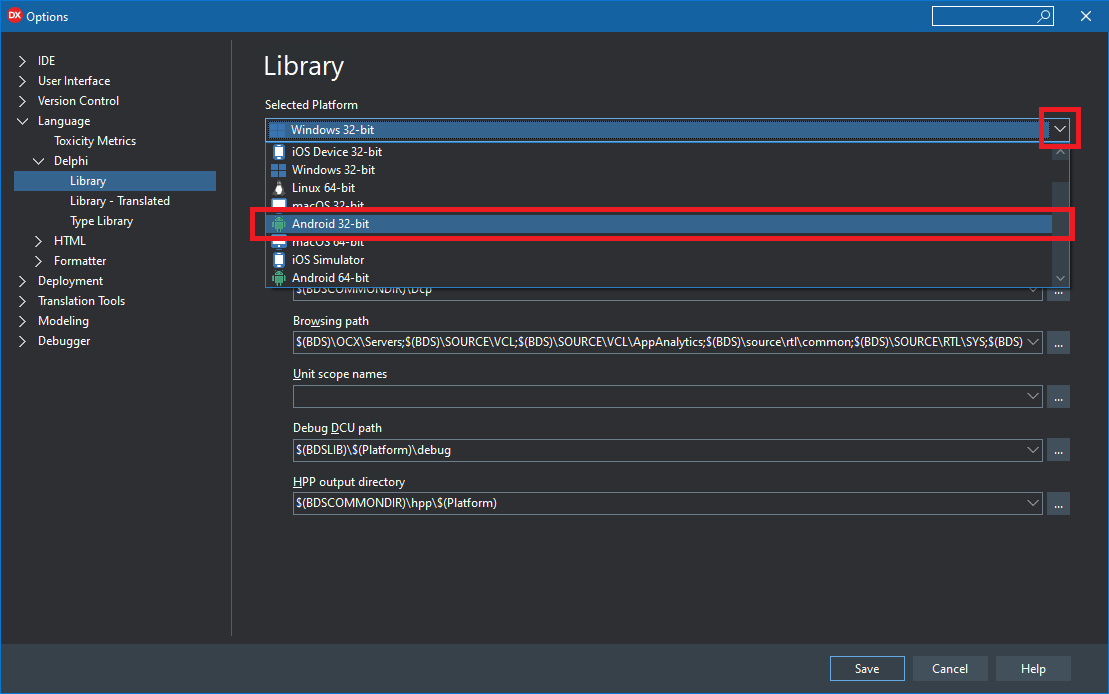
Step 4 - select the "Android 32-bit" platform in the Selected Platform option
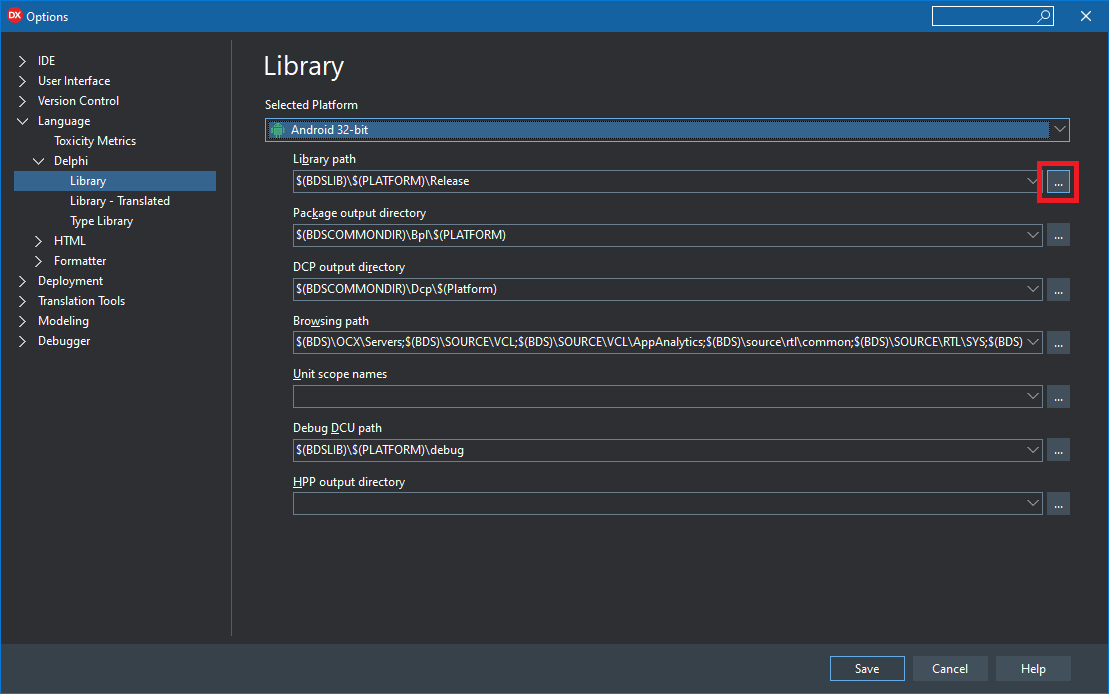
Step 5 - in the item "Library path", click on the options button (3 dots, located on the right side of the option)
Step 6 - with the Directories window open, click on the button with a folder icon, to the right of an Edit
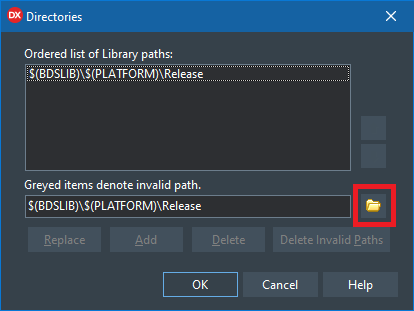
Step 7 - select the "src" folder you downloaded from this project
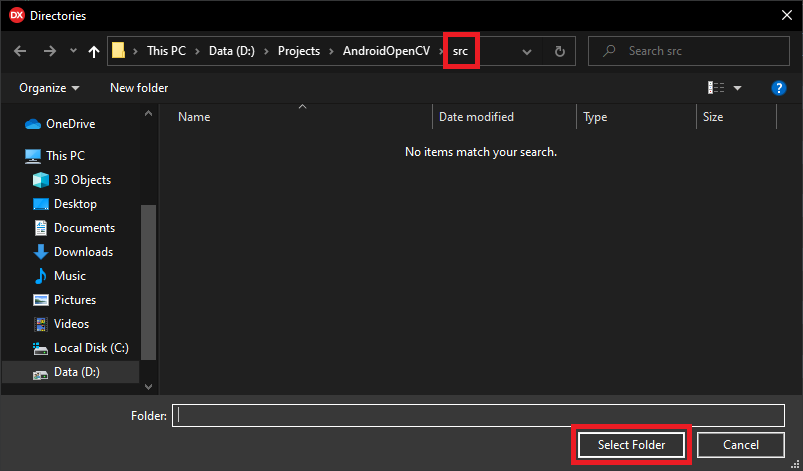
Step 8 - click on the "Add" button and then the "Ok" button
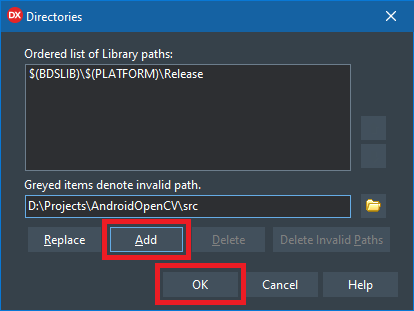
Step 8 - repeat steps 5, 6, 7 and 8 for the "Android 64-bit" platform
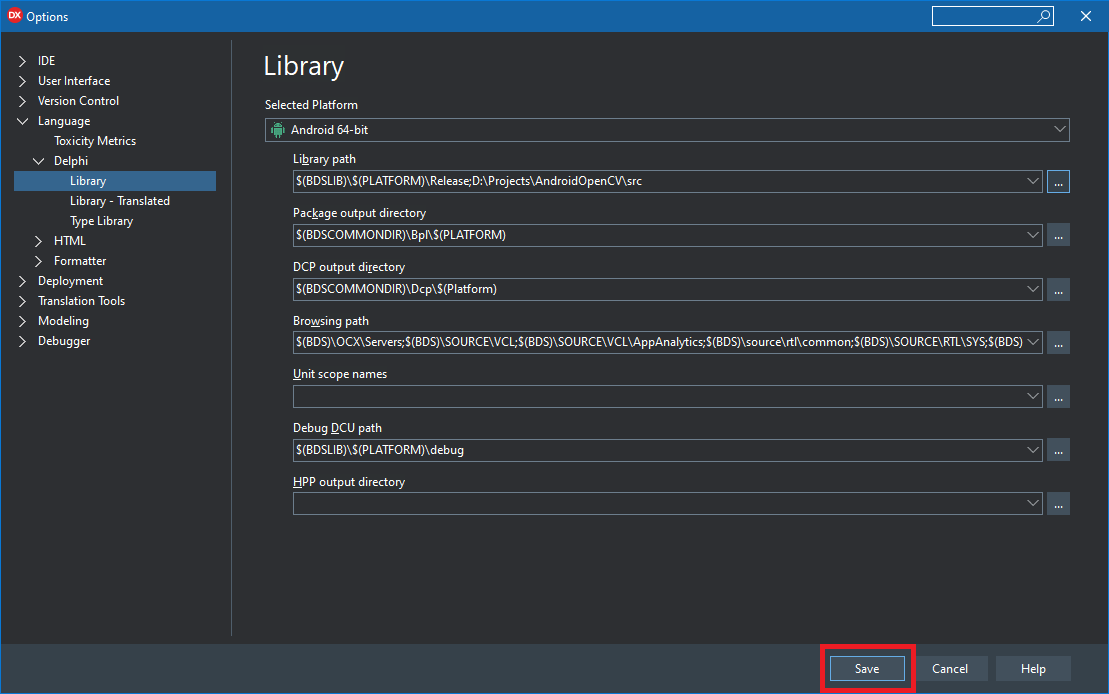
Step 9 - with all the settings made, now just click Save button
Adding OpenCV to your Android project
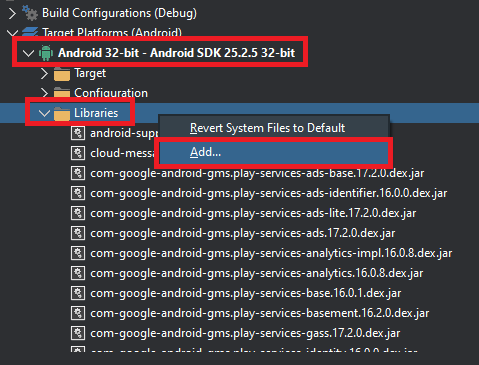
Step 1 - in your Android project, add the file "AndroidOpenCV.jar" ("jar" folder you downloaded from this project) in "Libraries"
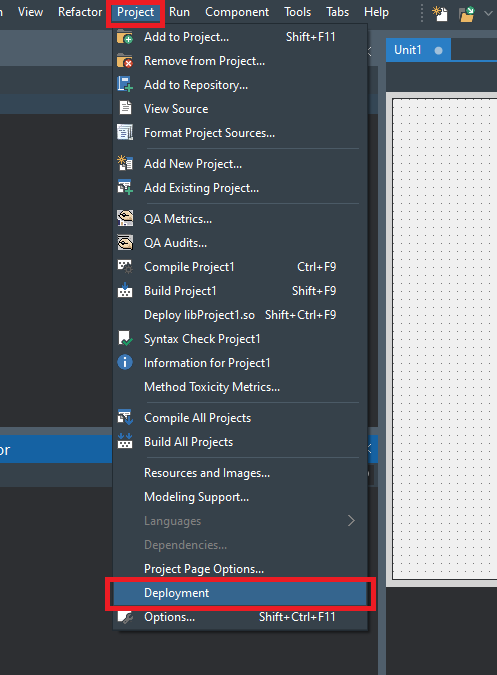
Step 2 - in the menu of your IDE, click on "Project" and then click on "Deployment"
Step 3 - in the combobox of the Deployment window, choose the option "All configurations - Android 32-bit platform" and then click "Add Files" (button with an "add file" icon, located in the menu of the Deployment window)
Step 4 - navigate to the folder you downloaded from this project and add all files from the "\libs\opencv\v4.2.0\armeabi-v7a", "\ libs\cpp_shared\armeabi-v7a" and "\libs\3rdparty\armeabi-v7a"
Step 5 - after adding all the necessary files, still in the Deployment window, change the Remote Path to "library\lib\armeabi-v7a" of all the files you added in the previous step
if you also have the project for Android 64, repeat steps 3, 4 and 5 replacing:
Step 3 - Combobox value
"All configurations - Android 32-bit platform" -> "All configurations - Android 64-bit platform"Step 4 - folder names
"\libs\opencv\v4.2.0\armeabi-v7a" -> "\libs\opencv\v4.2.0\arm64-v8a""\libs\cpp_shared\armeabi-v7a" -> "\libs\cpp_shared\arm64-v8a""\libs\3rdparty\armeabi-v7a" -> "\libs\3rdparty\arm64-v8a"Step 5 - Remote Path value
"library\lib\armeabi-v7a" -> "library\lib\arm64-v8a"Basic usage
add Android.OpenCV in uses section
uses Android.OpenCV;and load OpenCV library using
initialization

TJOpenCVLoader.JavaClass.initDebug;
Good! Now you ready to use OpenCV on Android
Authors
- Carlos Modesto - Initial work - CarlosHe