

wingp

Nginx + PHP Stack for Windows. Running Nginx as Windows service with PHP FastCGI (multiple versions), supports virtual hosts management.
- Quiet · last change 10-9-2024
- ★ 8 on GitHub
README

Wingp is a mix of Windows, Nginx, PHP (FastCGI) Stack for PHP Developer on Windows.
Download
Latest release can be downloaded from [https://github.com/AndanTeknomedia/wingp/releases/latest](https://github.com/AndanTeknomedia/wingp/releases/latest))
Or you can clone the project and run from there
C:\App>git clone https://github.com/AndanTeknomedia/wingp.gitTo build Wingp Stack Manager, go here
Installation
Go to Wingp main directory and run wingpstack.exe
Follow usage manual for more information on how to use it.
wingpstack.exe must be run with under administrator privilege to be able to deal Windows with hosts file.
Features
- Installing and Managing Nginx Service
- Installing and Managing PHP (FastCGI) Service
- Creating and Managing Virtual Hosts
- Supports Multiple PHP Versions
Screenshots
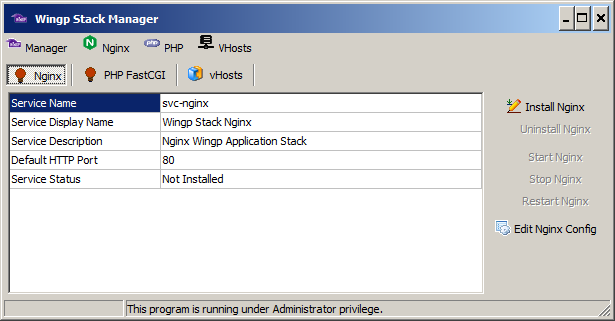Wingp Stack Manager Main Window
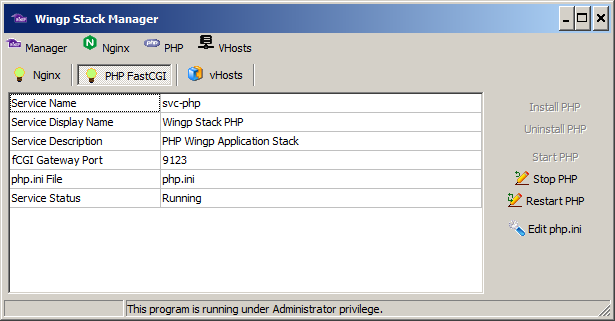Wingp Stack Manager Serving Nginx and PHP
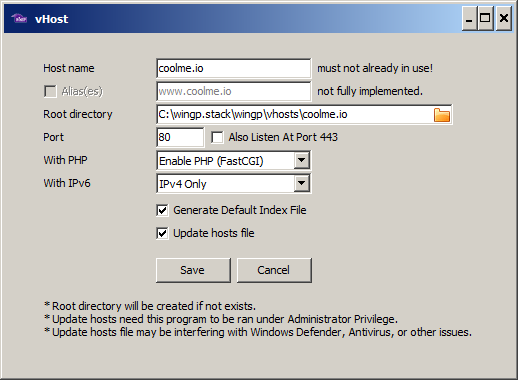Wingp Virtual Host Creation
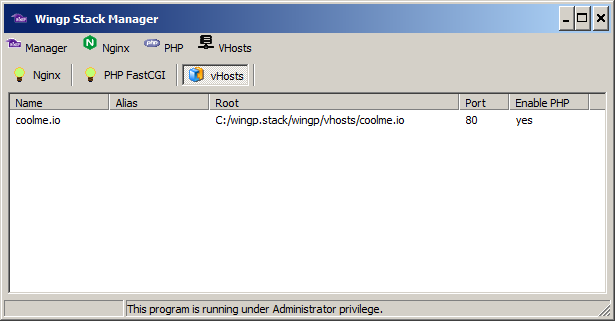Wingp With Nginx Serving Virtual Host
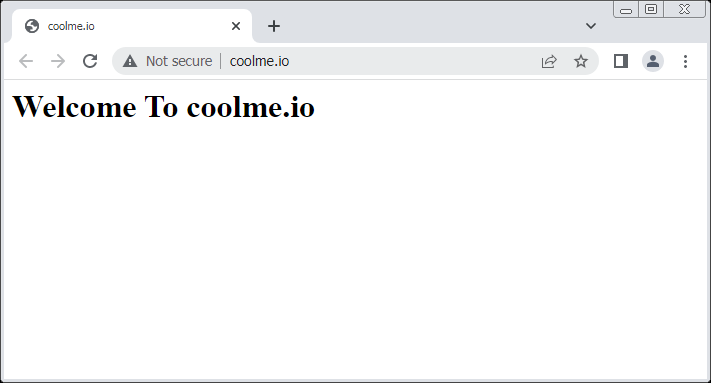Virtual Host Served On Wingp
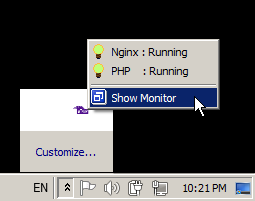Wingp Sistem Tray Status
Usage Manual
Installing and Controlling Services
Wingp uses WinSW (Windows Service Wrapper) to install and manage services. At first services installation (both Nginx and PHP), Wingp copies .\WinSW.exe to .\daemon\php\php-version directory and .daemon\nginx directory generate WinSW configuration XML file in both directories: svc-nginx.xml and svc-php.xml for Nginx and PHP, respectively.
Nginx Service
- To install Nginx service, click on menu Nginx » Install Nginx.
- To start Nginx service, click on menu Nginx » Start Nginx.
- To stop Nginx service, click on menu Nginx » Stop Nginx.
- To Uninstall Nginx service, click on menu Nginx » Uninstall Nginx. Nginx service must be stopped first.
PHP Service
Before you start, select a PHP version from menu PHP » PHP Version.
- To install PHP service, click on menu PHP » Install PHP.
- To start PHP service, click on menu PHP » Start PHP.
- To stop PHP service, click on menu PHP » Stop PHP.
- To Uninstall PHP service, click on menu PHP » Uninstall PHP. PHP service must be stopped first.
Using Multiple PHP Version
Wingp supports multiple PHP Version. Only one version can be activate at a time. This enables you to switch among multiple PHP version for application testing.
.png?raw=true)Site Running On PHP-5.6.4
.png?raw=true)Site Running On PHP-8.0.0
Updating Nginx and PHP
Wingp comes with nginx-1.26.2 for Windows and PHP-7.4.32 (x64, thread safe) included. In case you want to update them, follow instructions below.
Updating Nginx
To update Nginx:
- Stop and then uninstall Nginx service.
- Delete the content of Nginx directory (i.e.
.\daemon\nginx-1.26.2). - Extract and copy new Nginx files into the directory.
- Edit Nginx configuration file
.\daemon\nginx-1.26.2\conf\nginx.confand this following line after default server block:include ../../../vhosts/nginx-*.conf; - Re-Install Nginx service.
Updating PHP
To update PHP:
- Stop and then uninstall PHP service.
- Delete the content of active PHP version directory (i.e.
.\daemon\php\php-X.Y.Z). For example, you want to update PHP-7.4.32, then navigate to.\daemon\php\php-7.4.32and delete it's content. - Extract and copy new PHP files into the directory.
- Duplicate
php.ini-productionand rename the copy tophp.iniand edit it as necessary. If you skip this step, Wingp will generatephp.inifile for you, copying fromphp.ini-production - Re-Install PHP service.
Please note that these steps are needed to update the active PHP version only. To change among PHP versions, read Change Active PHP Version.
Change Active PHP Version
Wingp already has PHP-7.4.32 (x64, thread safe) included and activated. You can install other PHP version by following these steps:
- Navigate to https://windows.php.net/downloads/releases/archives/
- Download version you need. Files with
x86suffixes are for Windows 32bit.x64suffixes are for Windows 64bit. Thentsin the file name meansnon-thread-safe, which you may want to avoid using. - Install the downloaded ZIP:
- Extract the downloaded version into
.\daemon\phpdirectory, keeping the default directory name. For example,php-8.0.0-Win32-vs16-x64is extracted to.\daemon\php\php-8.0.0-Win32-vs16-x64without altering the output directory name. This is important as the directory name will be used by Wingp to identify its version.After the extraction, the content of.\daemon\phpwill look like this: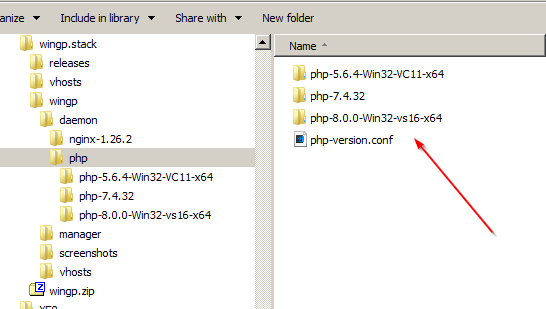 Use menu PHP » PHP Version » Reload PHP Versions to reload available PHP version.
- Use menu PHP » Add Version. A new window will appear. Browse for the downloaded ZIP file and click Add. This will let Wingp extract the ZIP and reload installed PHP versions.
- Extract the downloaded version into
If only one version of PHP is available, Wingp will set it as active default. If multiple version are available, Wingp will select the first one as active default. To change active PHP version, follow these steps:
- Stop PHP service if it is running.
- Uninstall PHP service.
- Use menu PHP » PHP Version » <PHP-x.y.x> to activate it.
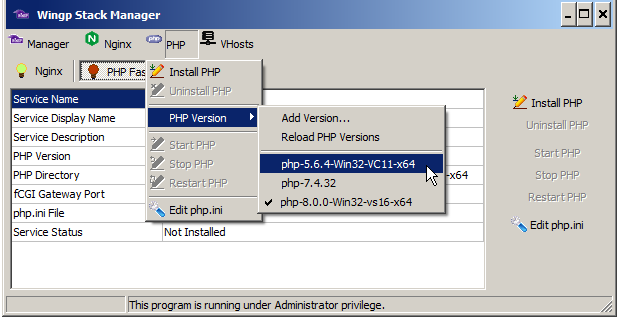
- Confirm the dialog asking to change PHP version.
- Re-install PHP service. The selected PHP version will be activated and installed as service
- Start PHP service
You can add as many version of PHP as you want, but please note that some version may need specific configuration. For Example, php-5.6.4-Win32-VC11-x64 will need Visual C++ Redistributable for Visual Studio 2012 to work. Another example is PHP version 8.0.1 and above may not run on Windows 7, since they need newer kernel32.dll.
These configuration, if missed, may cause PHP service fails to start. Please read PHP documentation and requirements before activating any PHP version.
You can also test the version of PHP by running it:
CD <wingpdir>\daemon\php\php-x.y.x
php-cgi.exe -v
Updating The Stack Manager
To update the stack manager, i.e. wingpstack.exe just obtain this file here and overwrite the existing one — close it if running.
Managing VHosts
Managing virtual host is the main goal of Wingp.
Adding VHost
Open Wingp Stack Manager main window.
- Click on menu VHosts » Add VHost
- Enter parameter. The host name (i.e. the domain name) must be unique and consts of alphanumeric character only, plus the
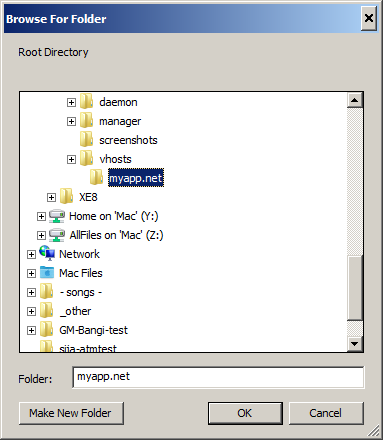
-and. - Browse for root directory where the host's file will be located. Please use folder inside
.\vhoststo avoid issues with PHP.
- IPv6 is supported by Nginx but not tested by Wingp.
- Port 443 can be checked if you want to use SSL.
- Update hosts file only enabled if Wingp is running under administrative privilege.
- Check Generate Default Index File to let Wingp automatically create
index.php(orindex.htmlif PHP not enabled) in the host's root directory. If the file already exists (i.e. you select an existing directory), Wingp will ask if you want to overwrite it. - Click Save to create the virtual host.
- Wingp will ask to reload Nginx (if it is running). Click OK to confirm your options.
- Wait until the creation process completed. You can browse your virtual host on
http://myapp.net
Deleting VHost
Important! You may want to copy (backup) your virtual host root directories before uninstalling Wingp.
- Click on menu VHosts » Delete VHost
- Confirm your options and click OK
Editing VHost
Not yet implemented. Please edit manually.
Tray Icon
Use menu Manager » Minimize To Tray to hide main window and continue running on Windows sistem tray.
To restore the main window, right click on the tray icon and click Restore.
:exclamation: Closing the main window will quit the application.
Advanced Topic
Manually Edit Virtual Host Configuration File
Every virtual hosts has its own configuration. These configuration can be found in .\vhosts\nginx-<vhost-name>.conf files. Wingp manages these file, add or delete them when their virtual hosts added or removed. These files are included as server block in Nginx's main configuration file. Check here for more info.
You may manually edit these files and add your own configration, like URL rewriting, resource protection and installing SSL certificates.
Enabling SSL on Virtual Hosts
To enable SSL on virtual hosts locally, this post may help: [https://medium.com/the-new-control-plane/generating-self-signed-certificates-on-windows-7812a600c2d8](https://medium.com/the-new-control-plane/generating-self-signed-certificates-on-windows-7812a600c2d8)
To Enable SSL on virtual hosts publicly, you may use Certbot or Win ACME. Follow their istructions on how to obtain and install SSL certificate.
Editing Nginx Configuration File
Please follow official documentation here.
Wingp needs this line in Nginx server block to enable virtual hosts:
include ../../../vhosts/nginx-*.conf;Editing PHP Configuration File
Wingp doesn't need any specific configuration in php.ini file. Feel free to edit it as necessary. These directives may help.
To edit php.ini, click on menu PHP » Edit php.ini. This will bring editor with the selected PHP version's INI file loaded. When you save, the selected PHP version's INI file will be updated, without interferencing with other version's INI file.
To change INI file of other PHP versions, you need to change active PHP version first.
To change active PHP version, click here.
Windows hosts File
Wingp updates Windows hosts file everytime a virtual host added or removed. Wingp only map virtual host's name to local loopback IP, for example:
127.0.0.1 coolme.io
127.0.0.1 myapp.net
When a virtual host is removed, the corresponding entry also removed.
If you need to access Nginx virtual hosts from LAN, you need to update the accessing computer's hosts file and map the serving computer's IP to virtual host name there. The serving computer is where Wingp is running.You can also use a router to do this task.
Windows Firewall
Nginx and PHP service executables need to be allowed to go through Windows Firewall. You can allow either these executables or their ports (as shown on Wingp Stack Manager main window).
Only Nginx needed to be allowed for external access (i.e. LAN and public internet).
To access your virtual host from public internet, use a domain name (the same as the virtual host name) and point it to you computer's public IP. You may need to add port-forwarding entry in your modem/router configuration.
:exclamation: publishing your virtual host to the internet is risky. Please take everything into your consideration.
Uninstallation
Important! You may want to copy (backup) your virtual host root directories before uninstalling Wingp.
Follow these steps to uninstall Wingp:
- On Wingp main window, stop both Nginx and PHP Service — skip if already stopped. Wait until their statuses changed.
- Unintstall both services. Wait until their statuses changed to "Not Installed". Check Windows Service Manager to ensure they both removed.
- Close Wingp and remove
wingpdirectory along with its contents.
You may also wanto to stop and remove Nginx and PHP services manually:
- Close Wingp. Then open Command Prompot with administative privilege, i.e. Run As Administrator.
- Navigate to PHP directoy
wingp\daemon\php.- Stop PHP service by typing
svc-php stop - Remove PHP service by typing
svc-php uninstall
- Stop PHP service by typing
- Navigate to Nginx directoy
wingp\daemon\nginx.- Stop Nginx service by typing
svc-Nginx stop - Remove Nginx service by typing
svc-Nginx uninstall
- Stop Nginx service by typing
- Close the terminal and remove
wingpdirectory along with its contents.
Used Tools
Wingp was build using various tools available. The Wingp Manager (wingp.exe) itself was compiled using Delphi XE8 (with Indy 10). Delphi XE2 and higher versions may also compile, but not yet tested.
- Nginx for Windows » [https://github.com/nginx/nginx/](https://github.com/nginx/nginx/)
- PHP » [https://php.net](https://php.net)
- WinSW (Windows Service Wrapper) » [https://github.com/winsw/winsw](https://github.com/winsw/winsw)
- hostsedit — Windows hosts file editor » [https://github.com/OnlyDeLtA/HostsEdit](https://github.com/OnlyDeLtA/HostsEdit)
- Notepad2 » [https://www.flos-freeware.ch/notepad2.html](https://www.flos-freeware.ch/notepad2.html)
Used Libraries
- Windows Service Manager for Delphi » DelphiVault.Windows.ServiceManager
- SuperObject for Delphi & FPC » [https://github.com/pult/SuperObject.Delphi](https://github.com/pult/SuperObject.Delphi)
Building From Source
- Close wingpstack.exe if it is running.
- Open
manager\wingpstack.dprojin Delphi. - On Project Manager panel, right click on Release and click Make. Output exe will be placed at Wingp's root directory.
Disclaimer
Wingp was designed to aid in application development, not for production use. Wingp also doesn't take security issues into its concern, and leaves them to Nginx and PHP.
Wingp can be used, repackaged and redistributed freely without any cost.
Wingp came with no warranty, and is not responsible for any risk and damage. If you use Wingp, then any responsibility is on you.