

Peg Solitaire tutorial: what changed
Revision 0 to 1. Removed lines have a minus sign; added lines have a plus sign.
Title: Peg Solitaire tutorial
| Old | New | Line | |
|---|---|---|---|
| 1 | + | This tutorial is the second Lazarus tutorial that aims at introducing the basics of Lazarus application development. It's best to start this tutorial after having finished the first one ([[Howdy World (Hello World on steroids)]]). This tutorial exlpains a bit about how to work with graphics and how to make a program modular. The final product of this tutorial is a basic but working version of the Peg Solitaire game ([1](http://en.wikipedia.org/wiki/Peg_solitaire)). If all goes well in the end it will look something like this: | |
| 2 | + | ||
| 3 | + | <figure> | |
| 4 | + | <img src="tutpeg_solitaire.png" title="tutpeg_solitaire.png" /> | |
| 5 | + | <figcaption>tutpeg_solitaire.png</figcaption> | |
| 6 | + | </figure> | |
| 7 | + | ||
| 8 | + | ## Start the project | |
| 9 | + | ||
| 10 | + | As mentioned in the previous tutorial it's best to start with a clean, separate directory for each project. A quick recap: | |
| 11 | + | ||
| 12 | + | - Create a new directory for this game. | |
| 13 | + | - Start a new Application (Project/New Project... and select Application). | |
| 14 | + | - Save the project as PegSolitaire. | |
| 15 | + | - Save the main [[TForm|form]] as ufrmMain. | |
| 16 | + | - In the object inspector change the form's name to *frmMain*. | |
| 17 | + | - Change the caption to *Lazarus Peg Solitaire*. | |
| 18 | + | - In the project options insert *bin\* in front of the target filename (or *bin/* for Linuxes). | |
| 19 | + | ||
| 20 | + | And extra for this project: | |
| 21 | + | ||
| 22 | + | - Open the project options dialog ( <span class="kbd">Shift</span>+<span class="kbd">Ctrl</span>+ <span class="kbd">F11</span>). | |
| 23 | + | - Select Compiler *Options/Code Generation*. | |
| 24 | + | - Enable Range checking and Overflow error checking (see image belows). | |
| 25 | + | ||
| 26 | + | <figure> | |
| 27 | + | <img src="tutpeg_compiler_options.png" title="tutpeg_compiler_options.png" /> | |
| 28 | + | <figcaption>tutpeg_compiler_options.png</figcaption> | |
| 29 | + | </figure> | |
| 30 | + | ||
| 31 | + | ## First steps | |
| 32 | + | ||
| 33 | + | It's always a good idea to seperate gui related code from data structure definitions. So the first step will be the creation of a separate [[Unit|unit]] for our Solitaire data structures. | |
| 34 | + | ||
| 35 | + | - From the menu choose *File/New Unit*. | |
| 36 | + | - Save the unit as *PegDatastructures.pas* (and press the lowercase button that pops up). | |
| 37 | + | ||
| 38 | + | The basic elements of a Peg Solitaire board are the marbles, the board structure and the empy places. We'll simulate this by a simple matrix that has cells of a certain type (empty, occupied and not accessible). And we'll encapsulate all this in a [[Class|class]] that handles all the data manipulation. | |
| 39 | + | ||
| 40 | + | - Add the following code to the PegDatastructures unit (after the classes in the *[[Uses|uses]]* section and before the *[[Implementation|implementation]]* section): | |
| 41 | + | ||
| 42 | + | ``` pascal | |
| 43 | + | const | |
| 44 | + | C_MAX = 7; // Max board size: 7x7 | |
| 45 | + | ||
| 46 | + | type | |
| 47 | + | TCellNums = 1..C_MAX; | |
| 48 | + | TCellType = (ctNoAccess, ctEmpty, ctPeg); | |
| 49 | + | TPegCells = array[TCellNums, TCellNums] of TCellType; | |
| 50 | + | ||
| 51 | + | TPegSolitaire = class | |
| 52 | + | private | |
| 53 | + | Size: TCellNums; | |
| 54 | + | PegCells: TPegCells; | |
| 55 | + | ||
| 56 | + | public | |
| 57 | + | constructor Create(const pSize: TCellNums); | |
| 58 | + | end; | |
| 59 | + | ``` | |
| 60 | + | ||
| 61 | + | It's fair to assume that other code that is going to use this class needs access to the cells contents (i.e. PegCells). The way to handle this is either by defining a set of [[Function|functions]] to access the cells or define a so called [[Array|array]] property. Let's go for the latter approach and add the following line to the public section of the TPegSolitaire class: | |
| 62 | + | ||
| 63 | + | ``` pascal | |
| 64 | + | property Cell[const pRow, pCol: TCellNums]: TCellType; | |
| 65 | + | ``` | |
| 66 | + | ||
| 67 | + | - Position the text cursor on the constructor line. | |
| 68 | + | - Press <span class="kbd">Ctrl</span>+<span class="kbd">Shift</span>+<span class="kbd">C</span>: the IDE generates the constructor body (as we expected) but it also generates the empty bodies for the 2 [[Method|methods]] that give us access to *PegCells* via the *Cells* property. | |
| 69 | + | - GetCell retrieves data from the private [[Variable|variable]] PegCells. Add the following code to the [[Function|function]]: | |
| 70 | + | ||
| 71 | + | ``` pascal | |
| 72 | + | result := PegCells[pRow,pCol] | |
| 73 | + | ``` | |
| 74 | + | ||
| 75 | + | - SetCell populates the PegCells array with data. Add the following code to the [[Procedure|procedure]]: | |
| 76 | + | ||
| 77 | + | ``` pascal | |
| 78 | + | PegCells[pRow,pCol] := pValue | |
| 79 | + | ``` | |
| 80 | + | ||
| 81 | + | - And now finalize the Create [[Constructor|constructor]]. Add this code to it's body: | |
| 82 | + | ||
| 83 | + | ``` pascal | |
| 84 | + | var iRow,iCol: integer; | |
| 85 | + | begin | |
| 86 | + | // Store the size of the board locally | |
| 87 | + | Size := pSize; | |
| 88 | + | ||
| 89 | + | // Initialize all cells to 'not accessible' | |
| 90 | + | for iRow := 1 to C_MAX do | |
| 91 | + | for iCol := 1 to C_MAX do | |
| 92 | + | Cell[iRow,iCol] := ctNoAccess; | |
| 93 | + | ``` | |
| 94 | + | ||
| 95 | + | Now that the basic data structure is in place, let's have a look at the graphics we are going to need. There are many ways to display a solitaire board. We are going to use a paintbox. That will give us full control over the graphic features that Lazarus gives us out of the box. | |
| 96 | + | ||
| 97 | + | Our main form is going to use the data structure we defined in the PegDatastructure file. | |
| 98 | + | ||
| 99 | + | - Open the main form's sourcefile. | |
| 100 | + | - Add PegDatastructures it to the uses list at the top of the file: | |
| 101 | + | ||
| 102 | + | ``` pascal | |
| 103 | + | uses | |
| 104 | + | PegDatastructures, | |
| 105 | + | Classes, SysUtils, FileUtil, Forms, Controls, Graphics, Dialogs; | |
| 106 | + | ``` | |
| 107 | + | ||
| 108 | + | - Press <span class="kbd">F12</span> (this will give us the form editor). | |
| 109 | + | - From the *[[Standard tab|Standard]]* palette choose a [[TButton]] and drop it on the form (in the upper left corner). | |
| 110 | + | - Change the caption to *Test paint*. | |
| 111 | + | - On the *[[Additional tab]]* select [[TPaintBox]] and drop it on the form. | |
| 112 | + | - Change Align to *alRight*. | |
| 113 | + | - Change BordSpacing.Around to *4*. | |
| 114 | + | - Change Anchors.akLeft to *true*. | |
| 115 | + | - Change Name to *pbPeg*. | |
| 116 | + | - Resize the form so it looks something like this: | |
| 117 | + | ||
| 118 | + | <figure> | |
| 119 | + | <img src="tutpeg_empty.png" title="tutpeg_empty.png" /> | |
| 120 | + | <figcaption>tutpeg_empty.png</figcaption> | |
| 121 | + | </figure> | |
| 122 | + | ||
| 123 | + | Next step is to draw the cells matrix on this paintbox by splitting it in rows and columns that will contain each cell of the board. To make it scaleable we'll calculate the width and height independantly. We'll need a couple of variables to hold the results. First the width and height of the cells, so all cells (7) fit exactly on the form. We'll develop the painting code interactively and we are going to use the button that was dropped on the form for that. | |
| 124 | + | ||
| 125 | + | - Double click the test paint button (this creates the event handler). | |
| 126 | + | - Add 2 variables: | |
| 127 | + | ||
| 128 | + | ``` pascal | |
| 129 | + | var | |
| 130 | + | CellWidth : integer; | |
| 131 | + | CellHeight: integer; | |
| 132 | + | ``` | |
| 133 | + | ||
| 134 | + | We'll need some extra variables to hold intermediate results: | |
| 135 | + | ||
| 136 | + | - Add 3 local variables: | |
| 137 | + | ||
| 138 | + | ``` pascal | |
| 139 | + | iRow, iCol: TCellNums; | |
| 140 | + | CellArea : TRect; | |
| 141 | + | ``` | |
| 142 | + | ||
| 143 | + | CellArea is used to limit the rectangular area on screen where a cell will be drawn. | |
| 144 | + | ||
| 145 | + | To process all rows and cols two straightforward [[For|for loops]] will do. | |
| 146 | + | ||
| 147 | + | - Add the following code to the event handler: | |
| 148 | + | ||
| 149 | + | ``` pascal | |
| 150 | + | // Calculate the width/height of each cell to accomodate for all cells in the paintbox | |
| 151 | + | CellWidth := pbPeg.Width div 7; | |
| 152 | + | CellHeight := pbPeg.Height div 7; | |
| 153 | + | ||
| 154 | + | // Draw boxes for all cells | |
| 155 | + | for iRow := 1 to 7 do | |
| 156 | + | for iCol := 1 to 7 do | |
| 157 | + | begin | |
| 158 | + | // Calculate the position of the cell in the paintbox | |
| 159 | + | CellArea.Top := (iRow-1) * CellHeight; | |
| 160 | + | CellArea.Left := (iCol-1) * CellWidth; | |
| 161 | + | CellArea.Right := CellArea.Left + CellWidth; | |
| 162 | + | CellArea.Bottom := CellArea.Top + CellHeight; | |
| 163 | + | // And now draw the cell | |
| 164 | + | pbPeg.Canvas.Rectangle(CellArea); | |
| 165 | + | end; | |
| 166 | + | ``` | |
| 167 | + | ||
| 168 | + | A Canvas, as it's name suggests, is a control that helps us drawing things like lines, rectangles, circles etc. A paintbox control has an embedded canvas. Therefore the line *pbPeg.Canvas.Rectangle(CellArea)* will draw a rectangle on the paintbox, limited to the area defined in *CellArea*. And because the paintbox is placed on the form, we can see the result there. | |
| 169 | + | ||
| 170 | + | - Compile and run the program (press <span class="kbd">F9</span>). | |
| 171 | + | - Press the *Test paint* button. | |
| 172 | + | - Maximize the form (the cells disappear; don't worry we'll fix that). | |
| 173 | + | - Press the *Test paint* button again. | |
| 174 | + | ||
| 175 | + | This proves that our calculations were spot on and that we now have the means to draw whatever is necessary in the right spot. One thing needs to be done though before adding more drawing functionality. Drawing of the cells has no relation with the main form whatsoever (or any form for that matter). The only thing we need for drawing things is a Canvas and some measurements for the cells. So we are going to create a supporting class to clean up the main form. | |
| 176 | + | ||
| 177 | + | - Create a new unit (File/New Unit). | |
| 178 | + | - Save it as PegSolPainter.pas (File/Save and then and choose *Rename to lowercase*). | |
| 179 | + | - Add a new class to the new unit file that will do all of the drawing (after the uses section, before the implementation section). | |
| 180 | + | ||
| 181 | + | ``` pascal | |
| 182 | + | type | |
| 183 | + | TPegSolPainter = class | |
| 184 | + | private | |
| 185 | + | PegSol : TPegSolitaire; | |
| 186 | + | Canvas : TCanvas; | |
| 187 | + | ||
| 188 | + | public | |
| 189 | + | constructor Create(pPegSol: TPegSolitaire; pCanvas: TCanvas); | |
| 190 | + | end; | |
| 191 | + | ``` | |
| 192 | + | ||
| 193 | + | Note that a TPegSolitaire variable is also added, because obviously we are going to use that class to retrieve a cells' state. | |
| 194 | + | ||
| 195 | + | - Position the text cursor in the constructor line and press <span class="kbd">Ctrl</span>+<span class="kbd">Shift</span>+<span class="kbd">C</span>. | |
| 196 | + | - The constructor must store the 2 parms locally: | |
| 197 | + | ||
| 198 | + | ``` pascal | |
| 199 | + | constructor TPegSolPainter.Create(pPegSol: TPegSolitaire; pCanvas: TCanvas); | |
| 200 | + | begin | |
| 201 | + | PegSol := pPegSol; | |
| 202 | + | Canvas := pCanvas; | |
| 203 | + | end; | |
| 204 | + | ``` | |
| 205 | + | ||
| 206 | + | Trying to compile this code will failse because we haven't added the PegDatastrucures unit to the uses section. And because we use a TCanvas we'll have to add the Graphics unit as well. | |
| 207 | + | ||
| 208 | + | - Add *PegDatastructures* and *Graphics* to the *uses* list. | |
| 209 | + | ||
| 210 | + | ``` pascal | |
| 211 | + | uses | |
| 212 | + | PegDatastructures, | |
| 213 | + | Graphics, | |
| 214 | + | Classes, SysUtils; | |
| 215 | + | ``` | |
| 216 | + | ||
| 217 | + | The reason we built this class was to remove all drawing and painting code from the form. So we need to create a method that will do the drawing. Before adding that method there is something that needs to be addressed: to calculate the width of a cell, we divide the paintbox width by the number of cells. In theory we could use the property Canvas.Width for this. However that property does not always give us the right width at the right time. So to be able to draw cells, we must provide our draw method with the correct values for the width and height of the canvas. | |
| 218 | + | ||
| 219 | + | Now we know this, we can add a paint method to our class. | |
| 220 | + | ||
| 221 | + | - Add procedure Repaint to the class. | |
| 222 | + | ||
| 223 | + | ``` pascal | |
| 224 | + | TPegSolPainter = class | |
| 225 | + | private | |
| 226 | + | PegSol : TPegSolitaire; | |
| 227 | + | Canvas : TCanvas; | |
| 228 | + | ||
| 229 | + | public | |
| 230 | + | constructor Create(pPegSol: TPegSolitaire; pCanvas: TCanvas); | |
| 231 | + | procedure Repaint(const pCanvasWidth, pCanvasHeight: integer); | |
| 232 | + | end; | |
| 233 | + | ``` | |
| 234 | + | ||
| 235 | + | - Generate the body of the procedure (<span class="kbd">Ctrl</span>+<span class="kbd">Shift</span>+<span class="kbd">C</span>). | |
| 236 | + | - Copy the code from *TfrmMain.Button1Click(Sender: TObject)* to this newly created method: | |
| 237 | + | ||
| 238 | + | ``` pascal | |
| 239 | + | procedure TPegSolPainter.Repaint(const pCanvasWidth, pCanvasHeight: integer); | |
| 240 | + | var | |
| 241 | + | CellWidth : integer; | |
| 242 | + | CellHeight : integer; | |
| 243 | + | iRow, iCol : TCellNums; | |
| 244 | + | CellArea : TRect; | |
| 245 | + | begin | |
| 246 | + | // Calculate the width of each cell to accomodate for all cells | |
| 247 | + | CellWidth := pbPeg.Width div 7; | |
| 248 | + | CellHeight := pbPeg.Height div 7; | |
| 249 | + | ||
| 250 | + | // Draw boxes for all cells | |
| 251 | + | for iRow := 1 to 7 do | |
| 252 | + | for iCol := 1 to 7 do | |
| 253 | + | begin | |
| 254 | + | // Calculate the position of the cell in the paintbox | |
| 255 | + | CellArea.Top := (iRow-1) * CellHeight; | |
| 256 | + | CellArea.Left := (iCol-1) * CellWidth; | |
| 257 | + | CellArea.Right := CellArea.Left + CellWidth; | |
| 258 | + | CellArea.Bottom := CellArea.Top + CellHeight; | |
| 259 | + | // And now draw the cell | |
| 260 | + | pbPeg.Canvas.Rectangle(CellArea); | |
| 261 | + | end; | |
| 262 | + | end; | |
| 263 | + | ``` | |
| 264 | + | ||
| 265 | + | Because we no longer need the paintbox pbPeg we must remove the references to it. Three changes are needed: | |
| 266 | + | ||
| 267 | + | - Change the calculation of the CellWidth and CellHeight to: | |
| 268 | + | ||
| 269 | + | ``` pascal | |
| 270 | + | // Calculate the width of each cell to accomodate for all cells | |
| 271 | + | CellWidth := pCanvasWidth div 7; | |
| 272 | + | CellHeight := pCanvasHeight div 7; | |
| 273 | + | ``` | |
| 274 | + | ||
| 275 | + | - Change the drawing of the rectangle to: | |
| 276 | + | ||
| 277 | + | ``` pascal | |
| 278 | + | // And now draw the cell | |
| 279 | + | Canvas.Rectangle(CellArea); | |
| 280 | + | ``` | |
| 281 | + | ||
| 282 | + | Now that we have a class that can do the fancy painting for us, it's time to make use of it. We are going to use this paint class together with the PegSolitare class to draw the cells. | |
| 283 | + | ||
| 284 | + | - In the main form source, locate the Button1Click method. | |
| 285 | + | - Remove all statements and variables. | |
| 286 | + | - Add 2 new variables: one for the game class and one for the painter class: | |
| 287 | + | ||
| 288 | + | ``` pascal | |
| 289 | + | procedure TfrmMain.Button1Click(Sender: TObject); | |
| 290 | + | var | |
| 291 | + | pegsol : TPegSolitaire; // The game data | |
| 292 | + | pegpaint: TPegSolPainter; // The paint class for the game | |
| 293 | + | begin | |
| 294 | + | end; | |
| 295 | + | ``` | |
| 296 | + | ||
| 297 | + | - Add *PegSolPainter* to the uses list. | |
| 298 | + | ||
| 299 | + | To use the paint class is fairley straightforward: create a new instance and call the repaint method like so: | |
| 300 | + | ||
| 301 | + | - Add the following code to the Button1Click method: | |
| 302 | + | ||
| 303 | + | ``` pascal | |
| 304 | + | // Create a new game object | |
| 305 | + | pegsol := TPegSolitaire.Create(7); | |
| 306 | + | ||
| 307 | + | // Create a new painter object to paint this game | |
| 308 | + | pegpaint := TPegSolPainter.Create(pegsol, pbPeg.Canvas); | |
| 309 | + | ||
| 310 | + | // And paint the board | |
| 311 | + | pegpaint.Repaint(pbPeg.Width, pbPeg.Height); | |
| 312 | + | ||
| 313 | + | // Clean up | |
| 314 | + | pegpaint.Free; | |
| 315 | + | pegsol.Free | |
| 316 | + | ``` | |
| 317 | + | ||
| 318 | + | Run and test the program to see that it works exactly as before. The result will look something like this: 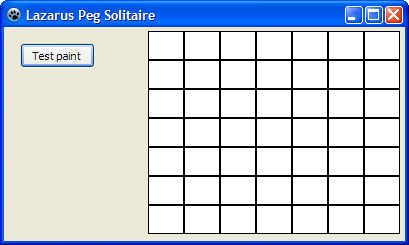 | |
| 319 | + | ||
| 320 | + | ## It's all about events | |
| 321 | + | ||
| 322 | + | What have we accomplished so far? There is a datastructure that holds all the data for a Peg Solitaire game, there is a class that can paint on a Canvas and we have a fairly simple form with a test button. So what's next? Events! | |
| 323 | + | ||
| 324 | + | As we have seen in the previous section, the cell matrix we painstakingly drew wasn't to last. This happens because the form doesn't know anything about our little game. As soon as the form thinks it's time to redraw itself, it does so and ignores our cell grid. What it dóes do is send a message to it's child controls that a refresh is necessary. This message is available to us as an event: a paint event. | |
| 325 | + | ||
| 326 | + | - Open the form editor (select ufrmMain in the editor and press <span class="kbd">F12</span>). | |
| 327 | + | - Select the paintbox pbPeg. | |
| 328 | + | - Open the Events tab in the Object Inspector. | |
| 329 | + | - One of the events in the list is OnPaint. | |
| 330 | + | ||
| 331 | + | <figure> | |
| 332 | + | <img src="tutpeg_onpaint.png" title="tutpeg_onpaint.png" /> | |
| 333 | + | <figcaption>tutpeg_onpaint.png</figcaption> | |
| 334 | + | </figure> | |
| 335 | + | ||
| 336 | + | This event is 'fired' everytime the paintbox needs to redraw it's surface. That is the place were we are going to do our drawing. | |
| 337 | + | ||
| 338 | + | - Select the OnPaint event in the Object Inspector and click on the small button with three dots. This will generate the event handler body. | |
| 339 | + | - Copy/Paste the exact code from the *Button1Click* event handler to this new method. | |
| 340 | + | ||
| 341 | + | ``` pascal | |
| 342 | + | procedure TfrmMain.pbPegPaint(Sender: TObject); | |
| 343 | + | var | |
| 344 | + | pegsol : TPegSolitaire; // The game data | |
| 345 | + | pegpaint: TPegSolPainter; // The paint class for the game | |
| 346 | + | begin | |
| 347 | + | // Create a new game object | |
| 348 | + | pegsol := TPegSolitaire.Create(7); | |
| 349 | + | ||
| 350 | + | // Create a new painter object to paint this game | |
| 351 | + | pegpaint := TPegSolPainter.Create(pegsol, pbPeg.Canvas); | |
| 352 | + | ||
| 353 | + | // And paint the board | |
| 354 | + | pegpaint.Repaint(pbPeg.Width, pbPeg.Height); | |
| 355 | + | ||
| 356 | + | // Clean up | |
| 357 | + | pegpaint.Free; | |
| 358 | + | pegsol.Free | |
| 359 | + | end; | |
| 360 | + | ``` | |
| 361 | + | ||
| 362 | + | - Remove all code and variables from method *Button1Click*. Remember: the IDE will automatically remove this now empty method for us. | |
| 363 | + | - Remove the *Test paint* button from the form. | |
| 364 | + | - Run the program to see what happens (ignore the fact that the background color is now different). | |
| 365 | + | ||
| 366 | + | Now what is clear is that we create a game object in the OnPaint method, paint the empty cells and then destroy it. But we need to store the game object until a game has finished. The same goes for the paint object. So the OnPaint event is not the most logical place to create these objects. The form's class declaration is a better place to store them. | |
| 367 | + | ||
| 368 | + | - Find the forms's declaration. | |
| 369 | + | - Add the 2 variables we created in the OnPaint event: | |
| 370 | + | ||
| 371 | + | ``` pascal | |
| 372 | + | TfrmMain = class(TForm) | |
| 373 | + | pbPeg: TPaintBox; | |
| 374 | + | procedure pbPegPaint(Sender: TObject); | |
| 375 | + | private | |
| 376 | + | { private declarations } | |
| 377 | + | pegsol : TPegSolitaire; // The game data | |
| 378 | + | pegpaint: TPegSolPainter; // The paint class for the game | |
| 379 | + | public | |
| 380 | + | { public declarations } | |
| 381 | + | end; | |
| 382 | + | ``` | |
| 383 | + | ||
| 384 | + | These variables must be initialized as soon as the form opens (or anytime we want to start a new game). So let's create a procedure that does that for us and add it to the private section of the form. | |
| 385 | + | ||
| 386 | + | - Add procedure StartNewGame to the form. | |
| 387 | + | ||
| 388 | + | ``` pascal | |
| 389 | + | private | |
| 390 | + | { private declarations } | |
| 391 | + | pegsol : TPegSolitaire; // The game data | |
| 392 | + | pegpaint: TPegSolPainter; // The paint class for the game | |
| 393 | + | ||
| 394 | + | procedure StartNewGame; | |
| 395 | + | ``` | |
| 396 | + | ||
| 397 | + | - Generate the body. | |
| 398 | + | - Add the initialzation code: | |
| 399 | + | ||
| 400 | + | ``` pascal | |
| 401 | + | procedure TfrmMain.StartNewGame; | |
| 402 | + | begin | |
| 403 | + | // Clean up the previous game | |
| 404 | + | pegpaint.Free; | |
| 405 | + | pegsol.Free; | |
| 406 | + | ||
| 407 | + | // Start with a new game | |
| 408 | + | pegsol := TPegSolitaire.Create(7); | |
| 409 | + | pegpaint := TPegSolPainter.Create(pegsol, pbPeg.Canvas); | |
| 410 | + | end; | |
| 411 | + | ``` | |
| 412 | + | ||
| 413 | + | Now that the initialization code is created, it must be executed. A logical time to do this is as soon as the form is created (i.e. the application is started). For this another event is available to us: the FormCreate event. We can create it in two ways: find the OnFormCreate event in the Object Inspector and click on the '...' button. But another way to generate it is double clicking the form itself. | |
| 414 | + | ||
| 415 | + | - Open the form editor (press <span class="kbd">F12</span>). | |
| 416 | + | - Double click somewhere in a free area on the form; do nót click on the paintbox. | |
| 417 | + | ||
| 418 | + | <figure> | |
| 419 | + | <img src="tutpeg_form_create.png" title="tutpeg_form_create.png" /> | |
| 420 | + | <figcaption>tutpeg_form_create.png</figcaption> | |
| 421 | + | </figure> | |
| 422 | + | ||
| 423 | + | - Add the call to the StartNewGame procedure: | |
| 424 | + | ||
| 425 | + | ``` pascal | |
| 426 | + | procedure TfrmMain.FormCreate(Sender: TObject); | |
| 427 | + | begin | |
| 428 | + | StartNewGame | |
| 429 | + | end; | |
| 430 | + | ``` | |
| 431 | + | ||
| 432 | + | Now that the game and paint objects are created at program start, they are no longer required in the OnPaint method. | |
| 433 | + | ||
| 434 | + | - Locate procedure *procedure TfrmMain.pbPegPaint(Sender: TObject);* | |
| 435 | + | - Remove the local variables and all code except for the line that actualle does the painting. | |
| 436 | + | ||
| 437 | + | ``` pascal | |
| 438 | + | procedure TfrmMain.pbPegPaint(Sender: TObject); | |
| 439 | + | begin | |
| 440 | + | // Paint the board | |
| 441 | + | pegpaint.Repaint(pbPeg.Width, pbPeg.Height); | |
| 442 | + | end; | |
| 443 | + | ``` | |
| 444 | + | ||
| 445 | + | - Run the program and see what happens. | |
| 446 | + | ||
| 447 | + | ## Intermezzo | |
| 448 | + | ||
| 449 | + | So far we have focused on building a program to play the classic solitaire game in the 7x7 grid. Is it now possible to create smaller or bigger grids for other type games? Let's test this. | |
| 450 | + | ||
| 451 | + | - In the main form locate the StartNewGame method. | |
| 452 | + | - Change the line *pegsol := TPegSolitaire.Create(7);* to *pegsol := TPegSolitaire.Create(5);*. So a smaller board with 5x5 squares is created. | |
| 453 | + | - Run the program and see what happens. | |
| 454 | + | ||
| 455 | + | As we can see on screen we still see a 7x7 matrix! This is the result of using magic numbers, which we should have avoided (see <http://en.wikipedia.org/wiki/Magic_number_%28programming%29#Unnamed_numerical_constants>). | |
| 456 | + | ||
| 457 | + | Using magic numbers equals disaster: it's a matter of *when*, not *if* a program will fail. | |
| 458 | + | ||
| 459 | + | - Open PegSolPainter. | |
| 460 | + | - Locate the procedure *TPegSolPainter.Repaint(const pCanvasWidth, pCanvasHeight: integer);*. | |
| 461 | + | ||
| 462 | + | In there we see the number of 7 a couple of times. This the magic number that plays tricks on us. In the calculation of the cell width and height, we need the size of the board as stored in the pegsol game variable. And the same goes for the iRow and iCol loops. So let's fix this once and for all: | |
| 463 | + | ||
| 464 | + | ``` pascal | |
| 465 | + | // Calculate the width of each cell to accomodate for all cells | |
| 466 | + | CellWidth := pCanvasWidth div pegsol.Size; | |
| 467 | + | CellHeight := pCanvasHeight div pegsol.Size; | |
| 468 | + | ||
| 469 | + | // Draw boxes for all cells | |
| 470 | + | for iRow := 1 to pegsol.Size do | |
| 471 | + | for iCol := 1 to pegsol.Size do | |
| 472 | + | begin | |
| 473 | + | // Calculate the position of the cell in the paintbox | |
| 474 | + | CellArea.Top := (iRow-1) * CellHeight; | |
| 475 | + | CellArea.Left := (iCol-1) * CellWidth; | |
| 476 | + | CellArea.Right := CellArea.Left + CellWidth; | |
| 477 | + | CellArea.Bottom := CellArea.Top + CellHeight; | |
| 478 | + | // And now draw the cell | |
| 479 | + | Canvas.Rectangle(CellArea); | |
| 480 | + | end; | |
| 481 | + | ``` | |
| 482 | + | ||
| 483 | + | There's a caveat here: pegsol doesn't have a publicly accessible Size variable. And this is how it should be: all variables in a class should be private. The way to access those private ***values*** is via functions or properties (the interface of the class). For this simple value we will use a property. | |
| 484 | + | ||
| 485 | + | - Open PegDatastructures. | |
| 486 | + | - Rename the private variable in TPegSolitaire to *FSize*. | |
| 487 | + | - Add a public read only property to the class: property Size: TCellNums read FSize; | |
| 488 | + | ||
| 489 | + | The class will now look like this: | |
| 490 | + | ||
| 491 | + | ``` pascal | |
| 492 | + | TPegSolitaire = class | |
| 493 | + | private | |
| 494 | + | FSize: TCellNums; | |
| 495 | + | PegCells: TPegCells; | |
| 496 | + | function GetCell(const pRow, pCol: TCellNums): TCellType; | |
| 497 | + | procedure SetCell(const pRow, pCol: TCellNums; const pValue: TCellType); | |
| 498 | + | ||
| 499 | + | public | |
| 500 | + | constructor Create(const pSize: TCellNums); | |
| 501 | + | property Cell[const pRow, pCol: TCellNums]: TCellType read GetCell write SetCell; | |
| 502 | + | property Size: TCellNums read FSize; | |
| 503 | + | end; | |
| 504 | + | ``` | |
| 505 | + | ||
| 506 | + | It's common practice to prefix variables that are accessed via properties with a letter *F*. We've made the public access to the size property read-only, because it should never be changed, once the game is started. The only place where the private variable should get it's final value is in the Create constructor. | |
| 507 | + | ||
| 508 | + | - Locate the constructor. | |
| 509 | + | - Change *Size := pSize;* to *FSize := pSize;* (if you don't you'll get a compilation error). | |
| 510 | + | - And while we're at it, the initialization needs a minor fix as well. There is no need to initialize cells we are not going to use. So the constructor should look like this (*C_MAX* is replaced with *Size*): | |
| 511 | + | ||
| 512 | + | ``` pascal | |
| 513 | + | constructor TPegSolitaire.Create(const pSize: TCellNums); | |
| 514 | + | var iRow,iCol: integer; | |
| 515 | + | begin | |
| 516 | + | FSize := pSize; | |
| 517 | + | for iRow := 1 to Size do | |
| 518 | + | for iCol := 1 to Size do | |
| 519 | + | Cell[iRow,iCol] := ctNoAccess; | |
| 520 | + | end; | |
| 521 | + | ``` | |
| 522 | + | ||
| 523 | + | We are now ready to test the program and see if it now draws a nice 5x5 matrix. | |
| 524 | + | ||
| 525 | + | - Run the program and see what happens (a 5x5 matrix is drawn). | |
| 526 | + | ||
| 527 | + | Now that the basics of the game are in place, it's time to flesh out the gui. | |
| 528 | + | ||
| 529 | + | ## Let's get artistic | |
| 530 | + | ||
| 531 | + | So far so good. We now have a game class, a supporting paint class and an unimpressive checker board on our form (well, sort of). In our solitaire game a cell can have 3 states: not accessible, empty or occupied. For each cell type we want a different graphic representation. Let's get to it. | |
| 532 | + | ||
| 533 | + | - In the editor open PegSolPainter (the unit with the paint class for our board). | |
| 534 | + | - Locate the Repaint method. | |
| 535 | + | - Locate the line where the cell is drawn: *Canvas.Rectangle(CellArea);*. | |
| 536 | + | ||
| 537 | + | Obviously we need to make a change here. It depends on the cell state what needs to be drawn (not accessible cell, empty cell or peg cell). The case... operation comes to the rescue. | |
| 538 | + | ||
| 539 | + | - Change the drawing of cells like so: | |
| 540 | + | ||
| 541 | + | ``` pascal | |
| 542 | + | // Draw boxes for all cells | |
| 543 | + | for iRow := 1 to pegsol.Size do | |
| 544 | + | for iCol := 1 to pegsol.Size do | |
| 545 | + | begin | |
| 546 | + | // Calculate the position of the cell in the paintbox | |
| 547 | + | CellArea.Top := (iRow-1) * CellHeight; | |
| 548 | + | CellArea.Left := (iCol-1) * CellWidth; | |
| 549 | + | CellArea.Right := CellArea.Left + CellWidth; | |
| 550 | + | CellArea.Bottom := CellArea.Top + CellHeight; | |
| 551 | + | ||
| 552 | + | // And now draw the cell based on the cell's contents | |
| 553 | + | case pegsol.Cell[iRow,iCol] of | |
| 554 | + | ||
| 555 | + | ctNoAccess: // Draw cells that are not accessible | |
| 556 | + | begin | |
| 557 | + | Canvas.Brush.Color := clGray; | |
| 558 | + | Canvas.Rectangle(CellArea); | |
| 559 | + | end; | |
| 560 | + | ||
| 561 | + | ctEmpty: // Draw cells that are currently empty | |
| 562 | + | begin | |
| 563 | + | Canvas.Brush.Color := clBlue; | |
| 564 | + | Canvas.Rectangle(CellArea); | |
| 565 | + | end; | |
| 566 | + | ||
| 567 | + | ctPeg: // Draw cells that are occupied | |
| 568 | + | begin | |
| 569 | + | Canvas.Brush.Color := clBlue; | |
| 570 | + | Canvas.Rectangle(CellArea); // Erase the background first | |
| 571 | + | Canvas.Brush.Color := clGreen; | |
| 572 | + | Canvas.Ellipse(CellArea); // Draw the pegs as green circles | |
| 573 | + | end; | |
| 574 | + | end; | |
| 575 | + | end; | |
| 576 | + | ``` | |
| 577 | + | ||
| 578 | + | We could run the program at this stage (just try it), but it will only display a boring 5x5 grayish grid. This is because we didn't define any game setup yet. Let's fix this first. | |
| 579 | + | ||
| 580 | + | - Open the main form source. | |
| 581 | + | - Locate the StartNewGame method. | |
| 582 | + | - Create a 7x7 game instead of 5x5. | |
| 583 | + | - Initialize a couple of cells. For example: | |
| 584 | + | ||
| 585 | + | ``` pascal | |
| 586 | + | procedure TfrmMain.StartNewGame; | |
| 587 | + | begin | |
| 588 | + | // Clean up the previous game | |
| 589 | + | pegpaint.Free; | |
| 590 | + | pegsol.Free; | |
| 591 | + | ||
| 592 | + | // Start with a new 7x7 game | |
| 593 | + | pegsol := TPegSolitaire.Create(7); | |
| 594 | + | pegpaint := TPegSolPainter.Create(pegsol, pbPeg.Canvas); | |
| 595 | + | ||
| 596 | + | // Initialize some cells | |
| 597 | + | pegsol.Cell[3,4] := ctEmpty; | |
| 598 | + | pegsol.Cell[4,2] := ctPeg; | |
| 599 | + | pegsol.Cell[4,3] := ctPeg; | |
| 600 | + | pegsol.Cell[4,4] := ctEmpty; | |
| 601 | + | pegsol.Cell[4,5] := ctPeg; | |
| 602 | + | pegsol.Cell[4,6] := ctPeg; | |
| 603 | + | pegsol.Cell[5,4] := ctEmpty; | |
| 604 | + | end; | |
| 605 | + | ``` | |
| 606 | + | ||
| 607 | + | - Run the program (it'll look something like the image below). | |
| 608 | + | ||
| 609 | + | <figure> | |
| 610 | + | <img src="tutpeg_first_pegs.png" title="tutpeg_first_pegs.png" /> | |
| 611 | + | <figcaption>tutpeg_first_pegs.png</figcaption> | |
| 612 | + | </figure> | |
| 613 | + | ||
| 614 | + | ## Populate the board | |
| 615 | + | ||
| 616 | + | As we know a classic solitaire board should look something like this: | |
| 617 | + | ||
| 618 | + | <figure> | |
| 619 | + | <img src="tutpeg_classic.png" title="tutpeg_classic.png" /> | |
| 620 | + | <figcaption>tutpeg_classic.png</figcaption> | |
| 621 | + | </figure> | |
| 622 | + | ||
| 623 | + | And if we were to populate all cells individually, that would result in a lot of code. What if we could intialize the game by just passing it some text that would symbolically describe the board? Something like this: | |
| 624 | + | ||
| 625 | + | ``` pascal | |
| 626 | + | // Initialize the cells to the classic game | |
| 627 | + | pegsol.InitializeBoard( ' ooo ' + LineEnding + | |
| 628 | + | ' ooo ' + LineEnding + | |
| 629 | + | 'ooooooo' + LineEnding + | |
| 630 | + | 'ooo.ooo' + LineEnding + | |
| 631 | + | 'ooooooo' + LineEnding + | |
| 632 | + | ' ooo ' + LineEnding + | |
| 633 | + | ' ooo ' ); | |
| 634 | + | ``` | |
| 635 | + | ||
| 636 | + | 1. **o** is an occupied cell. | |
| 637 | + | 2. **.** is an empty but playable cell. | |
| 638 | + | 3. The spaces indicate cells that are not accessible. | |
| 639 | + | ||
| 640 | + | Let's assume this is going to work and create a method in the TPegSelitaire class that can handle this. | |
| 641 | + | ||
| 642 | + | - Let's be optimistic (also called 'Top down design') and add the above code to TfrmMain.StartNewGame: | |
| 643 | + | ||
| 644 | + | ``` pascal | |
| 645 | + | procedure TfrmMain.StartNewGame; | |
| 646 | + | begin | |
| 647 | + | // Clean up the previous game | |
| 648 | + | pegpaint.Free; | |
| 649 | + | pegsol.Free; | |
| 650 | + | ||
| 651 | + | // Start with a new 7x7 game | |
| 652 | + | pegsol := TPegSolitaire.Create(7); | |
| 653 | + | pegpaint := TPegSolPainter.Create(pegsol, pbPeg.Canvas); | |
| 654 | + | ||
| 655 | + | // Initialize the cells to the classic game | |
| 656 | + | pegsol.InitializeBoard( ' ooo ' + LineEnding + | |
| 657 | + | ' ooo ' + LineEnding + | |
| 658 | + | 'ooooooo' + LineEnding + | |
| 659 | + | 'ooo.ooo' + LineEnding + | |
| 660 | + | 'ooooooo' + LineEnding + | |
| 661 | + | ' ooo ' + LineEnding + | |
| 662 | + | ' ooo ' ); | |
| 663 | + | end; | |
| 664 | + | ``` | |
| 665 | + | ||
| 666 | + | - Open the PegDatastructures sourcefile. | |
| 667 | + | - Add this procedure to the public section of the class: *InitializeBoard(const pBoard: ansistring);* | |
| 668 | + | ||
| 669 | + | ``` pascal | |
| 670 | + | public | |
| 671 | + | constructor Create(const pSize: TCellNums); | |
| 672 | + | procedure InitializeBoard(const pBoard: ansistring); | |
| 673 | + | ||
| 674 | + | property Cell[const pRow, pCol: TCellNums]: TCellType read GetCell write SetCell; | |
| 675 | + | property Size: TCellNums read FSize; | |
| 676 | + | ``` | |
| 677 | + | ||
| 678 | + | - Generate the body of InitializeBoard (<span class="kbd">Ctrl</span>+<span class="kbd">Shift</span>+<span class="kbd">C</span>...). | |
| 679 | + | ||
| 680 | + | Now what does this procedure actually need to do? It must split the textstring into seperate lines and then process those lines, Because we used *LineEnding* tokens to separate the lines, we can use a *TStringList* class to split them. | |
| 681 | + | ||
| 682 | + | - Code *InitalizeBoard* like so: | |
| 683 | + | ||
| 684 | + | ``` pascal | |
| 685 | + | procedure TPegSolitaire.InitializeBoard(const pBoard: ansistring); | |
| 686 | + | var lst : TStringList; | |
| 687 | + | iRow,iCol: integer; | |
| 688 | + | s : string; | |
| 689 | + | begin | |
| 690 | + | // Create a list with the board text in it. This will split all lines | |
| 691 | + | // into individual lines, because of the LineEnding 'splitter'. | |
| 692 | + | lst := TStringList.Create; | |
| 693 | + | lst.Text := pBoard; | |
| 694 | + | ||
| 695 | + | // Process all lines one at a time | |
| 696 | + | for iRow := 0 to lst.Count-1 do | |
| 697 | + | if iRow < Size then // Make sure there is no overflow in the rows | |
| 698 | + | begin | |
| 699 | + | // Process a single line of text | |
| 700 | + | s := lst[iRow]; | |
| 701 | + | for iCol := 1 to length(s) do | |
| 702 | + | if iCol <= Size then // Make sure there is no overflow in the columns | |
| 703 | + | case s[iCol] of | |
| 704 | + | ' ': Cell[iRow+1,iCol] := ctNoAccess; | |
| 705 | + | '.': Cell[iRow+1,iCol] := ctEmpty; | |
| 706 | + | 'o': Cell[iRow+1,iCol] := ctPeg; | |
| 707 | + | end; | |
| 708 | + | end; | |
| 709 | + | ||
| 710 | + | // Clean up the list | |
| 711 | + | lst.Free; | |
| 712 | + | end; | |
| 713 | + | ``` | |
| 714 | + | ||
| 715 | + | 1. a TStringList is used as a buffer. This works because we used LineEnding as a separator between all lines. | |
| 716 | + | 2. There are *Count* number of lines, but they are numbered 0..Count-1. Our cells are numbered starting with 1. That's why you see *iRow+1* in the cell assignments. | |
| 717 | + | ||
| 718 | + | The above procedure contains a lot of extra variables and shouldn't be that difficult to understand. It's possible to reduce the procedure to the bare minimum like so: | |
| 719 | + | ||
| 720 | + | ``` pascal | |
| 721 | + | procedure TPegSolitaire.InitializeBoard(const pBoard: ansistring); | |
| 722 | + | var iRow,iCol: integer; | |
| 723 | + | begin | |
| 724 | + | with TStringList.Create do | |
| 725 | + | begin | |
| 726 | + | Text := pBoard; | |
| 727 | + | for iRow := 0 to Min(Count-1, Size-1) do | |
| 728 | + | for iCol := 1 to Min(length(Strings[iRow]),Size) do | |
| 729 | + | case Strings[iRow][iCol] of | |
| 730 | + | ' ': Cell[iRow+1,iCol] := ctNoAccess; | |
| 731 | + | '.': Cell[iRow+1,iCol] := ctEmpty; | |
| 732 | + | 'o': Cell[iRow+1,iCol] := ctPeg; | |
| 733 | + | end; | |
| 734 | + | Free; | |
| 735 | + | end; | |
| 736 | + | end; | |
| 737 | + | ``` | |
| 738 | + | ||
| 739 | + | This procedure does exactly the same but it uses the handy feature that you can use the With statement together with dynamically created objects. For this procedure to work add the Math unit to the uses section. | |
| 740 | + | ||
| 741 | + | - Run the program. All cells are now populated like in the classic Peg Solitaire game. | |
| 742 | + | ||
| 743 | + | ## Events revisited | |
| 744 | + | ||
| 745 | + | It doesn't look too impressive yet, but we have done quite a lot. The main thing missing at the moment is being able to leap cells to remove them from the board. And for that we are going to use the mouse. But how? Let's investigate the possibilities. | |
| 746 | + | ||
| 747 | + | - Drop a [[TMemo]] on the form, to the left of the paint box pbPeg (it's on the *Standard* tab of the component palette). | |
| 748 | + | - In the Object Inspector change Align to *alClient*. It will occupy all remaining space that is left of the paintbox. | |
| 749 | + | - Change BorderSpacing.Around to *4*. | |
| 750 | + | - Clear the Lines property (click on the 3-dotted button and erase the text). The result should look like this: | |
| 751 | + | ||
| 752 | + | <figure> | |
| 753 | + | <img src="tutpeg_with_memo.png" title="tutpeg_with_memo.png" /> | |
| 754 | + | <figcaption>tutpeg_with_memo.png</figcaption> | |
| 755 | + | </figure> | |
| 756 | + | ||
| 757 | + | - Select the paintbox pbPeg. | |
| 758 | + | - In the Object Inspector select the Events tab. | |
| 759 | + | ||
| 760 | + | There are 2 events that are interesting to us: OnMouseDown and OnMouseUp. Let's see what happens whith the OnMouseDown event. | |
| 761 | + | ||
| 762 | + | - In the Object Inspector select the OnMouseDown event. | |
| 763 | + | - Click on the 3-dotted button (this generates the body of the event procedure). | |
| 764 | + | ||
| 765 | + | The header of the generated procedure contains a number of variables. Two of them are X and Y. They contain the position on the paintbox where the mouse button was pressed. Let's make them visible by adding some information to the memo component we've placed on the form. | |
| 766 | + | ||
| 767 | + | - Add the following statement to the procedure; it adds a formatted line to the memo displaying the position where the mouse button was pressed: | |
| 768 | + | ||
| 769 | + | ``` pascal | |
| 770 | + | Memo1.Append( format('Mouse down @ %dx%d',[X,Y]) ) | |
| 771 | + | ``` | |
| 772 | + | ||
| 773 | + | - Run the program (press <span class="kbd">F9</span>). | |
| 774 | + | - Click on the game board at several different locations. The memo box will display where the mouse button was pressed. | |
| 775 | + | - End the program. | |
| 776 | + | ||
| 777 | + | Obviously we cannot use the 'raw' X and Y coordinates; they are too high for our 7x7 game board. They must be translated to the cell's row and column coordinates. For that we need a function that translates a X/Y coordinate to a cell coordinate. For that we need the width and height of the paintbox, the number of cells in the grid and the width/height of an individual cell. The one place where all this comes together is... the paint class. So that is the obvious place to do this calculation. | |
| 778 | + | ||
| 779 | + | - Open the PegDatastructures file. | |
| 780 | + | - Add the *TCellPosition* record type to store cell coordinates: | |
| 781 | + | ||
| 782 | + | ``` pascal | |
| 783 | + | type | |
| 784 | + | TCellNums = 1..C_MAX; | |
| 785 | + | TCellType = (ctNoAccess, ctEmpty, ctPeg); | |
| 786 | + | TPegCells = array[TCellNums, TCellNums] of TCellType; | |
| 787 | + | ||
| 788 | + | TCellPosition = record | |
| 789 | + | Row: TCellNums; | |
| 790 | + | Col: TCellNums; | |
| 791 | + | end; | |
| 792 | + | ``` | |
| 793 | + | ||
| 794 | + | - Open the PegSolPainter class file. | |
| 795 | + | - Add the public function CanvasXYtoCell(...) to the class: | |
| 796 | + | ||
| 797 | + | ``` pascal | |
| 798 | + | public | |
| 799 | + | constructor Create(pPegSol: TPegSolitaire; pCanvas: TCanvas); | |
| 800 | + | ||
| 801 | + | procedure Repaint(const pCanvasWidth, pCanvasHeight: integer); | |
| 802 | + | function CanvasXYtoCell(const pX, pY: integer): TCellPosition; | |
| 803 | + | ``` | |
| 804 | + | ||
| 805 | + | - Generate the body (<span class="kbd">Ctrl</span>+<span class="kbd">Shift</span>+<span class="kbd">C</span>). | |
| 806 | + | - Add the following code: | |
| 807 | + | ||
| 808 | + | ``` pascal | |
| 809 | + | function TPegSolPainter.CanvasXYtoCell(const pX, pY: integer): TCellPosition; | |
| 810 | + | begin | |
| 811 | + | result.Col := (pX div CellWidth) + 1; | |
| 812 | + | result.Row := (pY div CellHeight) + 1; | |
| 813 | + | end; | |
| 814 | + | ``` | |
| 815 | + | ||
| 816 | + | The above code maps the large X/Y coordinate on the actual cell's row/col numbers. There is one problem though: the CellWidth and CellHeight are not available. They are intermediate results in the Repaint procedure and not stored. Let's fix that as well. | |
| 817 | + | ||
| 818 | + | - Add *CellWidth* and *CellHeight* as private variables to the *TPegSolPainter* class: | |
| 819 | + | ||
| 820 | + | ``` pascal | |
| 821 | + | TPegSolPainter = class | |
| 822 | + | private | |
| 823 | + | PegSol : TPegSolitaire; | |
| 824 | + | Canvas : TCanvas; | |
| 825 | + | CellWidth : integer; | |
| 826 | + | CellHeight : integer; | |
| 827 | + | ``` | |
| 828 | + | ||
| 829 | + | - Remove the variables *CellWidth* and *CellHeight* from the variable list in the Repaint procedure: | |
| 830 | + | ||
| 831 | + | ``` pascal | |
| 832 | + | procedure TPegSolPainter.Repaint(const pCanvasWidth, pCanvasHeight: integer); | |
| 833 | + | var | |
| 834 | + | iRow, iCol : TCellNums; | |
| 835 | + | CellArea : TRect; | |
| 836 | + | begin | |
| 837 | + | ``` | |
| 838 | + | ||
| 839 | + | Now we can modify the procedure where the mouse down coordinate was processed. With the new function the X/Y position can now be translated to an actuel cell coordinate. | |
| 840 | + | ||
| 841 | + | - Open the main form sourcefile. | |
| 842 | + | - Locate the *pbPegMouseDown* procedure. | |
| 843 | + | - Change the code to: | |
| 844 | + | ||
| 845 | + | ``` pascal | |
| 846 | + | procedure TfrmMain.pbPegMouseDown(Sender: TObject; Button: TMouseButton; Shift: TShiftState; X, Y: Integer); | |
| 847 | + | var CellRC: TCellPosition; | |
| 848 | + | begin | |
| 849 | + | CellRC := pegpaint.CanvasXYtoCell(X,Y); | |
| 850 | + | Memo1.Append( format('Mouse down @ %dx%d',[CellRC.Row, CellRC.Col]) ) | |
| 851 | + | end; | |
| 852 | + | ``` | |
| 853 | + | ||
| 854 | + | Let's do the same for the OnMouseUp event: | |
| 855 | + | ||
| 856 | + | - Generate the procedure body for the OnMouseUp event. | |
| 857 | + | - Add this code: | |
| 858 | + | ||
| 859 | + | ``` pascal | |
| 860 | + | procedure TfrmMain.pbPegMouseUp(Sender: TObject; Button: TMouseButton; Shift: TShiftState; X, Y: Integer); | |
| 861 | + | begin | |
| 862 | + | with pegpaint.CanvasXYtoCell(X,Y) do | |
| 863 | + | Memo1.Append( format('Mouse up @ %dx%d',[Row, Col]) ) | |
| 864 | + | end; | |
| 865 | + | ``` | |
| 866 | + | ||
| 867 | + | Note that this method does exactly the same as the OnMouseDown, but using the *with* construct saves us the trouble of declaring a local variable (less is more...). | |
| 868 | + | ||
| 869 | + | Let's test this: | |
| 870 | + | ||
| 871 | + | - Run the program. | |
| 872 | + | - Click on the upper left most cell and hold the mouse down. | |
| 873 | + | - Move the mouse cursor to another cell. | |
| 874 | + | - Release the mouse button. | |
| 875 | + | ||
| 876 | + | Every time you press the mouse button and release it, the exact cell where the mouse button was pressed or released is displayed in the memo box. | |
| 877 | + | ||
| 878 | + | ## Gluing things together | |
| 879 | + | ||
| 880 | + | This program works a bit like the calculator program: | |
| 881 | + | ||
| 882 | + | 1. The user selects a peg to move by pressing the mouse button. | |
| 883 | + | 2. The user moves the peg over another peg to an empty cell (leaps). | |
| 884 | + | 3. The user release the mouse button to execute the leap. | |
| 885 | + | ||
| 886 | + | Here we do not remember a number but a cell (-position). So as soon as the user presses the mouse button on a cell, we must store that position somewhere. | |
| 887 | + | ||
| 888 | + | - Open the main form's sourcefile. | |
| 889 | + | - Add a variable *FromCell* the the form's private variables. | |
| 890 | + | ||
| 891 | + | ``` pascal | |
| 892 | + | private | |
| 893 | + | { private declarations } | |
| 894 | + | pegsol : TPegSolitaire; // The game data | |
| 895 | + | pegpaint: TPegSolPainter; // The paint class for the game | |
| 896 | + | FromCell: TCellPosition; // The peg that is going to leap | |
| 897 | + | ``` | |
| 898 | + | ||
| 899 | + | - Locate the OnMouseDown event handler. | |
| 900 | + | - Add the following line to that procedure: | |
| 901 | + | ||
| 902 | + | ``` pascal | |
| 903 | + | FromCell := pegpaint.CanvasXYtoCell(X,Y); | |
| 904 | + | ``` | |
| 905 | + | ||
| 906 | + | Now as soon as the user releases the mouse button, we must execute the leap (verify if it's ok and update the board). Let's be optimistic (remember the Top Down remark?) and assume there is a procedure that does that for us: Leap(\<FromCell\>, \<ToCell\>). | |
| 907 | + | ||
| 908 | + | - Locate the OnMouseUp event handler and add the following line: | |
| 909 | + | ||
| 910 | + | ``` pascal | |
| 911 | + | pegsol.Leap(FromCell, pegpaint.CanvasXYtoCell(X,Y)); | |
| 912 | + | ``` | |
| 913 | + | ||
| 914 | + | *FromCell* we already populated when the mouse button was pressed. The target cell is simply calculated by calling pegpaint.CanvasXYToCell(...). We could introduce a local variable for that, but it's not really necessary. | |
| 915 | + | ||
| 916 | + | - Add the following line to the procedure as well: | |
| 917 | + | ||
| 918 | + | ``` pascal | |
| 919 | + | pbPeg.Repaint; | |
| 920 | + | ``` | |
| 921 | + | ||
| 922 | + | This will force the paintbox to repaint itself, so all updated cells show the correct contents. | |
| 923 | + | ||
| 924 | + | The complete OnMouseUp method now looks like this: | |
| 925 | + | ||
| 926 | + | ``` pascal | |
| 927 | + | procedure TfrmMain.pbPegMouseUp(Sender: TObject; Button: TMouseButton; Shift: TShiftState; X, Y: Integer); | |
| 928 | + | begin | |
| 929 | + | with pegpaint.CanvasXYtoCell(X,Y) do | |
| 930 | + | Memo1.Append( format('Mouse up @ %dx%d',[Row, Col]) ); | |
| 931 | + | pegsol.Leap(FromCell, pegpaint.CanvasXYtoCell(X,Y)); | |
| 932 | + | pbPeg.Repaint; | |
| 933 | + | end; | |
| 934 | + | ``` | |
| 935 | + | ||
| 936 | + | Before going into the Leap procedure, a bit of extra functionality is introduced. Remember that we can retrieve the state of a cell (empty, peg or no access) via the Cell property of TPegSolitaire? For example *pegsol.Cell\[2,2\]* would give us the state of the cell in row 2 and column 2. But in the mean time we have introduced a new datastructure: TCellPosition. So for example if we want to get the state of the *FromCell* we would need the following awkward statement: | |
| 937 | + | ||
| 938 | + | ``` pascal | |
| 939 | + | state := pegsol.Cell[ FromCell.Row, FromCell.Col ] | |
| 940 | + | ``` | |
| 941 | + | ||
| 942 | + | It would be nice if we could write something like: | |
| 943 | + | ||
| 944 | + | ``` pascal | |
| 945 | + | state := pegsol.GetCell(FromCell) | |
| 946 | + | ``` | |
| 947 | + | ||
| 948 | + | Let's add this to our game class. | |
| 949 | + | ||
| 950 | + | - Open sourcefile PegDatastructures. | |
| 951 | + | - Add the private function: *GetCell(const pPosition: TCellPosition): TCellType;* | |
| 952 | + | ||
| 953 | + | ``` pascal | |
| 954 | + | TPegSolitaire = class | |
| 955 | + | private | |
| 956 | + | FSize: TCellNums; | |
| 957 | + | PegCells: TPegCells; | |
| 958 | + | ||
| 959 | + | function GetCell(const pRow, pCol: TCellNums): TCellType; | |
| 960 | + | procedure SetCell(const pRow, pCol: TCellNums; const pValue: TCellType); | |
| 961 | + | function GetCell(const pPosition: TCellPosition): TCellType; | |
| 962 | + | ``` | |
| 963 | + | ||
| 964 | + | There now are two functions with the name GetCell, but the parameter list is different. So Lazarus knows exactly when to call which function. | |
| 965 | + | ||
| 966 | + | - Generate the body of the function (<span class="kbd">Ctrl</span>+<span class="kbd">Shift</span>+<span class="kbd">C</span>). | |
| 967 | + | - Insert the following code: | |
| 968 | + | ||
| 969 | + | ``` pascal | |
| 970 | + | result := Cell[pPosition.Row, pPosition.Col] | |
| 971 | + | ``` | |
| 972 | + | ||
| 973 | + | Back to the main storyline. We have introduced a procedure *Leap(...)*, but it doesn't exist yet. It is a method that changes the game board, so the place to put it is the TPegSolitaire class. | |
| 974 | + | ||
| 975 | + | - Open sourcefile PegDatastructures. | |
| 976 | + | - Add procedure Leap to the public section of the TPegSolitaire class. | |
| 977 | + | ||
| 978 | + | ``` pascal | |
| 979 | + | public | |
| 980 | + | constructor Create(const pSize: TCellNums); | |
| 981 | + | procedure InitializeBoard(const pBoard: ansistring); | |
| 982 | + | procedure Leap(const pFromCell, pToCell: TCellPosition); | |
| 983 | + | ``` | |
| 984 | + | ||
| 985 | + | - Generate the procedure body (<span class="kbd">Ctrl</span>+<span class="kbd">Shift</span>+<span class="kbd">C</span>). | |
| 986 | + | ||
| 987 | + | Now this procedure does all the hard work: check if the cells are valid and if the leap is at all possible. This is not difficult, but the number of checks is quite extensive for something that looks simple. The code is fairly self-explanatory and if not, hopefully the comments explain what is going on. Note that the procedure uses the GetCell(\<cellposition\>) function we created earlier. | |
| 988 | + | ||
| 989 | + | ``` pascal | |
| 990 | + | procedure TPegSolitaire.Leap(const pFromCell, pToCell: TCellPosition); | |
| 991 | + | var dx, dy: integer; | |
| 992 | + | JumpedCell: TCellPosition; | |
| 993 | + | begin | |
| 994 | + | // Verify that the start cell is occupied and the target cell is empty | |
| 995 | + | // If not, leave the procedure via the EXIT. | |
| 996 | + | if (GetCell(pFromCell) <> ctPeg) or | |
| 997 | + | (GetCell(pToCell) <> ctEmpty) then | |
| 998 | + | EXIT; | |
| 999 | + | ||
| 1000 | + | // Calculate the horizontal and vertical distance between the cells | |
| 1001 | + | dx := abs(pFromCell.Col - pToCell.Col); | |
| 1002 | + | dy := abs(pFromCell.Row - pToCell.Row); | |
| 1003 | + | ||
| 1004 | + | // A valid move has one direction equal to zero and the other equal to 2 | |
| 1005 | + | if ((dx = 2) and (dy = 0)) | |
| 1006 | + | or ((dx = 0) and (dy = 2)) then | |
| 1007 | + | begin | |
| 1008 | + | // Determine the position of the jumped cell; it's in the middle | |
| 1009 | + | JumpedCell.Col := (pFromCell.Col + pToCell.Col) div 2; | |
| 1010 | + | JumpedCell.Row := (pFromCell.Row + pToCell.Row) div 2; | |
| 1011 | + | ||
| 1012 | + | // Final check: is there a peg in the jumped cell? | |
| 1013 | + | if GetCell(JumpedCell) = ctPeg then | |
| 1014 | + | begin | |
| 1015 | + | // Jump: clear the FromCell, empty the jumped cell and populate the ToCell | |
| 1016 | + | Cell[pFromCell.Row, pFromCell.Col] := ctEmpty; | |
| 1017 | + | Cell[JumpedCell.Row, JumpedCell.Col] := ctEmpty; | |
| 1018 | + | Cell[pToCell.Row, pToCell.Col] := ctPeg; | |
| 1019 | + | end; | |
| 1020 | + | end; | |
| 1021 | + | end; | |
| 1022 | + | ``` | |
| 1023 | + | ||
| 1024 | + | Believe it or not but we now have a working Peg Solitaire game program! | |
| 1025 | + | ||
| 1026 | + | - Run the program. | |
| 1027 | + | - Press the mouse button on one peg cell. | |
| 1028 | + | - Leap over another peg cell to an empty cell. | |
| 1029 | + | - Release the mouse button. | |
| 1030 | + | - Repeat... | |
| 1031 | + | ||
| 1032 | + | ## Cleaning up | |
| 1033 | + | ||
| 1034 | + | On the form we still have the memo component that displays mouse clicks. We don't really need it anymore. | |
| 1035 | + | ||
| 1036 | + | - Delete the memo from the main form. | |
| 1037 | + | - Delete the memo updates from the MouseDown and MouseUp events. | |
| 1038 | + | ||
| 1039 | + | ``` pascal | |
| 1040 | + | procedure TfrmMain.pbPegMouseDown(Sender: TObject; Button: TMouseButton; Shift: TShiftState; X, Y: Integer); | |
| 1041 | + | begin | |
| 1042 | + | FromCell := pegpaint.CanvasXYtoCell(X,Y); | |
| 1043 | + | end; | |
| 1044 | + | ||
| 1045 | + | procedure TfrmMain.pbPegMouseUp(Sender: TObject; Button: TMouseButton; Shift: TShiftState; X, Y: Integer); | |
| 1046 | + | begin | |
| 1047 | + | pegsol.Leap(FromCell, pegpaint.CanvasXYtoCell(X,Y) ); | |
| 1048 | + | pbPeg.Repaint; | |
| 1049 | + | end; | |
| 1050 | + | ``` | |
| 1051 | + | ||
| 1052 | + | - Open the form editor (<span class="kbd">F12</span>). | |
| 1053 | + | - Select the paintbox pbPeg | |
| 1054 | + | - In the Object Inspector change property Align to *alClient* (look on the Properties tab). | |
| 1055 | + | - Remove the unit *stdctrls* from the uses list. The compiler would othwerwise give a hint in the Messages window that it isn't used (it was automatically added when we dropped the memo component on the form). | |
| 1056 | + | ||
| 1057 | + | ### What's next? | |
| 1058 | + | ||
| 1059 | + | To make it a fully functional game we need a way to change the board without recompiling the application. And the graphics could be improved as well. Let's address the first issue first. | |
| 1060 | + | ||
| 1061 | + | ## Creating more board layouts | |
| 1062 | + | ||
| 1063 | + | It would be nice if we could add more boards to our game without recompiling the application. The obvious place would be to store the board layouts in external textfiles. The user can then start a new game by opening one of the textfiles. The fun thing is, it's easy to add because we've already done most of the hard work. First let's make two board layouts. | |
| 1064 | + | ||
| 1065 | + | - From the menu choose *File/New...*; this opens a pop up dialog. | |
| 1066 | + | - Choose the option Module/Text and click OK. | |
| 1067 | + | - Type the following text (it should look familiar :-) ): | |
| 1068 | + | ||
| 1069 | + | ``` pascal | |
| 1070 | + | ooo | |
| 1071 | + | ooo | |
| 1072 | + | ooooooo | |
| 1073 | + | ooo.ooo | |
| 1074 | + | ooooooo | |
| 1075 | + | ooo | |
| 1076 | + | ooo | |
| 1077 | + | ``` | |
| 1078 | + | ||
| 1079 | + | - From the menu choose File/Save. | |
| 1080 | + | - Save the file in the projects' bin folder as *classic.txt*. | |
| 1081 | + | ||
| 1082 | + | Add another file: | |
| 1083 | + | ||
| 1084 | + | - From the menu choose *File/New...*. | |
| 1085 | + | - Choose the option Module/Text and click OK. | |
| 1086 | + | - Type the following text: | |
| 1087 | + | ||
| 1088 | + | ``` pascal | |
| 1089 | + | ... | |
| 1090 | + | .o. | |
| 1091 | + | ..ooo.. | |
| 1092 | + | .ooooo. | |
| 1093 | + | ooooooo | |
| 1094 | + | ... | |
| 1095 | + | ... | |
| 1096 | + | ``` | |
| 1097 | + | ||
| 1098 | + | - From the menu choose File/Save. | |
| 1099 | + | - Save the file in the bin folder as *triangle.txt*. | |
| 1100 | + | ||
| 1101 | + | There are many ways to create and open new boards. In this tutorial we'll use the menu driven approach (a thorough description of the menu is something for another tutorial). | |
| 1102 | + | ||
| 1103 | + | - Open the main form's editor. | |
| 1104 | + | - Select the [[TMainMenu]] control from the Standard components palette. | |
| 1105 | + | - Click on the form (it doesn't matter if you 'hit' the paintbox). An icon is displayed showing that the menu is now availabe. | |
| 1106 | + | - Double click on the icon with label MainMenu1. This opens the menu editor with one item aldready available, labeled *New Item1*. | |
| 1107 | + | - In the Object Inspector change Caption to *&File* (include the ampersand; it's used to draw the underscore symbol when you press Alt to access the main menu). | |
| 1108 | + | - Right click on the File item in the Menu Editor and select *Create Submenu* from the pop up window. | |
| 1109 | + | - Change the Caption to *E&xit* (this adds a familiar application exit button). | |
| 1110 | + | - Right click on the File item. | |
| 1111 | + | - Select *Insert New Item (after)* from the pop up menu. | |
| 1112 | + | - Change the caption of that new menu to *&Game*. | |
| 1113 | + | - Right click on the Game menu and select *Create Submenu* from the pop up.. | |
| 1114 | + | - Change the caption to *Load from file...*. | |
| 1115 | + | ||
| 1116 | + | The menu will now look something like this: | |
| 1117 | + | ||
| 1118 | + | <figure> | |
| 1119 | + | <img src="tutpeg_mainmenu.png" title="tutpeg_mainmenu.png" /> | |
| 1120 | + | <figcaption>tutpeg_mainmenu.png</figcaption> | |
| 1121 | + | </figure> | |
| 1122 | + | ||
| 1123 | + | The menu is also visible at the top of the main form. | |
| 1124 | + | ||
| 1125 | + | - Click on the *File* menu item; this opens the submenu and *Exit* is visible. | |
| 1126 | + | - Double click on *Exit*. As you might have guessed this creates an event handler. In other words the procedure that gets executed as soon as the user clicks on this menu item. | |
| 1127 | + | - Add the following not too complex code to the generated procedure: | |
| 1128 | + | ||
| 1129 | + | ``` pascal | |
| 1130 | + | Close | |
| 1131 | + | ``` | |
| 1132 | + | ||
| 1133 | + | This will close the main form. And because it is the only form of our application it will end the application. | |
| 1134 | + | ||
| 1135 | + | Okay now it's time to look at how to open the board files. There are standard components and menu's available to do this, but let's do it the manual way. | |
| 1136 | + | ||
| 1137 | + | - Open the main form's editor. | |
| 1138 | + | - In the component palette select the *[[Dialogs tab]]*. | |
| 1139 | + | - Select the [[TOpenDialog]] component (click on it). | |
| 1140 | + | - Click on the main form (anywhere). A OpenDialog1 component is now visible. This component provides us with a kind of explorer pop up with which we can select files. The main form now looks like this: | |
| 1141 | + | ||
| 1142 | + | <figure> | |
| 1143 | + | <img src="tutpeg_mainform.png" title="tutpeg_mainform.png" /> | |
| 1144 | + | <figcaption>tutpeg_mainform.png</figcaption> | |
| 1145 | + | </figure> | |
| 1146 | + | ||
| 1147 | + | - In the Object Inspector click on the Filter property and then on the 3-dotted button. This pops up the filter dialog. This is the place where we tell the file dialog what files we allow the user to select. | |
| 1148 | + | - We only want to see text files so add this filter line: *Peg Solitaire textfiles (*.txt) \| *.txt* (see image below). | |
| 1149 | + | - Press OK. | |
| 1150 | + | ||
| 1151 | + | <figure> | |
| 1152 | + | <img src="tutpeg_filterdialog.png" title="tutpeg_filterdialog.png" /> | |
| 1153 | + | <figcaption>tutpeg_filterdialog.png</figcaption> | |
| 1154 | + | </figure> | |
| 1155 | + | ||
| 1156 | + | - In the Object Inspector change Options.ofFileMustExist to *true*. This forces the dialog to only allow existing files to be selected. | |
| 1157 | + | ||
| 1158 | + | So far so good. Now to actually open a file when the menu item is selected: | |
| 1159 | + | ||
| 1160 | + | - On the main form click on the Game menu item. This opens the drop down menu. | |
| 1161 | + | - Click on *Load from file...*. As expected this generates an.... event handler. | |
| 1162 | + | - Add the following code to the Event handler: | |
| 1163 | + | ||
| 1164 | + | ``` pascal | |
| 1165 | + | if OpenDialog1.Execute then | |
| 1166 | + | ShowMessage(OpenDialog1.FileName); | |
| 1167 | + | ``` | |
| 1168 | + | ||
| 1169 | + | Remember: small steps. We have now added a menu to the form to exit the application and to load a game board set up from disk. We haven't actually coded the loading part, but let's first try the code we have so far. | |
| 1170 | + | ||
| 1171 | + | - Run the application. | |
| 1172 | + | - From the menu choose *Game/Load from file...*. | |
| 1173 | + | - Select *triangle.txt* and press Open. | |
| 1174 | + | - A window pops up that shows us the selected filename. | |
| 1175 | + | - End the program. | |
| 1176 | + | ||
| 1177 | + | Now let's finish the board loading code. The code is pretty self-explanatory and reuses some of the procedures we have created so far. | |
| 1178 | + | ||
| 1179 | + | - Open the main form's editor. | |
| 1180 | + | - From the menu choose *Game/Load from file...*. This will open the event handler. | |
| 1181 | + | - Replace the code with this: | |
| 1182 | + | ||
| 1183 | + | ``` pascal | |
| 1184 | + | procedure TfrmMain.MenuItem4Click(Sender: TObject); | |
| 1185 | + | begin | |
| 1186 | + | // Open the pop up dialog | |
| 1187 | + | if OpenDialog1.Execute then | |
| 1188 | + | begin | |
| 1189 | + | // Start with a new empty board | |
| 1190 | + | StartNewGame; | |
| 1191 | + | ||
| 1192 | + | // Dynamically create a stringlist to load the board layout | |
| 1193 | + | with TStringList.Create do | |
| 1194 | + | begin | |
| 1195 | + | // Load the board layout from the textfile | |
| 1196 | + | LoadFromFile(OpenDialog1.FileName); | |
| 1197 | + | ||
| 1198 | + | // Initialize the board with the file's contents | |
| 1199 | + | pegsol.InitializeBoard(Text); | |
| 1200 | + | ||
| 1201 | + | // Clean up the stringlist | |
| 1202 | + | Free | |
| 1203 | + | end; | |
| 1204 | + | ||
| 1205 | + | // After loading the new board update the paintbox | |
| 1206 | + | pbPeg.Repaint; | |
| 1207 | + | end; | |
| 1208 | + | end; | |
| 1209 | + | ``` | |
| 1210 | + | ||
| 1211 | + | And that's all there is to it! | |
| 1212 | + | ||
| 1213 | + | Run the program, open a board set up file and play the game! | |
| 1214 | + | ||
| 1215 | + | ## Eye candy | |
| 1216 | + | ||
| 1217 | + | We now have a working Peg Solitaire application. There's still plenty of room for improvent, but the game itself is working nicely. The last part of this tutorial is about improving the looks of the game. Sure the game works, but a bit more detail in the graphics would be nice. And that's pretty easy to add. All we need are three images for the cell types, update the painter class and in the main form, tell the painter to use the images. So let's add the three images to the painter class: | |
| 1218 | + | ||
| 1219 | + | - Open the PegSolPainter sourcefile. | |
| 1220 | + | - Add the 3 images to the private variables section: | |
| 1221 | + | ||
| 1222 | + | ``` pascal | |
| 1223 | + | TPegSolPainter = class | |
| 1224 | + | private | |
| 1225 | + | PegSol : TPegSolitaire; | |
| 1226 | + | Canvas : TCanvas; | |
| 1227 | + | CellWidth : integer; | |
| 1228 | + | CellHeight : integer; | |
| 1229 | + | ||
| 1230 | + | ImgNoAccess: TPicture; | |
| 1231 | + | ImgEmpty : TPicture; | |
| 1232 | + | ImgPeg : TPicture; | |
| 1233 | + | ``` | |
| 1234 | + | ||
| 1235 | + | - Add a procedure to the public section for loading the images. | |
| 1236 | + | ||
| 1237 | + | ``` pascal | |
| 1238 | + | public | |
| 1239 | + | constructor Create(pPegSol: TPegSolitaire; pCanvas: TCanvas); | |
| 1240 | + | procedure Repaint(const pCanvasWidth, pCanvasHeight: integer); | |
| 1241 | + | function CanvasXYtoCell(const pX, pY: integer): TCellPosition; | |
| 1242 | + | procedure LoadImage(const pCellType: TCellType; const pFilename: string); | |
| 1243 | + | ``` | |
| 1244 | + | ||
| 1245 | + | - Generate the body for the procedure. | |
| 1246 | + | - Add the code: | |
| 1247 | + | ||
| 1248 | + | ``` pascal | |
| 1249 | + | procedure TPegSolPainter.LoadImage(const pCellType: TCellType; const pFilename: string); | |
| 1250 | + | ||
| 1251 | + | procedure UpdateImage(var pImg: TPicture; const pNewImage: TPicture); | |
| 1252 | + | begin | |
| 1253 | + | pImg.Free; | |
| 1254 | + | pImg := pNewImage | |
| 1255 | + | end; | |
| 1256 | + | ||
| 1257 | + | var pic: TPicture; | |
| 1258 | + | begin | |
| 1259 | + | // Make sure the file exists | |
| 1260 | + | if FileExists(pFilename) then | |
| 1261 | + | begin | |
| 1262 | + | // First load the picture in a local variable | |
| 1263 | + | pic := TPicture.Create; | |
| 1264 | + | pic.LoadFromFile(pFilename); | |
| 1265 | + | ||
| 1266 | + | // Now update the required image based on the pCelltype parm | |
| 1267 | + | case pCelltype of | |
| 1268 | + | ctNoAccess: UpdateImage(ImgNoAccess, pic); | |
| 1269 | + | ctEmpty : UpdateImage(ImgEmpty, pic); | |
| 1270 | + | ctPeg : UpdateImage(ImgPeg, pic); | |
| 1271 | + | end; | |
| 1272 | + | end; | |
| 1273 | + | end; | |
| 1274 | + | ``` | |
| 1275 | + | ||
| 1276 | + | The code again is self-explanatory. Note that we use a short local procedure to update an image. If we wouldn't do that then the case statement (*case pCellType of*) would be more complex (i.e. contain more redundant code). Now each cell type only needs one line to update the right image. | |
| 1277 | + | ||
| 1278 | + | We've added the pictures to the class. Now we must use them and that of course happens in the Repaint procedure. For each celltype we check whether an image is available. And if so, use that image instead of the plain drawing. | |
| 1279 | + | ||
| 1280 | + | - Locate the Repaint method. | |
| 1281 | + | - In the case statement, change the ctNoAccess, ctEmpty and ctPeg sections to: | |
| 1282 | + | ||
| 1283 | + | ``` pascal | |
| 1284 | + | // And now draw the cell based on the cell's contents | |
| 1285 | + | case pegsol.Cell[iRow,iCol] of | |
| 1286 | + | ||
| 1287 | + | ctNoAccess: // Draw cells that are not accessible | |
| 1288 | + | if not assigned(ImgNoAccess) then | |
| 1289 | + | begin | |
| 1290 | + | Canvas.Brush.Color := clGray; | |
| 1291 | + | Canvas.Rectangle(CellArea); | |
| 1292 | + | end | |
| 1293 | + | else with ImgNoAccess do | |
| 1294 | + | Canvas.CopyRect(CellArea, Bitmap.Canvas, Rect(0,0,Width,Height)); | |
| 1295 | + | ||
| 1296 | + | ctEmpty: // Draw cells that are currently empty | |
| 1297 | + | if not assigned(ImgEmpty) then | |
| 1298 | + | begin | |
| 1299 | + | Canvas.Brush.Color := clBlue; | |
| 1300 | + | Canvas.Rectangle(CellArea); | |
| 1301 | + | end | |
| 1302 | + | else with ImgEmpty do | |
| 1303 | + | Canvas.CopyRect(CellArea, Bitmap.Canvas, Rect(0,0,Width,Height)); | |
| 1304 | + | ||
| 1305 | + | ctPeg: // Draw cells that are occupied | |
| 1306 | + | if not assigned(ImgPeg) then | |
| 1307 | + | begin | |
| 1308 | + | Canvas.Brush.Color := clBlue; | |
| 1309 | + | Canvas.Rectangle(CellArea); // Erase the background first | |
| 1310 | + | Canvas.Brush.Color := clGreen; | |
| 1311 | + | Canvas.Ellipse(CellArea); | |
| 1312 | + | end | |
| 1313 | + | else with ImgPeg do | |
| 1314 | + | Canvas.CopyRect(CellArea, Bitmap.Canvas, Rect(0,0,Width,Height)); | |
| 1315 | + | ||
| 1316 | + | end; | |
| 1317 | + | ``` | |
| 1318 | + | ||
| 1319 | + | In the main form locate the StartNewGame method and add the image loading code to the painter class. | |
| 1320 | + | ||
| 1321 | + | - Open the main form editor. | |
| 1322 | + | - Locate method *StartNewGame*. | |
| 1323 | + | - Add LoadImage statements after the creation of the *pegpaint* object: | |
| 1324 | + | ||
| 1325 | + | ``` pascal | |
| 1326 | + | // Start with a new 7x7 game | |
| 1327 | + | pegsol := TPegSolitaire.Create(7); | |
| 1328 | + | pegpaint := TPegSolPainter.Create(pegsol, pbPeg.Canvas); | |
| 1329 | + | ||
| 1330 | + | pegpaint.LoadImage(ctNoAccess, 'tutpeg_cellforbidden.jpg'); | |
| 1331 | + | pegpaint.LoadImage(ctEmpty, 'tutpeg_cellempty.jpg'); | |
| 1332 | + | pegpaint.LoadImage(ctPeg, 'tutpeg_celloccupied.jpg'); | |
| 1333 | + | ``` | |
| 1334 | + | ||
| 1335 | + | Make sure that the above images are downloaded from below and put in the program's *bin* folder, or better yet, create your own images. Note: to download these images, click on them first thén download them. | |
| 1336 | + | ||
| 1337 | + | 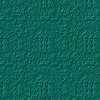  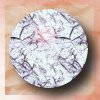 | |
| 1338 | + | ||
| 1339 | + | - Now test the solitaire game and hopefully it looks something like the image at the beginning of this tutorial... | |
| 1340 | + | ||
| 1341 | + | ## Final tweaks | |
| 1342 | + | ||
| 1343 | + | Most programs have their own icons that are displayed in menu's and in explorer windows. It's easy to add your own custom icon to an application. | |
| 1344 | + | ||
| 1345 | + | - From the menu choose *Project/Project Options...*. | |
| 1346 | + | - Click on *Project Options* in the pop up dialog (right at the top). This will display the window with the application icon. | |
| 1347 | + | - Click on *Load Icon* and load your icon of choice; or download the marble that comes with this tutorial: | |
| 1348 | + | ||
| 1349 | + | <figure> | |
| 1350 | + | <img src="tutpeg_marble.png" title="tutpeg_marble.png" /> | |
| 1351 | + | <figcaption>tutpeg_marble.png</figcaption> | |
| 1352 | + | </figure> | |
| 1353 | + | ||
| 1354 | + | - Press OK. | |
| 1355 | + | ||
| 1356 | + | The application will now have a nice marble icon in the form's title bar and in explorer windows. | |
| 1357 | + | ||
| 1358 | + | --- | |
| 1359 | + | *From the Free Pascal wiki, page "Peg Solitaire tutorial", as it stood on 2023-12-04 after a change by Amerou, out of the wiki's dump of 2024-05-26. Copyright stays with the author who wrote it, according to the old wiki's [[Licensing]] page. If you have concerns about this material, [message the admin](/wiki-contact).* |