

MSEide MSEgui first step: what changed
Revision 1 to 2. Removed lines have a minus sign; added lines have a plus sign.
| Old | New | Line | |
|---|---|---|---|
| 1 | 1 | **My first mse program.** | |
| 2 | 2 | ||
| 3 | 3 | This introductory article for beginners. It contains step by step instructions to create the first program. | |
| 4 | 4 | ||
| 5 | 5 | Naturally, the software MSEide + MSEgui should already be installed. | |
| 6 | 6 | ||
| 7 | 7 | Start MSEide. | |
| 8 | 8 | ||
| 9 | 9 | The screen should get a window similar to the following: | |
| 10 | 10 | ||
| 11 | - | ||
| 12 | - | ||
| 13 | - | ||
| 14 | - | ||
| 11 | + | 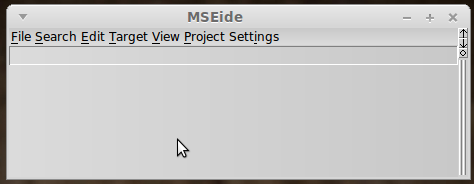 | |
| 15 | 12 | ||
| 16 | 13 | Let's create a new project. | |
| 17 | 14 | ||
| 18 | 15 | Project menu (Project) - New (New) - From template (From Template). | |
| 19 | 16 | ||
| 20 | 17 | On the screen you get the following: | |
| 21 | 18 | ||
| 22 | - | ||
| 23 | - | ||
| 24 | - | ||
| 25 | - | ||
| 19 | + | 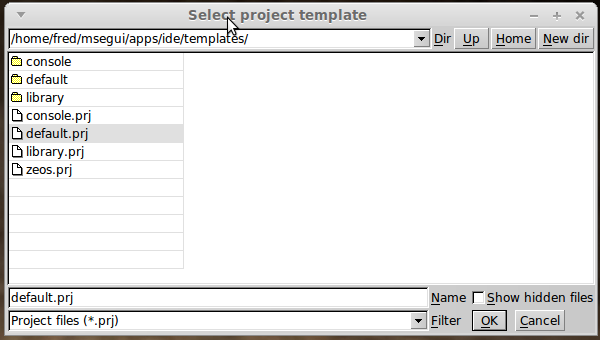 | |
| 26 | 20 | ||
| 27 | 21 | At this point MSEide prompts you to select a template file for the new project. | |
| 28 | 22 | ||
| 29 | 23 | We can use or default.prj or default_all_langs.prj. | |
| 30 | 24 | ||
| 31 | 25 | Template default.prj has a smaller executable file, default_all_langs.prj will connect automatically language constants, and dialogs (eg, file open dialog), windows maintenance... | |
| 32 | 26 | ||
| 33 | 27 | For this first program we do not have any dialog and service windows, so it is sufficient template default.prj. | |
| 34 | 28 | ||
| 35 | 29 | Select and press Ok. | |
| 36 | 30 | ||
| 37 | 31 | Click new. Cat-g (New dir) to create a directory. | |
| 38 | 32 | ||
| 39 | 33 | In the dialog box that appears, type "hellodemo" and click Ok. | |
| 40 | 34 | ||
| 41 | 35 | In the second field from the bottom of the window New Project (New Project), enter "hello". | |
| 42 | 36 | ||
| 43 | 37 | Prj extension will be added automatically. | |
| 44 | 38 | ||
| 45 | 39 | Now click Ok: | |
| 46 | 40 | ||
| 47 | - | ||
| 48 | - | ||
| 49 | - | ||
| 50 | - | ||
| 41 | + | 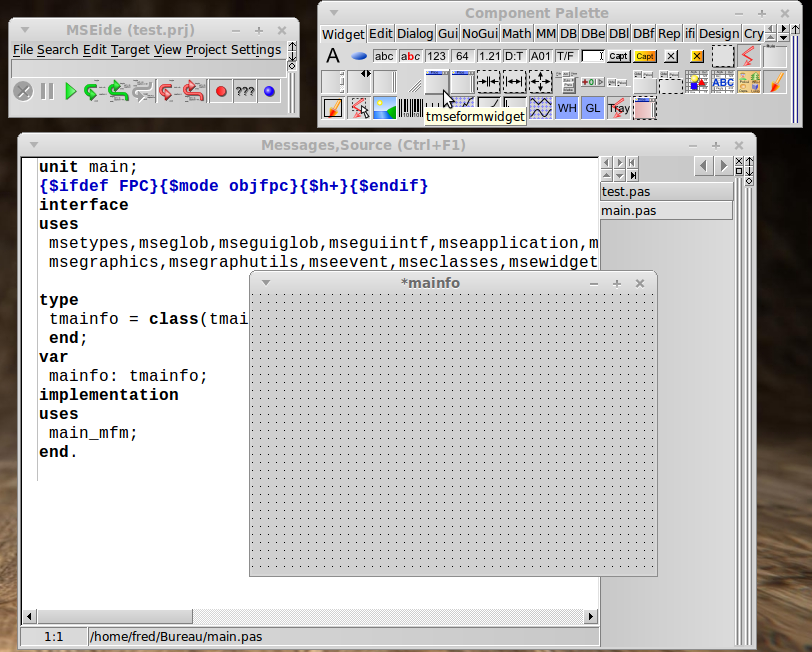 | |
| 51 | 42 | ||
| 52 | 43 | You have created your first project ! | |
| 53 | 44 | ||
| 54 | 45 | You should have at least four windows : | |
| 55 | 46 | ||
| 56 | 47 | \- 'MSEide (hello.prj)' - 'Component Palette (Component palette)' - 'Messages' - 'Source Code (Source, Messages) (Ctrl + F1) 'and' * mainfo '. | |
| 57 | 48 | ||
| 58 | 49 | Click on the box '* mainfo' (the smallest). | |
| 59 | 50 | ||
| 60 | 51 | Now you've got another important window =\> 'Object Inspector mainfo (Object inspector mainfo)'. | |
| 61 | 52 | ||
| 62 | 53 | For added convenience, grab the mouse box '* mainfo' for any angle and a little stretch. | |
| 63 | 54 | ||
| 64 | 55 | You will get something like this: | |
| 65 | 56 | ||
| 66 | - | ||
| 67 | - | ||
| 68 | - | ||
| 69 | - | ||
| 57 | + | 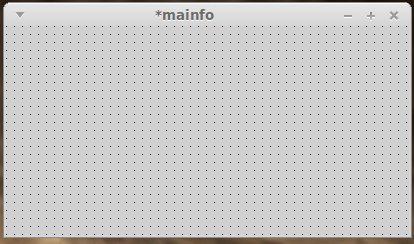 | |
| 70 | 58 | ||
| 71 | 59 | This is the main form of your project - its main window. | |
| 72 | 60 | ||
| 73 | 61 | On it you will put the necessary visual or non-visual components. | |
| 74 | 62 | ||
| 75 | 63 | Take components needed from the ('Palette components (Component palette)'): | |
| 76 | 64 | ||
| 77 | - | ||
| 78 | - | ||
| 79 | - | ||
| 80 | - | ||
| 65 | + | 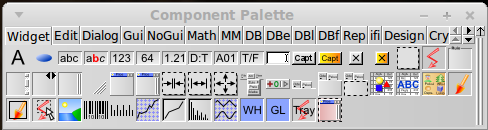 | |
| 81 | 66 | ||
| 82 | 67 | The components are located on multiple pages. | |
| 83 | 68 | ||
| 84 | 69 | To switch between pages click on tabs at the top of the window. | |
| 85 | 70 | ||
| 86 | 71 | If you hold for a while the mouse pointer over a component, you will be prompted with the class (type) of this component. | |
| 87 | 72 | ||
| 88 | 73 | Now get component Widget tbutton and once click on it | |
| 89 | 74 | ||
| 90 | 75 | Now click on the main form of your project. Component appeared on the form. | |
| 91 | 76 | ||
| 92 | 77 | Place the mouse over the component. | |
| 93 | 78 | ||
| 94 | 79 | Now press the left mouse button and hold, move it to the side. | |
| 95 | 80 | ||
| 96 | 81 | Release the mouse button. Thus it is possible to move the component form. | |
| 97 | 82 | ||
| 98 | 83 | To change the size, perform the same steps with the black squares arranged around the perimeter of the component. | |
| 99 | 84 | ||
| 100 | 85 | Place the component in the right top of the form: | |
| 101 | 86 | ||
| 102 | - | ||
| 103 | - | ||
| 104 | - | ||
| 105 | - | ||
| 87 | + | 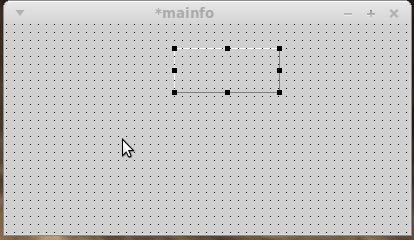 | |
| 106 | 88 | ||
| 107 | 89 | Go to the ('The object inspector mainfo (Object inspector mainfo)'). | |
| 108 | 90 | ||
| 109 | 91 | In the drop-down list, select (if there is not already selected) tbutton1 (tbutton). | |
| 110 | 92 | ||
| 111 | 93 | Below in the box to the right of the field caption, type the - button. | |
| 112 | 94 | ||
| 113 | 95 | Now you have set the value of the caption in the 'button: | |
| 114 | 96 | ||
| 115 | - | ||
| 116 | - | ||
| 117 | - | ||
| 118 | - | ||
| 97 | + | 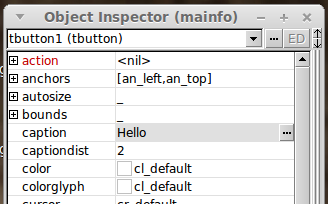 | |
| 119 | 98 | ||
| 120 | 99 | Get the component type tlabel and place it on the left of our first button. | |
| 121 | 100 | ||
| 122 | 101 | Go to the Inspector window and select the object tbutton1 (tbutton) and | |
| 123 | 102 | ||
| 124 | 103 | set the value of a field in onexecute 'pressed' and press the Enter key on the keyboard. | |
| 125 | 104 | ||
| 126 | 105 | In the description of the class will be added the setnewaction method, | |
| 127 | 106 | ||
| 128 | 107 | and in the text of the module will be an empty implementation of this method. | |
| 129 | 108 | ||
| 130 | 109 | This method (procedure) will be called when the button is pressed. | |
| 131 | 110 | ||
| 132 | 111 | Go to the editor ('messages, source code (Source, Messages) (Ctrl + F1)') and edit the procedure pressed: | |
| 133 | 112 | ||
| 134 | 113 | ` procedure tmainfo.pressed(const sender:TObject);`\ | |
| 135 | 114 | ` begin`\ | |
| 136 | 115 | ` tlabel1.caption:='Hello World!';`\ | |
| 137 | 116 | ` end;` | |
| 138 | 117 | ||
| 139 | 118 | Back in the form with a second button, write 'output' and in the procedure body onexecute, | |
| 140 | 119 | ||
| 141 | 120 | called by pressing the (procedure name as you want), register one line: | |
| 142 | 121 | ||
| 143 | 122 | ` application.terminated:=true;` | |
| 144 | 123 | ||
| 145 | 124 | Run one of three ways: | |
| 146 | 125 | ||
| 147 | 126 | \- By clicking on the green triangle in the main window; | |
| 148 | 127 | ||
| 149 | 128 | \- Pressing F9; | |
| 150 | 129 | ||
| 151 | 130 | \- In menu (Target) - Continue to start (Continue) | |
| 152 | 131 | ||
| 153 | - | ||
| 154 | - | ||
| 155 | - | ||
| 156 | - | ||
| 132 | + | 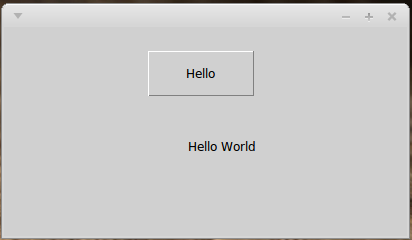 | |
| 157 | 133 | ||
| 158 | 134 | This wiki was greatly inspired by web page of Alexei Yu Ulasevich (STAKANOV) =\> <http://freepascal.ru/article/mse> | |
| 159 | 135 | ||
| 160 | 136 | --- | |
| 161 | 137 | *From the Free Pascal wiki, page "MSEide MSEgui first step", as it stood on 2020-09-01 after a change by Trev, out of the wiki's dump of 2024-05-26. Copyright stays with the author who wrote it, according to the old wiki's [[Licensing]] page. If you have concerns about this material, [message the admin](/wiki-contact).* | |
| 162 | 138 | Category: MSEide+MSEgui | |
| 163 | 139 | Category: Tutorials |