

Form Tutorial/zh CN: what changed
Revision 0 to 1. Removed lines have a minus sign; added lines have a plus sign.
Title: Form Tutorial/zh CN
| Old | New | Line | |
|---|---|---|---|
| 1 | + | 一个在 Lazarus 中使用窗体的简短介绍。 | |
| 2 | + | ||
| 3 | + | ## 窗体是什么? | |
| 4 | + | ||
| 5 | + | The form (class [[TForm]]) represents a window or dialog box that is the user interface of an [[Application|application]]. It is the container on which all other [[LCL Components|components]] (e.g. buttons, labels, edit fields, images, etc.) are inserted . | |
| 6 | + | ||
| 7 | + | ## 第一个GUI应用程序 | |
| 8 | + | ||
| 9 | + | Upon successfully installing Lazarus and starting a new Application Project, an empty form is created. Otherwise you can create a new [[Overview of Free Pascal and Lazarus|GUI application]] under Main menu -\> Project -\> New Project -\> Application OK. | |
| 10 | + | ||
| 11 | + | Now you have created a new, fully functional project with a form: | |
| 12 | + | ||
| 13 | + | <figure> | |
| 14 | + | <img src="Form1_Designmodus.png" title="Form1_Designmodus.png" /> | |
| 15 | + | <figcaption>Form1_Designmodus.png</figcaption> | |
| 16 | + | </figure> | |
| 17 | + | ||
| 18 | + | To run the newly created project, you can simply press the <span class="kbd">F9</span> key or click with the mouse on the main menu icon  (or Main menu: Run -\> Run). The project will be compiled and executed. | |
| 19 | + | ||
| 20 | + | Nothing really exciting happens. The form (Form1) changes slightly in appearance and the points from the raster grid (help for positioning of individual components) disappear (as long as the grid points are visible, you also know that it is still in design mode):\ | |
| 21 | + | 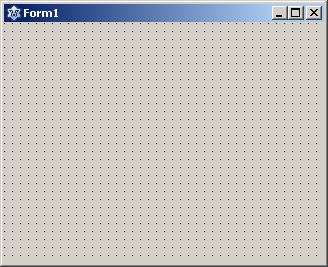 -\> 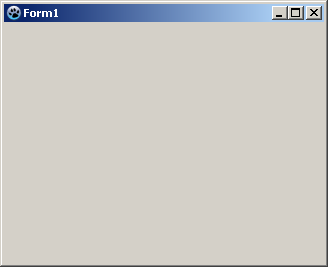 | |
| 22 | + | ||
| 23 | + | Next, you can place a [[TButton]] onto the form. This will be used later to allow the opening of a second form: | |
| 24 | + | ||
| 25 | + | Select the TButton from the [[Standard tab]] on the [[Component Palette]]. | |
| 26 | + | ||
| 27 | + | <figure> | |
| 28 | + | <img src="TButtonStandardpalette.png" title="TButtonStandardpalette.png" /> | |
| 29 | + | <figcaption>TButtonStandardpalette.png</figcaption> | |
| 30 | + | </figure> | |
| 31 | + | ||
| 32 | + | and click on the form: There is now a button placed on Form1 with the name and caption "Button1". | |
| 33 | + | ||
| 34 | + | In order for this button to do something, you have to announce that you intend to do something when you click it. This can be regarded as a simple event. For this you need an [[Event order|event handler]] that is called after the click. The event handler for a mouse click can be quite easily reached by double-clicking on Button1 (or in the Object Inspector, select Button1 -\> Events tab -\> OnClick, then click on the \[...\] button). This creates a procedure TForm1.Button1Click in the code editor, which is always called (at [[runtime]], not in design time) when Button1 is clicked: | |
| 35 | + | ||
| 36 | + | <figure> | |
| 37 | + | <img src="NeuesProjekt2.png" title="NeuesProjekt2.png" /> | |
| 38 | + | <figcaption>NeuesProjekt2.png</figcaption> | |
| 39 | + | </figure> | |
| 40 | + | ||
| 41 | + | To make the application do something after clicking on Button1, add some code between the [[Begin]] and [[End]] of the procedure TForm1.Button1Click like this: | |
| 42 | + | ||
| 43 | + | ``` pascal | |
| 44 | + | procedure TForm1.Button1Click(Sender: TObject); | |
| 45 | + | begin | |
| 46 | + | Caption:='My first Form'; //Caption of Form1 is changed (text in formhead) | |
| 47 | + | //or | |
| 48 | + | Button1.Caption:='Hello'; //Caption of button is changed (shown text of button) | |
| 49 | + | end; | |
| 50 | + | ``` | |
| 51 | + | ||
| 52 | + | Now run the form by pressing <span class="kbd">F9</span>, and notice that when the button is clicked the form caption and the button caption both change. | |
| 53 | + | ||
| 54 | + | You can now experiment a little bit and learn how to use the standard components. To get started, I would recommend you to try samples of the following components: | |
| 55 | + | ||
| 56 | + | <table> | |
| 57 | + | <tbody> | |
| 58 | + | <tr> | |
| 59 | + | <td><p>[[TButton]]</p></td> | |
| 60 | + | <td><figure> | |
| 61 | + | <img src="tbutton.png" title="tbutton.png" /> | |
| 62 | + | <figcaption>tbutton.png</figcaption> | |
| 63 | + | </figure></td> | |
| 64 | + | </tr> | |
| 65 | + | <tr> | |
| 66 | + | <td><p>[[TLabel]]</p></td> | |
| 67 | + | <td><figure> | |
| 68 | + | <img src="tlabel.png" title="tlabel.png" /> | |
| 69 | + | <figcaption>tlabel.png</figcaption> | |
| 70 | + | </figure></td> | |
| 71 | + | </tr> | |
| 72 | + | <tr> | |
| 73 | + | <td><p>[[TEdit]]</p></td> | |
| 74 | + | <td><figure> | |
| 75 | + | <img src="tedit.png" title="tedit.png" /> | |
| 76 | + | <figcaption>tedit.png</figcaption> | |
| 77 | + | </figure></td> | |
| 78 | + | </tr> | |
| 79 | + | <tr> | |
| 80 | + | <td><p>[[TMemo]]</p></td> | |
| 81 | + | <td><figure> | |
| 82 | + | <img src="tmemo.png" title="tmemo.png" /> | |
| 83 | + | <figcaption>tmemo.png</figcaption> | |
| 84 | + | </figure></td> | |
| 85 | + | </tr> | |
| 86 | + | <tr> | |
| 87 | + | <td><p>[[TToggleBox]]</p></td> | |
| 88 | + | <td><figure> | |
| 89 | + | <img src="ttogglebox.png" title="ttogglebox.png" /> | |
| 90 | + | <figcaption>ttogglebox.png</figcaption> | |
| 91 | + | </figure></td> | |
| 92 | + | </tr> | |
| 93 | + | <tr> | |
| 94 | + | <td><p>[[TCheckBox]]</p></td> | |
| 95 | + | <td><figure> | |
| 96 | + | <img src="tcheckbox.png" title="tcheckbox.png" /> | |
| 97 | + | <figcaption>tcheckbox.png</figcaption> | |
| 98 | + | </figure></td> | |
| 99 | + | </tr> | |
| 100 | + | <tr> | |
| 101 | + | <td><p>[[TRadioButton]]</p></td> | |
| 102 | + | <td><figure> | |
| 103 | + | <img src="tradiobutton.png" title="tradiobutton.png" /> | |
| 104 | + | <figcaption>tradiobutton.png</figcaption> | |
| 105 | + | </figure></td> | |
| 106 | + | </tr> | |
| 107 | + | <tr> | |
| 108 | + | <td><p>[[TListBox]]</p></td> | |
| 109 | + | <td><figure> | |
| 110 | + | <img src="tlistbox.png" title="tlistbox.png" /> | |
| 111 | + | <figcaption>tlistbox.png</figcaption> | |
| 112 | + | </figure></td> | |
| 113 | + | </tr> | |
| 114 | + | <tr> | |
| 115 | + | <td><p>[[TComboBox]]</p></td> | |
| 116 | + | <td><figure> | |
| 117 | + | <img src="tcombobox.png" title="tcombobox.png" /> | |
| 118 | + | <figcaption>tcombobox.png</figcaption> | |
| 119 | + | </figure></td> | |
| 120 | + | </tr> | |
| 121 | + | <tr> | |
| 122 | + | <td><p>[[TScrollBar]]</p></td> | |
| 123 | + | <td><figure> | |
| 124 | + | <img src="tscrollbar.png" title="tscrollbar.png" /> | |
| 125 | + | <figcaption>tscrollbar.png</figcaption> | |
| 126 | + | </figure></td> | |
| 127 | + | </tr> | |
| 128 | + | </tbody> | |
| 129 | + | </table> | |
| 130 | + | ||
| 131 | + | There is additional helpful information in the [[Lazarus Tutorial]]. | |
| 132 | + | ||
| 133 | + | ## 第二个窗体的使用 | |
| 134 | + | ||
| 135 | + | 这篇教程显示如何在一个工程中使用多个窗体。在这个示例中,仅仅两个窗体,Form1 (主窗体)和 Form2,被创建,but the process is identical for additional forms. | |
| 136 | + | ||
| 137 | + | There is a main form with a button, which when clicked opens the new form. The new form also receives a button which when clicked closes the new form and returns you to the main form. | |
| 138 | + | ||
| 139 | + | If you have worked through the first tutorial [[Form Tutorial|The first GUI app]], you will need to delete the code between the begin and end of procedure TForm1.Button1Click. Otherwise you will need to create a new project (application), drop a button on the form, and create the OnClick event handler for this Button1.\ | |
| 140 | + | Click the new button to enter a caption (visible text on the button). To do this, select the button (just click it once) and in the Object Inspector click Properties -\> Caption, and enter the text "Open Form2". | |
| 141 | + | ||
| 142 | + | <figure> | |
| 143 | + | <img src="Objektinspektor.png" title="Objektinspektor.png" /> | |
| 144 | + | <figcaption>Objektinspektor.png</figcaption> | |
| 145 | + | </figure> | |
| 146 | + | ||
| 147 | + | In the Main menu click File -\> New Form, to add a second form (Form2) to the project. Place a button (Button1) on Form2 and create the OnClick event handler for it. Change the caption of this button to "Close". | |
| 148 | + | ||
| 149 | + | Now the project has two forms, each of which can be selected and displayed with Main menu Project -\> Forms (or key combination <span class="kbd">Shift</span> + <span class="kbd">F12</span>). Alternatively, you can select the tab for a Unit in the Source Editor, then use <span class="kbd">F12</span> to switch between the code editor and form designer for the form of the associated [[Unit]]. | |
| 150 | + | ||
| 151 | + | In the [[source code editor]], go to the Form1 associated [[Unit]] (Unit1) and add "Unit2" to the [[Uses]] clause: | |
| 152 | + | ||
| 153 | + | ``` pascal | |
| 154 | + | uses | |
| 155 | + | Classes, SysUtils, ... , Unit2; // It is important that the individual units are separated by a comma(,) | |
| 156 | + | // and the uses clause ends with a semicolon(;). | |
| 157 | + | ``` | |
| 158 | + | ||
| 159 | + | Now you can call Unit2 (and thus Form2) from Unit1. | |
| 160 | + | ||
| 161 | + | Next, edit the OnClick event of the button belonging to Form1: | |
| 162 | + | ||
| 163 | + | ``` pascal | |
| 164 | + | unit Unit1; | |
| 165 | + | ... | |
| 166 | + | procedure TForm1.Button1Click(Sender: TObject); | |
| 167 | + | begin | |
| 168 | + | Form2.ShowModal; //Displays Form2, the focus is placed on Form2. | |
| 169 | + | end; | |
| 170 | + | ``` | |
| 171 | + | ||
| 172 | + | ``` pascal | |
| 173 | + | unit Unit2; | |
| 174 | + | ... | |
| 175 | + | procedure TForm2.Button1Click(Sender: TObject); | |
| 176 | + | begin | |
| 177 | + | Close; //Close Form2. | |
| 178 | + | end; | |
| 179 | + | ``` | |
| 180 | + | ||
| 181 | + | Now you can start the project ( or <span class="kbd">F9</span>) and open Form2 by clicking the button on Form1. | |
| 182 | + | ||
| 183 | + | ### Difference between Show and ShowModal | |
| 184 | + | ||
| 185 | + | Both methods *Show* and *ShowModal* make a form visible. To see the difference between *Show* and *ShowModal*: | |
| 186 | + | ||
| 187 | + | - Extend the previous example [[Form Tutorial|The use of a second form]] by adding a second TButton to *Form1*. | |
| 188 | + | - Select *Button1* and change the properties *Name* to *btnShow* and *Caption* to *Show*. | |
| 189 | + | - Select *Button2* and change the properties *Name* to *btnShowModal* and *Caption* to *ShowModal*. | |
| 190 | + | - Create (or modify) the *OnClick* event handler of the two buttons as follows: | |
| 191 | + | ||
| 192 | + | ``` pascal | |
| 193 | + | procedure TForm1.btnShowClick(Sender: TObject); | |
| 194 | + | begin | |
| 195 | + | Form2.Show; | |
| 196 | + | ShowMessage('Form2 is opened!'); | |
| 197 | + | end; | |
| 198 | + | ||
| 199 | + | procedure TForm1.btnShowModalClick(Sender: TObject); | |
| 200 | + | begin | |
| 201 | + | Form2.ShowModal; | |
| 202 | + | ShowMessage('Form2 is opened and closed again!'); | |
| 203 | + | end; | |
| 204 | + | ``` | |
| 205 | + | ||
| 206 | + | - Start and watch the difference! | |
| 207 | + | ||
| 208 | + | Show | |
| 209 | + | ||
| 210 | + | This procedure makes a form visible and continues to execute the code of the calling control (*Form1*). In our example, the message ([[Dialog Examples|ShowMessage]]) appears almost simultaneously with *Form2*. You can also continue to use the calling form *Form1*. For example, it is possible to move it, or click the *Show* button again (but clicking *ShowModal* will cause an error). | |
| 211 | + | ||
| 212 | + | Instead of using **`<myForm>.Show;`**, it is also possible to use **`<myForm>.Visible:=True;`**. The method *Show* does the following: | |
| 213 | + | ||
| 214 | + | ``` pascal | |
| 215 | + | procedure TCustomForm.Show; | |
| 216 | + | begin | |
| 217 | + | Visible := True; | |
| 218 | + | BringToFront; | |
| 219 | + | end; | |
| 220 | + | ``` | |
| 221 | + | ||
| 222 | + | The only difference between **`<myForm>.Show;`**, and **`<myForm>.Visible:=True;`** is that the form displayed using *Show* will be on top of all other forms currently displayed. | |
| 223 | + | ||
| 224 | + | ShowModal | |
| 225 | + | ||
| 226 | + | *ShowModal* halts the processing of code in the calling control (*Form1*) until the newly opened form (*Form2*) has been closed. In the example, the *ShowMessage* line immediately following *ShowModal* is executed only after *Form2* is closed. The calling form is frozen: You can neither move *Form1* nor click any of its buttons. | |
| 227 | + | ||
| 228 | + | ShowModal is a function that returns an integer result, see [[doc:lcl/forms/tmodalresult.html|TModalResult]]. The returned value allows branching based on how the form was closed. | |
| 229 | + | ||
| 230 | + | ## 两个窗体能够互相调用 | |
| 231 | + | ||
| 232 | + | It is generally good program design to avoid calling the main form from a second form. It is better to return to the main form by closing the second form (as in the previous example) and letting focus revert to the main form. It is, however, possible to call the main from from a sub-form, as this example will show. | |
| 233 | + | ||
| 234 | + | In order for Form1 to call Form2, Unit1 must have Unit2 in its Uses clause. Conversely, for Form2 to call Form1, Unit2 must have Unit1 in its Uses clause. This leads to a potential Circular Unit Reference compiler error, with each Unit referring to the other. This example also shows how to avoid the Circular Unit Reference error. | |
| 235 | + | ||
| 236 | + | To set up this example, either modify the forms from the previous example ([[Form Tutorial|The Use of a Second Form]]), or create a new project with two forms, each having a single button. Set the caption of Form1.Button1 to "Open Form2", and set the caption of Form2.Button1 to "Open Form1". | |
| 237 | + | ||
| 238 | + | 如果你正在修改先前的示例,在Unit1中的Uses分句中移除"Unit2"。 | |
| 239 | + | ||
| 240 | + | Add a Uses clause to the [[Implementation]] section of each [[Unit]]. Add Unit2 to the Unit1 clause, and add Unit1 to the Unit2 clause, as below: | |
| 241 | + | ||
| 242 | + | ``` pascal | |
| 243 | + | unit Unit1; | |
| 244 | + | ... | |
| 245 | + | implementation | |
| 246 | + | ||
| 247 | + | uses | |
| 248 | + | Unit2; | |
| 249 | + | ... | |
| 250 | + | ``` | |
| 251 | + | ||
| 252 | + | ``` pascal | |
| 253 | + | unit Unit2; | |
| 254 | + | ... | |
| 255 | + | implementation | |
| 256 | + | ||
| 257 | + | uses | |
| 258 | + | Unit1; | |
| 259 | + | ... | |
| 260 | + | ``` | |
| 261 | + | ||
| 262 | + | Now change the code located behind the OnClick event of the button event handler: | |
| 263 | + | ||
| 264 | + | ``` pascal | |
| 265 | + | unit Unit1; | |
| 266 | + | ... | |
| 267 | + | procedure TForm1.Button1Click(Sender: TObject); | |
| 268 | + | begin | |
| 269 | + | Form2.Show; | |
| 270 | + | end; | |
| 271 | + | ``` | |
| 272 | + | ||
| 273 | + | ``` pascal | |
| 274 | + | unit Unit2; | |
| 275 | + | ... | |
| 276 | + | procedure TForm2.Button1Click(Sender: TObject); | |
| 277 | + | begin | |
| 278 | + | Form1.Show; | |
| 279 | + | end; | |
| 280 | + | ``` | |
| 281 | + | ||
| 282 | + | ## Passing Variables to Other Forms | |
| 283 | + | ||
| 284 | + | In accordance with the above example [[Form Tutorial|The Use of a Second Form]], it is possible to declare a [[Global variables|global variable]] in the interface part of Unit2. This would allow access in both Unit1 and Unit2 to one and the same [[Variable|variable]] (This is because by putting Unit2 in the Uses clause of Unit1, all variables declared in the interface part of Unit2 are also available in Unit1). This practice should be limited to a minimum, as it quickly becomes difficult to remember which individual variables are in scope, potentially increasing errors. It is better to use [[Local variables|local variables]], define a [[Object Oriented Programming with Free Pascal and Lazarus|Property]] in a [[Class]] or, alternatively, as a variable in a class. | |
| 285 | + | ||
| 286 | + | In the next project, a second form is opened by clicking on the button. In this case, in the unit of the main form is counted how often the second shape has been shown. In this second form you can ask to see by clicking on the button, how often it has been opened: | |
| 287 | + | ||
| 288 | + | - a new project with two forms, each a button on it and their OnClick events to evaluate. | |
| 289 | + | - now, in the public part of the [[Class]] TForm2 (Unit2) a variable (in this case a [[Const|constant]], which we defined as variable abuse) of type integer with the name Count create: | |
| 290 | + | ||
| 291 | + | ``` pascal | |
| 292 | + | unit Unit2; | |
| 293 | + | ... | |
| 294 | + | TForm2 = class(TForm) | |
| 295 | + | Button1: TButton; | |
| 296 | + | procedure Button1Click(Sender: TObject); | |
| 297 | + | private | |
| 298 | + | { private declarations } | |
| 299 | + | public | |
| 300 | + | { public declarations } | |
| 301 | + | const Count: Integer = 0; //here | |
| 302 | + | end; | |
| 303 | + | ``` | |
| 304 | + | ||
| 305 | + | - now even customize the Button event handler accordingly: | |
| 306 | + | ||
| 307 | + | ``` pascal | |
| 308 | + | unit Unit1; | |
| 309 | + | ... | |
| 310 | + | procedure TForm1.Button1Click(Sender: TObject); | |
| 311 | + | begin | |
| 312 | + | inc(Form2.Count); //Increase the counter by 1 on each call to Form2 | |
| 313 | + | Form2.ShowModal; | |
| 314 | + | end; | |
| 315 | + | ``` | |
| 316 | + | ||
| 317 | + | ``` pascal | |
| 318 | + | unit Unit2; | |
| 319 | + | ... | |
| 320 | + | procedure TForm2.Button1Click(Sender: TObject); | |
| 321 | + | begin | |
| 322 | + | ShowMessage('Form2 would be displayed '+IntToStr(Count)+' times'); | |
| 323 | + | end; | |
| 324 | + | ``` | |
| 325 | + | ||
| 326 | + | In this way you can in Unit1 access all public variables/properties/functions/procedures (general methods) of Unit2. | |
| 327 | + | ||
| 328 | + | ## Other Form-Related Subjects | |
| 329 | + | ||
| 330 | + | ### Use Another Form as the Main Form | |
| 331 | + | ||
| 332 | + | If you determine after a while that you want to have displayed rather a different form or new form for the view at startup, you can under the main menu Project -\> Project Options -\> Forms: | |
| 333 | + | ||
| 334 | + | <figure> | |
| 335 | + | <img src="Projekteinstellungen_Formulare.png" title="Projekteinstellungen_Formulare.png" /> | |
| 336 | + | <figcaption>Projekteinstellungen_Formulare.png</figcaption> | |
| 337 | + | </figure> | |
| 338 | + | ||
| 339 | + | Alternatively, you can display, in Mainmenu -\> Project -\> Show .lpr file, that Project.lpr (Pascal code of the main program) and create the first form to be displayed as the first: | |
| 340 | + | ||
| 341 | + | ``` pascal | |
| 342 | + | program Project1; | |
| 343 | + | ... | |
| 344 | + | Application.CreateForm(TForm2, Form2); //Form2 is created in first and shown when the application starts | |
| 345 | + | Application.CreateForm(TForm1, Form1); | |
| 346 | + | ``` | |
| 347 | + | ||
| 348 | + | ### Save properties of the shape at end of program | |
| 349 | + | ||
| 350 | + | - [[Remember form position and size|Remember form position and size#Using_TForm.SessionProperties and TXMLPropStorage]] | |
| 351 | + | ||
| 352 | + | ## Generate the form dynamically | |
| 353 | + | ||
| 354 | + | ### Create a Lazarus designed form dynamically | |
| 355 | + | ||
| 356 | + | You do not have to create all the forms that may be called during the term of an application at startup. Some developers generally keep none of it and delete the code automatically created when you insert a new form in a project from the Projekt.lpr out immediately. If you want to write a library that contains a couple of GUIs, you can not get around the dynamic creation of forms. | |
| 357 | + | ||
| 358 | + | An example: | |
| 359 | + | ||
| 360 | + | - new application with two forms, Form1 a button (add "Unit2" in the uses clause of unit1) | |
| 361 | + | - open the Projekt.lpr (Project -\> lpr file.) | |
| 362 | + | - delete the line "Application.CreateForm(TForm2, Form2);" | |
| 363 | + | - in the OnClick event of Button1, Form1 add following code: | |
| 364 | + | ||
| 365 | + | ``` pascal | |
| 366 | + | procedure TForm1.Button1Click(Sender: TObject); | |
| 367 | + | begin | |
| 368 | + | Form2:=TForm2.Create(Nil); //Form2 is created | |
| 369 | + | Form2.ShowModal; //Form2 is displayed | |
| 370 | + | FreeAndNil(Form2); //Free Form2 | |
| 371 | + | end; | |
| 372 | + | ``` | |
| 373 | + | ||
| 374 | + | - now simply start | |
| 375 | + | ||
| 376 | + | ### Creating a new form dynamically | |
| 377 | + | ||
| 378 | + | The following example will demonstrate how new forms can be generated in code, without using the Form Designer,. | |
| 379 | + | ||
| 380 | + | In this example clicking a button should open another form that itself contains a button. Clicking this second button makes a message appear warning that the form will close; then the form is closed. | |
| 381 | + | ||
| 382 | + | - Create a new application with a form and a button | |
| 383 | + | - In the OnClick event of Button1, in Form1, add the following code: | |
| 384 | + | ||
| 385 | + | ``` pascal | |
| 386 | + | procedure TForm1.Button1Click(Sender: TObject); | |
| 387 | + | var | |
| 388 | + | MyForm: TForm; | |
| 389 | + | MyButton: TButton; | |
| 390 | + | begin | |
| 391 | + | MyForm:=TForm.Create(nil); | |
| 392 | + | MyForm.SetBounds(100, 100, 220, 150); | |
| 393 | + | MyForm.Caption:='My dynamic created form'; | |
| 394 | + | ||
| 395 | + | MyButton:=TButton.create(MyForm); | |
| 396 | + | MyButton.Caption:='Close my form'; | |
| 397 | + | MyButton.SetBounds(10, 10, 200, 30); | |
| 398 | + | MyButton.Parent:=MyForm; | |
| 399 | + | ||
| 400 | + | MyButton.OnClick:=@MyButtonClick; | |
| 401 | + | ||
| 402 | + | MyForm.ShowModal; | |
| 403 | + | ||
| 404 | + | FreeAndNil(MyForm); | |
| 405 | + | end; | |
| 406 | + | ``` | |
| 407 | + | ||
| 408 | + | > **Note:** If a component has been created with an owner (TButton.Create(Owner: TComponent)), it belongs to the owner, who is then responsible to free the component. Thus MyButton is freed automatically by freeing MyForm. | |
| 409 | + | ||
| 410 | + | - now the event handler for MyButton.OnClick must be created. To this end, write in the private section of class TForm1 the following procedure declaration: | |
| 411 | + | ||
| 412 | + | ``` pascal | |
| 413 | + | TForm1 = class(TForm) | |
| 414 | + | ... | |
| 415 | + | private | |
| 416 | + | { private declarations } | |
| 417 | + | procedure MyButtonClick(Sender: TObject); | |
| 418 | + | ``` | |
| 419 | + | ||
| 420 | + | - press <span class="kbd">Ctrl\]</span>+<span class="kbd">Shift</span>+<span class="kbd">C</span> (code completion) and insert the following code as the handler implementation: | |
| 421 | + | ||
| 422 | + | ``` pascal | |
| 423 | + | procedure TForm1.MyButtonClick(Sender: TObject); | |
| 424 | + | begin | |
| 425 | + | Showmessage('Attention, closing my dynamically created form!'); | |
| 426 | + | if Sender is TButton then | |
| 427 | + | TForm(TButton(Sender).Parent).Close; | |
| 428 | + | end; | |
| 429 | + | ``` | |
| 430 | + | ||
| 431 | + | - now the project can be compiled and executed | |
| 432 | + | ||
| 433 | + | ## See also | |
| 434 | + | ||
| 435 | + | - [[LCL Tips|Tips for manual generation of controls]] | |
| 436 | + | - [[LCL Tips|Example to create a complete GUI application by code]] | |
| 437 | + | - [[Testing, if form exists]] | |
| 438 | + | - [[Canvas draw vertical line on form/de]] | |
| 439 | + | - [[Drawing with canvas]] on form | |
| 440 | + | - [[user should not be able to close form]] | |
| 441 | + | - [[LCL Tips|Creating a non-rectangular window or control]] | |
| 442 | + | - [[Remember form position and size]] | |
| 443 | + | ||
| 444 | + | ## 贡献者和更改 | |
| 445 | + | ||
| 446 | + | - 简体中文版本由 robsean 于 2020-01-20 创建。 | |
| 447 | + | ||
| 448 | + | --- | |
| 449 | + | *From the Free Pascal wiki, page "Form Tutorial/zh CN", as it stood on 2020-02-15 after a change by Trev, out of the wiki's dump of 2024-05-26. Copyright stays with the author who wrote it, according to the old wiki's [[Licensing]] page. If you have concerns about this material, [message the admin](/wiki-contact).* | |
| 450 | + | Category: Code | |
| 451 | + | Category: Forms | |
| 452 | + | Category: LCL | |
| 453 | + | Category: Tutorials |