

FPSpreadsheet tutorial: Writing a mini spreadsheet application
Introduction
FPSpreadsheet is a powerful package for reading and writing spreadsheet files. The main intention is to provide a platform which is capable of native export/import of an application's data to/from the most important spreadsheet file formats without having these spreadsheet applications installed.
Soon, however, the wish arises to use this package also for editing of file content or formatting. For this purpose, the library contains a dedicated grid control, the FPSpreadsheetGrid, which closely resembles the features of a worksheet of a spreadsheet application. The demo "spready" which comes along with FPSpreadsheet demonstrates usage of this grid. Along with a bunch of formatting options, this demo still comes up to more than 1400 lines of code in the main form unit. Therefore, a set of visual controls was developed which greatly simplify creation of spreadsheet applications.
It is the intention of this tutorial to write a simple spreadsheet program on the basis of these controls.
Although most of the internal structure of the FPSpreadsheet library is covered by the visual controls it is recommended that you have some knowledge of FPSpreadsheet. Of course, you should not have a basic understanding of Lazarus and FPC, and you must know how to work with the object inspector of Lazarus.
Visual FPSpreadsheet Controls
FPSpreadsheet exposes non-visual classes, such as TsWorkbook, TsWorksheet etc. This keeps the library general enough for all kind of Pascal programs. For GUI programs, on the other hand, some infrastructure is needed which relates the spreadsheets to forms, grids, and other controls.
TsWorkbookSource
 The heart of the visual FPSpreadsheet controls is the TsWorkbookSource class. This provides a link between the non-visual spreadsheet data and the visual controls on the form. Its purpose is similar to that of a TDataSource component in database applications which links database tables or queries to dedicated "data-aware" controls.
All visual FPSpreadsheet controls have a property WorkbookSource which links them into the information chain provided by the TsWorkbookSource. The WorkbookSource keeps a list of all controls attached. Internally, these controls are called "listeners" because they listen to information distributed by the WorkbookSource.
The workbook and worksheets use events to notify the WorkbookSource of all relevant changes: changes in cell content or formatting, selecting other cells, adding or deleting worksheet etc. Information on these changes is passed on to the listening controls, and they react in their own specialized way on these changes. If, for example, a new worksheet is added to a workbook the visual TsWorkbookTabControl creates a new tab for the new worksheet, and the TsWorksheetGrid loads the new worksheet into the grid.
TsWorkbookTabControl
 This is a tabcontrol which provides a tab for each worksheet of the current workbook. The tab names are identical with the names of the worksheets. Selecting another tab is communicated to the other visual spreadsheet controls via the WorkbookSource.
TsWorksheetGrid
 This is a customized DrawGrid descendant of the LCL and displays cells of the currently selected worksheet. The texts are not stored in the grid (like a StringGrid would do), but are taken from the TsWorksheet data structure. Similarly, the worksheet provides the information of how each cell is formatted. Like any LCL grid it has a bunch of properties and can be tuned for many applications by adapting its
Options. The most important one will be described below.
Note: The
TsWorksheetGridcan also be operated without aTsWorkbookSource. For this purpose it provides its own set of methods for reading and writing files.
TsCellEdit
 The typical spreadsheet applications provide a line for editing formulas or cell content. This is the purpose of the TsCellEdit. It displays the content of the active cell of the worksheet which is the same as the active cell of the WorksheetGrid. If editing is finished (by pressing
ENTER, or by selecting another cell in the WorksheetGrid) the new cell value is transferred to the worksheet. Internally, the TsCellEdit is a memo control, i.e. it is able to process multi-line text correctly. Use Ctrl+ENTER to insert a forced line-break.
TsCellIndicator
 This is a TEdit control which displays the address of the currently selected cell in Excel notation, e.g. 'A1' if the active cell is in the first row and first column (row = 0, column = 0). Conversely, if a valid cell address is entered into this control the corresponding cell becomes active.
TsCellCombobox
 This combobox can be used to modify various cell properties by selecting values from the dropdown list. The property affected is determined by the
CellFormatItem of the combobox:
cfiFontName: the list contains he names of all fonts available on the current system. If an item is selected the corresponding font is used to format the cell of the currently selected cells.cfiFontSize: the list contains the most typical font sizes used in spreadsheets. Selecting an item sets the font size of the currently selected cells accordingly.cfiFontColor: the list contains all colors of the workbook's palette. The selected color is assigned to the font of the selected cells.cfiBackgroundColor: likecfiFontColor- the selected color is used as background fill color of the selected cells.
TsSpreadsheetInspector
 Inherits from TValueListEditor and displays name-value pairs for properties of the workbook, the selected worksheet, and the content and formatting of the active cell. It's main purpose is to help with debugging.
Writing a spreadsheet application
Enough of theory, let's get started. Let's write a small spreadsheet application. Sure - it cannot compete with the spreadsheets of the main Office applications like Excel or Open/LibreOffice, but it has all the main ingredients due to FPSpreadsheet. And using the FPSpreadsheet controls allows to achieve this with minimum lines of code.
Preparations
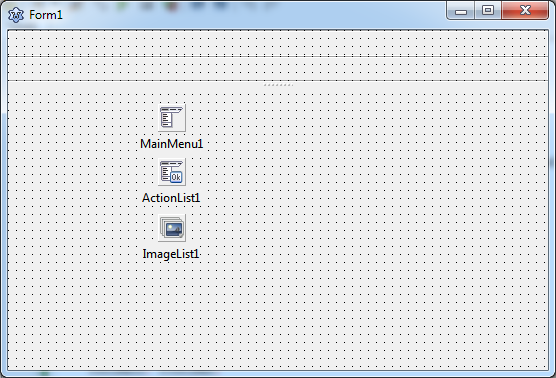 Create a new project and store it in a folder of your liking.
Since Office applications have a menu and a toolbar add a TMainMenu and a TToolbar component to the form. (You could even mimic the ribbon user interface of the new Microsoft applications by adding a TSpkToolbar from Lazarus Code and Components Repository, but be aware that this component does not yet provide all the features of a standard toolbar).
In fact, we will be needing another toolbar for the formula edit line. As you will see later, it will be resizable; as size control add a TSplitter to the form and top-align it such that it is positioned underneath the two toolbars. In order to keep a minimum size of the toolbar you should establish constraints: Look at the current height of the toolbar and enter this number into the MinHeight field of the Constraints property of the toolbar. To separate the formula toolbar from the rest of the main form, activate the option ebBottom of the EdgeBorders property of the second toolbar.
Since menu and toolbars will have to handle same user actions it is advantageous to provide a TActionList to store all possible actions. If assigned to the menu items and toolbuttons both will react on user interaction in the same way without any additional coding. And: The FPSpreadsheet visual controls package contains a bunch of spreadsheet-related standard actions ready to use.
The toolbar of the completed application will contain a lot of of icons. Therefore, we need a TImageList component which has to be linked to the Images property of the TMainMenu, the TToolbars, and the TActionList. Where to get icons? You can have a look in the folder images of your Lazarus installation where you'll find standard icons for loading and saving etc. This is a subset of the famfamfam SILK icon library. Another huge icon set is the Fugue icon collection. Both collections are licensed as "Creative commons" and are free even for commercial use, provided that appropriate reference is given in the created programs. When selecting icons prefer the png image format, and make sure to use always the same size, usually 16x16 pixels.
Setting up the visual workbook
TsWorkbookSource
As described in the introductory section the TsWorkbookSource component is the interface between workbook and controls on the user interface. Add this component to the form and give it a decent name (we'll keep the default name sWorkbookSource1 here, though). As you will see shortly, this component will have to be assigned to the property WorkbookSource of all controls of the FPSpreadsheet_visual package.
The WorkbookSource is responsible for loading and writing data from/to file and for communicating with the workbook. Therefore, it owns a set of options that are passed to the workbook and control these processes: 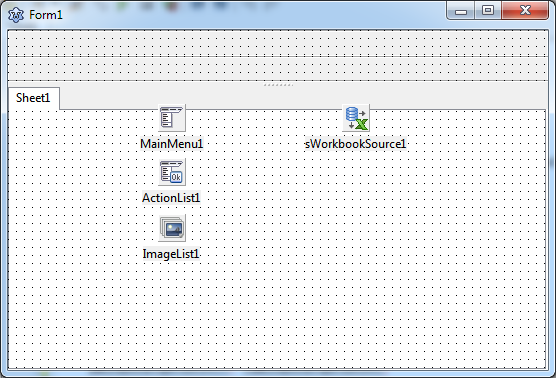
type
  TsWorkbookOption = (boVirtualMode, boBufStream, boAutoCalc, boCalcBeforeSaving, boReadFormulas);
  TsWorkbookOptions = set of TsWorkbookOption;
The most important ones are
boAutoCalc: activates automatic calculation of formulas whenever cell content changes.boCalcBeforeSaving: calculated formulas before a workbook is written to fileboReadFormulas: if set full formulas are read from the file, otherwise only formula results.boBufStreamandboVirtualMode: In non-visual programs, these options can help if running out of memory in case of large workbooks.boVirtualMode, in particular, is not usable for visual applications, though, because it avoids keeping data in the worksheet cells. See also FPSpreadsheet#Virtual_mode.
In this tutorial, it is assumed that the options boAutoCalc and boReadFormulas are activated.
TsWorkbookTabControl
The first visual control used in the form is a TsWorkbookTabControl - click it onto the form (into the space not occupied by the toolbar). Client-align it within the form, this shows the TabControl as a bright rectangle only. Now link its WorkbookSource property to the TsWorkbookSource component that we have added just before. Now the TabControl shows a tab labelled "Sheet1". This is because the TsWorkbookSource has created a dummy workkbook containing a single worksheet "Sheet1". The WorkbookSource synchronizes this internal workbook with the TabControl (and the other visual controls to come) such that it displays this worksheet as a tab.
In Excel the worksheet tabs are at the bottom of the form - to achieve this effect you can set the property TabPosition of the TabControl to tpBottom; there are some painting issues of the LCL with this TabPosition, though, therefore, I prefer the default setting, tpTop.
The screenshot shows how far we've got.\
TsWorksheetGrid
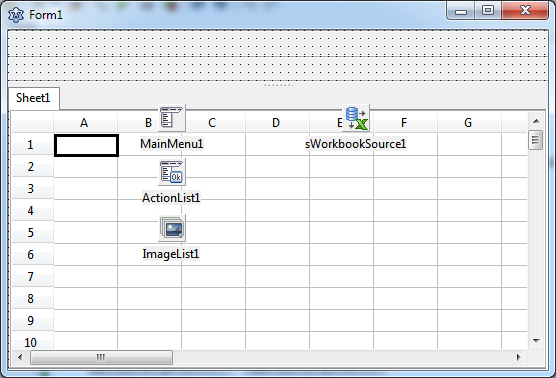 Now we add a TsWorksheetGrid control. Click it somewhere into the space occupied by the TabControl such that it becomes a child a of the TabControl. You see a standard stringgrid-like component. Link its
WorkbookSource property to the source added at the beginning, and the grid looks more like a spreadsheet: there are the column headers labelled by letters "A", "B", etc, and the row headers labelled by numbers "1", "2", etc; the active cell, A1, is marked by a thick border.
You may want to switch the grid's TitleStyle to tsNative in order to achieve themed painting of the row and column headers. And here is a good place to adapt the grid's Options in order to activate many features well-known to spreadsheets:
goEditingmust be active, otherwise the grid contents cannot be modified.goAlwaysShowEditorshould be off because it interferes with the editing convention of spreadsheet applications.goColSizingenables changing of the column width by dragging the dividing line between adjacent column headers. Dragging occurs with the left mouse button pressed.goRowSizingdoes the same with the row heights.goDblClickAutoResizeactivates the feature that optimum column width can be set by double-clicking in the header on its dividing line to the next column. The "optimum" column width is such that no cell content is truncated and no extra space is shown in the column.goHeaderHotTrackgives visual feedback if the mouse is above a header cell.goRangeSelect(which is on by default) enables selection of a rectangular range of cells by dragging the mouse between cells at opposite corners of the rectangle. You can even select multiple rectangles by holding the CTRL key down before the next rectangle is dragged (in older Lazarus releases - before 1.4 - only a single range could be selected).goThumbTrackingactivates immediate scrolling of the worksheet if one of the scrollbars is dragged with the mouse. The Office applications usually scroll by lines; you can achieve this by turning offgoSmoothScroll.
In addition to these Options inherited from TCustomGrid there are some more properties specialized for spreadsheet operation:
ShowGridLines, iffalse, hides the row and column grid lines.ShowHeaderscan be set tofalseif the the column and row headers are to be hidden. (The same can be achieved also by the deprecated propertyDisplayFixedColRow).- The LCL grids normally truncate text at the cell border if it is longer than the cell width. If
TextOverflowis set totruethen text can overflow into adjacent empty cells.
The properties AutoCalc and ReadFormulas are meant for stand-alone usage of the WorksheetGrid (i.e. without a TsWorkbookSource). Please use the corresponding options of the WorkbookSource instead. (AutoCalc enables automatic calculation of formulas whenever cell content changes. ReadFormulas activates reading of formulas from files, otherwise the grid would display only the formula results).
Adding the reader/writer units
Unlike in earlier versions of the fpspreadsheet library the reader/writer units for the various spreadsheet file format are no longer automatically included in the "uses" clause. Therefore, the programmer must decide which file formats will be processed. Here is a list of the available reader/writer units:
- xlsbiff2, xlsbiff5 and xlsbiff8 -- the binary xls file formats for ancient Excel 2, Excel 95 and Excel 97
- xlsOOXML -- xlsx file format of Excel 2007 and later,
- xlsXML -- xml format of Excel XP and 2003 (NOTE: only for reading)
- fpsopendocument - file format of OpenOffice/LibreOffice's Calc.
- fpsCSV --- text files with comma-separated values (csv),
- fpsHTML --- HTML files,
- wikitables -- tables in wiki Markup (only partly supported).
For simplicity, or if you require several units, you can also simply add the unit fpsallformats to get read/write support for all file formats supported.
Add the required reader/writer unit(s) to the uses clause of the mainform of your application. Otherwises the program will crash with a message that the reader/writer is not found for the specific file format.
Editing of values and formulas, Navigating
When you compile and run the program you'll already be able to enter data into the grid. Just select the cell that you want to edit by clicking or using the arrow keys - the active cell is highlighted by a thick border. Then begin typing. If the grid property EditorLineMode has been switched to elmMultiLine then manual line breaks can be entered by the key combination Ctrl+ENTER. When finished select another cell or press the ENTER key. Using ENTER automatically selects the next cell in the grid. The grid's property AutoAdvance defines what is understood as being the "next cell": by default, ENTER moves the active cell down (aaDown), but you can also move it to the right (aaRight), or turn this feature off (aaNone) - see the type TAutoAdvance defined in the unit grids.pas for even more options.
If - as assumed above - the WorkbookSource option boAutoCalc is enabled the worksheet automatically supports calculation of formulas. As an example, go to cell A1, and enter the number 10. Then, go to cell A2 and enter the formula =A1+10. The formula is automatically evaluated, and its result, 20, is displayed in cell A2.
When you navigate in the grid you may notice that cell A2 only displays the formula result, it seems that there is no way to modify the formula once it has been entered. No need to worry - press the key F2 or click into the cell a second time to enter enhanced edit mode in which formulas are visible in the cell.
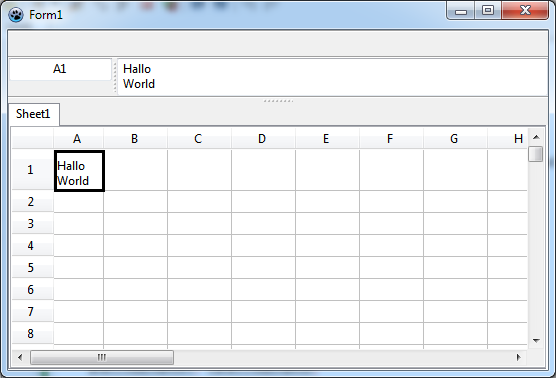 In order to edit formulas the Office applications offer a dedicated formula editor bar. Of course, fpspreadsheet has this feature, too. It is built into the TsCellEdit component which is set up such as to always show the full content of a cell. You remember the second toolbar from the "Preparations" section? This will house the TsCellEdit. But wait a minute - there's more to consider: Since formulas occasionally may get rather long the control should be capable of managing serval lines. The same with multi-lined text. TsCellEdit can do this since it is inherited from TCustomMemo which is a multi-line control. You also remember that we added a splitter to the form of the second toolbar? This is for height adjustment for the case that we want to use the multi-line feature of the TsCellEdit: just drag the splitter down to show more lines, or drag it upwards to stop at the height of a single line due to the MinHeight constraints that we had assigned to the toolbar.
The TsCellEdit will cover all available space in the second toolbar. Before we add the TsCellEdit we can make life easier if we think about what else will be in the second toolbar. In Excel, there is an indicator which displays the address of the currently active cell. This is the purpose of the TsCellIndicator. Since its height should not change when the toolbar is dragged down we first add a TPanel to the second toolbar; reduce its Width to about 100 pixels, remove its Caption and set its BevelOuter to bvNone.
Add the TsCellIndicator to this panel and align it to the top of the panel. Connect its WorkbookSource to the TsWorkbookSource control on the form, and immediately you'll see the text "A1", the address of the currenly selected cell.
Sometimes it is desirable to change the width of this box at runtime. So, why not add a splitter to the second toolbar? Set its Align property to alLeft. The result is a bit strange: the splitter is at the very left edge of the toolbar, but you'd expect to see it at the right of the panel. This is because the panel is not aligned by default. Set the Align property of the panel to alLeft as well, and drag the splitter to the right of the panel. Now the splitter is at the correct position.
Almost done now... We finally add a TsCellEdit component to the empty space of the toolbar. Client-align it so that it fills the entire rest of the toolbar. As usual, set its WorkbookSource property to the instance of the TsWorkbookSource on the the form.
Compile and run. Play with the program:
- Enter some dummy data. Navigate in the worksheet. You'll see that the CellIndicator always shows the address of the active cell. The contents of the active cell is displayed in the CellEdit box. The CellIndicator is not just a passive display of the current cell, it can also be edited. Type in the address of a cell which you want to become active, press
ENTER, and see what happens... - Enter a formula. Navigate back into the formula cell - the formula is displayed in the CellEdit and can be changed there readily.
- Enter multi-lined text - you can enforce a lineending in the CellEdit by holding the
Ctrlkey down when you pressENTER. The cell displays only one line of the text. Drag the horizontal splitter underneath the second toolbar down - the CellEdit shows all lines. Another way to see all lines of the text, is to adjust the cell height. You must have activated the gridOptiongoRowSizing. Then you can drag the lower dividing line of the row with the multi-line cell down to increase the row height - the missing lines now appear in the cell!
Formatting of cells
In addition to entering data the user usually wants to apply some formatting to the cells in order to enhance or group them. The worksheet grid is set up in such a way that its cells display the formats taken from the workbook. In addition, the visual FPSpreadsheet controls are able to store formatting attributes into the cell. Because of the notification mechanism via the WorkbookSource these formats are returned to the WorksheetGrid for display.
Adding comboboxes for font name, font size, and font color
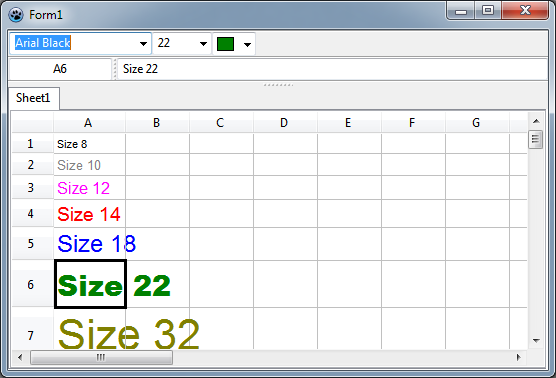 In this section, we want to provide the possibility to modify the font of the cell texts by selecting its name, size and/or color. The visual FPSpreadsheet provide the flexible TsCellCombobox for this purpose. It has the property
CellFormatItem which defines which attribute it controls:
cfiFontName: This option populates the combobox with all fonts found in the current system. The selected item is used for the type face in the selected cells.cfiFontSizefills the combobox with the mostly used font sizes (in points). Again, the selected item defines the font size of the selected cells.cfiFontColoradds all pre-defined colors ("palette") of the workbook to the combobox to set the text color of the selected cells. The combobox items consist of a little color box along with the color name. If theColorRectWidthis set to-1the color name is dropped.cfiBackgroundColor, the same with the background color of the selected cells.cfiCellBorderColor, the same with the border color of the selected cells - this feature is currently not yet supported.
Add three TsCellComboboxes to the first toolbar and set their CellFormatItem to cfiFontname, cfiFontSize, and cfiFontColor, respectively. Link their WorkbookSource property to the TsWorkbookSource on the form. You may want to increase the width of the font name combobox such that the longest font names are not cut off; the other comboboxes may become narrower. You may also want to turn off the color names of the third combobox by setting its ColorRectWidth to -1.
That's all to modify fonts. Compile and run. Enter some text and play with these new features of the program.
Using standard actions
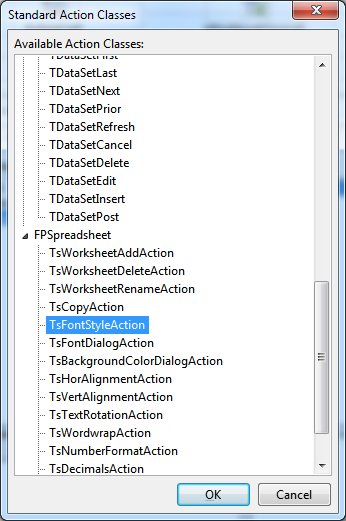 FPSpreadsheet supports a lot of formats that can be applied to cells, such as text alignment, text rotation, text font, or cell borders or background colors. Typical gui applications contain menu commands and/or toolbar buttons which are assigned to each of these properties and allow to set them by a simple mouse click. In addition, the state of these controls often reflects the properties of the active cell. For example, if there is a button for using a bold type-face this button should be drawn as being pressed if the active cell is bold, but as released if it is not. To simplify the coding of these tasks a large number of standard actions has been added to the library.
- TsWorksheetAddAction: adds an empty worksheet to the workbook. Specify its name in the
NameMaskproperty. TheNameMaskmust contain the format specifier%dwhich is replaced at runtime by a number such that the worksheet name is unique. - TsWorksheetDeleteAction: deletes the active worksheet from the workbook after a confirmation dialog. The last worksheet cannot be deleted.
- TsWorksheetRenameAction: renames the active worksheet.
- TsCopyAction: Copies the currently selected cells to an internal list ("CellClipboard") from where they can be pasted back into the spreadsheet to another location. The process can occur in a clipboard-manner ("copy"/"cut", then "paste") or in the way of the "copy brush" of the Office applications. The property
CopyItemdetermines whether the entire cell, or only cell values, cell formulas, or cell formats are transferred. - TsFontStyleAction: Modifies the font style of the selected cells. The property
FontStyledefines whether the action makes the font bold, italic, underlined or striked-out. Normally each font style is handles by its own action. See the example below. - TsHorAlignmentAction: Can be used to modify the horizontal alignment of text in the selected cells. Select
HorAlignmentto define which kind of alignment (left, center, right) is covered by the action. Like with the TsFontStyleAction, several actions should be provided to offer all available alignments. They are grouped in a mutually exclusive way like radiobuttons. - TsVertAlignmentAction: Changes the vertical alignment of text in the selected cells: the kind of alignment is defined by the
VertAlignmentproperty. Again, these actions work like radiobuttons. - TsTextRotationAction: Allows to specify the text orientation in the selected cells as defined by the property
TextRotationin a mutially exclusive way. - TsWordWrapAction: Activates the word-wrapping feature for the selected cells: if text is longer than the width of the cell (or height, if the text is rotated) then it is wrapped into multiple lines.
- TsNumberFormatAction: Defines the number format to be used for the selected cells. The format to be used is defined by the properties
NumberFormat(such asnfFixed) for built-in formats, andNumberFormatStrfor specialized formatting. - TsDecimalsAction: Allows to increase or decrease the number of decimal places shown in the selected cells. The property
Deltacontrols whether an increase (+1) or decrease (-1) is wanted. - TsCellBorderAction: Allows to specify if a border will be drawn around the selected cells. The subproperties
East,West,North,South,InnerHor,InnerVertofBordersdefine what the border will look like at each side of the cell range. Note that each rectangular range of cells is considere as a single block; the propertiesEast,West,NorthandSouthare responsible for the outer borders of the entire block, inner borders are defined byInnerHorandInnerVert. Using these properties, borders can be switched on and off (Visible), and in addition, the line style and line color can be changed. - TsMergeAction: If checked, the cells of each selected rectangular range are merged to a single block. Unchecking the action separates the block to individual cells. Note that the block's content and formatting is defined by the top-left cell of each block; content and formats of other cells will be lost.
- TsCellProtectionAction: comes in two flavors, one for protecting cells from modifications, and one for hiding formulas, depending on the value of the property
Protection. Note that this action is effective only if worksheet protection has been enabled by callingWorkbooksource.Worksheet.Protect(true).
Adding buttons for "Bold", "Italic", and "Underline"
 If you have never worked with standard actions before here are some detailed step-by-step instructions. Let us stick to above example and provide the possibility to switch the font style of the selected cells to bold. The standard action which is responsible for this feature is the
TsFontStyleAction.
- At first, we add this action to the form: Double-click on the TActionList to open the "ActionList Editor".
- Click on the down-arrow next to the "+" button, and select the item "New standard action" from the drop-down menu.
- This opens a dialog with the list of registered "Standard Action Classes".
- Scroll down until you find a group named "FPSpreadsheet".
- In this group, select the item "TsFontStyleAction" by double-clicking.
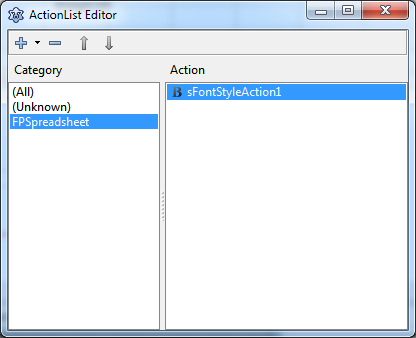
- Now an item
sFontStyleAction1appears in the ActionList Editor. - It should already be selected like in the screenshot at the right. If not, select
sFontStyleAction1in the ActionList Editor to bring it up in the Object Inspector and to set up its properties:- Use the text "Bold" for the
Caption- this is the text that will be assigned to the corresponding menu item. - Similarly, assign "Bold font" to the
Hintproperty. - Set the
ImageIndexto the index of the icon in the form's ImageList that you want to see in the toolbar. - Make sure that the item
fssBoldis highlighted in the dropdown list of the propertyFontStyle. If not, select it. SinceTsFontStyleActioncan handle several font styles (bold, italic, underline, strikeout) we have to tell the action which font style it should be responsible of. - Like with the visual controls, don't forget to assign the TsWorkbookSource to the corresponding property
WorkbookSourceof the action. This activates the communication between the worksheet/workbook on the one hand, and the action and the related controls on the other hand.
- Use the text "Bold" for the
Having set up the standard action we add a menu item to the form's MainMenu. Double-click on the TMainMenu of the form to bring up the "Menu Editor". Since the menu is empty so far there is only a dummy item, "New item1". This will become our "Format" menu. Select the item, and type "Format" into the Caption property field. Now the dummy item is re-labelled as "Format". Right-click on this "Format" item, and select "Create submenu" from the popup menu which brings up another new menu item, "New item2". Select it. In the dropdown list of the property Action of the object inspector, pick the sFontStyle1 action - this is the action that we have just set up - and the menu item automatically shows the caption provided by the action component, "Bold".
Finally we add a toolbar button for the "bold" action. Right-click onto the TToolbar, and add a new toolbutton by selecting item "New button" from the popup menu. Go to the property Action in the object inspector again, pick the sFontStyle1 item, and this is enough to give the tool button the ability to set a cell font to bold!
Repeat this procedure with two other buttons. Design them to set the font style to italic and underlined.
Test the program by compiling. Type some text into cells. Select one of them and click the "Bold" toolbutton - voila, the cell is in bold font. Select another cell. Note that the toolbutton is automatically drawn in the down state if the cell has bold font. Repeat with the other buttons.
Saving to file
After having entered data into the grid you will certainly want to save the grid to a spreadsheet file. Lazarus provides all the necessary infrastructure for saving available in the standard action TFileSaveAs. This action automatically opens a FileDialog for entering the file name.
Select the TFileSaveAs standard action from the list of standard action classes. Note that it cannot be found in the "FPSpreadsheet" category, but in the "File" group since it is a standard action of the LCL.
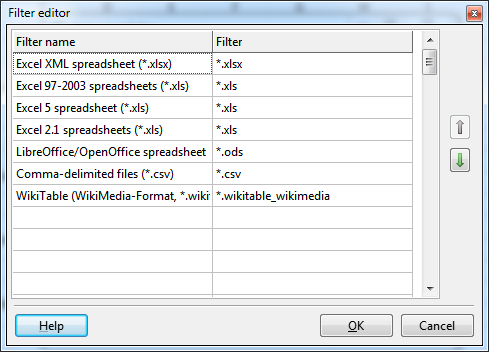
At first, let us specify the properties of the FileDialog. Select the property Dialog of the TFileSaveAs action in the object inspector. It is convenient to be able to store the workbook in various file formats; this can be prepared by providing a file format list in the Filter property of the dialog. Paste the following text into this property:
Excel XML spreadsheet (*.xlsx)|*.xlsx|Excel 97-2003 spreadsheets (*.xls)|*.xls|Excel 5 spreadsheet (*.xls)|*.xls|Excel 2.1 spreadsheets (*.xls)|*.xls|LibreOffice/OpenOffice spreadsheet (*.ods)|*.ods|Comma-delimited files (*.csv)|*.csv|WikiTable (WikiMedia-Format, *.wikitable_wikimedia)|*.wikitable_wikimedia
When you click on the ellipsis button next to Filter the file list appears in a more clearly arranged dialog shown at the right.
Make one of these file extensions, e.g. xlsx, the default of the file dialog by assigning its list index to the FilterIndex property. The xlsx file is the first format in the filter list. FilterIndex, therefore, must be set to 1.
Note: The indexes in the filter list are 1-based, in contrast to the convention of Lazarus and FPC using 0-based indexes.
Next, we define what happens after a file name has been selected in the file dialog. For this purpose, the TFileSaveAs action provides the event OnAccept. This is one of the few places where we have to write code in this project... But it is short: We check which file format has been selected in the format list and write the corresponding spreadsheet file by calling the method SaveToSpreadsheetFile of the TWorkbookSource:
uses
  ..., fpstypes, ...;   // for TsSpreadsheetFormat

procedure TForm1.FileSaveAs1Accept(Sender: TObject);
var
  fmt: TsSpreadsheetFormat;
begin
  Screen.Cursor := crHourglass;
  try
    case FileSaveAs1.Dialog.FilterIndex of
      1: fmt := sfOOXML;                // Note: Indexes are 1-based here!
      2: fmt := sfExcel8;
      3: fmt := sfExcel5;
      4: fmt := sfExcel2;
      5: fmt := sfOpenDocument;
      6: fmt := sfCSV;
      7: fmt := sfWikiTable_WikiMedia;
    end;
    sWorkbookSource1.SaveToSpreadsheetFile(FileSaveAs1.Dialog.FileName, fmt);
  finally
    Screen.Cursor := crDefault;
  end;
end;
We will make the FileSaveAs action available in the toolbar and in the menu:
- Toolbar: Add a TToolButton to the first toolbar and drag it to its left edge. Assign the FileSaveAs action to its
Actionproperty. - Menu: The "Save" command is usually in a submenu called "File". Therefore, double click on the TMainMenu, right-click on the "Format" item and insert a new item "before" the current one. Name it "File". Add a submenu to it. Click at the default menu item and assign the FileSaveAs action to its
Actionproperty.
Reading from file
What is left is reading of a spreadsheet file into our application. Of course, FPSpreadsheet is well-prepared for this task. The operations are very similar to saving. But instead of using a TFileSaveAs standard action, we use a TFileOpen standard action. Again, this standard action has a built-in file dialog where we have to set the DefaultExtension (".xls" or ".xlsx", most probably) and the format Filter:
All spreadsheet files|*.xls;*.xlsx;*.ods;*.csv|All Excel files (*.xls, *.xlsx)|*.xls;*.xlsx|Excel XML spreadsheet (*.xlsx)|*.xlsx|Excel 97-2003 spreadsheets (*.xls)|*.xls|Excel 5 spreadsheet (*.xls)|*.xls|Excel 2.1 spreadsheets (*.xls)|*.xls|LibreOffice/OpenOffice spreadsheet (*.ods)|*.ods|Comma-delimited files (*.csv)|*.csv
(Copy this string into the field Filter of the action's Dialog). As you may notice the Filter contains selections which cover various file formats, such as "All spreadsheet files", or "All Excel files". This is possible because the TsWorkbookSource has a property AutoDetectFormat for automatic detection of the spreadsheet file format. In the other cases, like "Libre/OpenOffice", we can specify the format, sfOpenDocument, explicitly. Evaluation of the correct file format and reading of the file is done in the OnAccept event handler of the action:
{ Loads the spreadsheet file selected by the FileOpen standard action }
procedure TForm1.FileOpen1Accept(Sender: TObject);
begin
  sWorkbookSource1.AutodetectFormat := false;
  case FileOpen1.Dialog.FilterIndex of
    1: sWorkbookSource1.AutoDetectFormat := true;         // All spreadsheet files
    2: sWorkbookSource1.AutoDetectFormat := true;         // All Excel files
    3: sWorkbookSource1.FileFormat := sfOOXML;            // Excel 2007+
    4: sWorkbookSource1.FileFormat := sfExcel8;           // Excel 97-2003
    5: sWorkbookSource1.FileFormat := sfExcel5;           // Excel 5.0
    6: sWorkbookSource1.FileFormat := sfExcel2;           // Excel 2.1
    7: sWorkbookSource1.FileFormat := sfOpenDocument;     // Open/LibreOffice
    8: sWorkbookSource1.FileFormat := sfCSV;              // Text files
  end;
  sWorkbookSource1.FileName :=FileOpen1.Dialog.FileName;  // This loads the file
end;
In order to see this action in the toolbar and menu, add a TToolButton to the toolbar and assign the TFileOpenAction to its Action property. In the menu, add a new item before the "Save as" item, and assign its Action accordingly.
Note: You can see a spreadsheet file even at designtime if you assign its name to the
Filenameproperty of the TsWorkbookSource. But be aware that the file probably cannot be found at runtime if it is specified by a relative path and if the application is to run on another computer with a different directory structure!
Summary
If you followed us through the steps of this tutorial you have programmed a complex spreadsheet gui application almost without having written any line of code (with the exception of the loading and saving routines). If you did not, have a look at the demo "fps_ctrls" in the examples folder of the FPSpreadsheet installation; it shows the result of this tutorial with some add-ons.
From the Free Pascal wiki, page "FPSpreadsheet tutorial: Writing a mini spreadsheet application", as it stood on 2020-02-16 after a change by Trev, out of the wiki's dump of 2024-05-26. Copyright stays with the author who wrote it, according to the old wiki's Licensing page. If you have concerns about this material, message the admin.
Talk about this page
Nobody has opened a bench for this page yet. Sign in to open one.