

CudaText plugins: what changed
Revision 2 to 3. Removed lines have a minus sign; added lines have a plus sign.
| Old | New | Line | |
|---|---|---|---|
| 1 | 1 | ## Comments | |
| 2 | 2 | ||
| 3 | 3 | You can add/remove code comments, via "Comments" plugin. Plugin is preinstalled in CudaText. It gives about 6 commands in menu "Plugins / Comments". Plugin supports only adding/removing of comments, not syntax highlighting for them (highlighting is lexer's work). | |
| 4 | 4 | ||
| 5 | 5 | - **Line comments**: from some position to the nearest end-of-line. E.g. in C lexer: "//text here", in Python lexer: "# text here". | |
| 6 | 6 | - **Comments for range** (**Stream comments**): from some text position to some bigger text position, often in the different line. E.g. in C lexer: "/* text here */". | |
| 7 | 7 | - **Comments for full lines**: from newline to another newline, ie comment for several whole lines. Rarely used, e.g. used in PowerShell. | |
| 8 | 8 | ||
| 9 | 9 | For example, Python lexer supports only line comment, and don't support stream comments. PowerShell lexer supports comments for full lines, while don't support comments for any range. | |
| 10 | 10 | ||
| 11 | 11 | Comment chars are editable in SynWrite editor, in dialog "Lexer properties" (after you install the same lexer to SynWrite). In dialog tab "Commenting" you'll see input fields. | |
| 12 | 12 | ||
| 13 | 13 | Command "Toggle stream comment" in plugin adds/removes comments of last 2 types: for range, for full lines (plugin chooses needed kind). | |
| 14 | 14 | ||
| 15 | 15 | Where comment chars are stored: | |
| 16 | 16 | ||
| 17 | 17 | - Line comments: in lexer file data/lexlib/*.lcf. | |
| 18 | 18 | - Range comments: in additional file data/lexlib/*.cuda-lexmap. | |
| 19 | 19 | ||
| 20 | 20 | ### Commenting options | |
| 21 | 21 | ||
| 22 | 22 | Plugin "Comments" has several options, and it gives the dialog to change them: menu item "Options / Settings-plugins / Comments / Config". | |
| 23 | 23 | ||
| 24 | 24 | **(Line commands) Try to keep text position after (un)commenting** | |
| 25 | 25 | ||
| 26 | 26 | Affects all commands for line-comments. | |
| 27 | 27 | ||
| 28 | 28 | With option on, plugin tries to insert comment chars into leading space-area of the line. For example, with C++ (line comment chars "//"), line with 4 leading spaces: | |
| 29 | 29 | ||
| 30 | - | ||
| 31 | - | ||
| 32 | - | ||
| 33 | - | ||
| 34 | - | ||
| 35 | - | ||
| 36 | - | ||
| 37 | - | ||
| 38 | - | ||
| 39 | - | ||
| 40 | - | ||
| 41 | - | ||
| 42 | - | ||
| 43 | - | ||
| 44 | - | ||
| 45 | - | ||
| 46 | - | ||
| 47 | - | ||
| 48 | - | ||
| 49 | - | ||
| 50 | - | ||
| 51 | - | ||
| 52 | - | ||
| 53 | - | ||
| 54 | - | ||
| 55 | - | ||
| 56 | - | ||
| 57 | - | ||
| 58 | - | ||
| 59 | - | ||
| 60 | - | ||
| 61 | - | ||
| 62 | - | ||
| 63 | - | ||
| 64 | - | ||
| 65 | - | ||
| 66 | - | ||
| 67 | - | ||
| 68 | - | ||
| 69 | - | ||
| 70 | - | ||
| 71 | - | ||
| 72 | - | ||
| 73 | - | ||
| 74 | - | ||
| 75 | - | ||
| 76 | - | ||
| 77 | - | ||
| 78 | - | ||
| 79 | - | ||
| 80 | - | ||
| 81 | - | ||
| 82 | - | ||
| 83 | - | ||
| 84 | - | ||
| 85 | - | ||
| 86 | - | ||
| 87 | - | ||
| 88 | - | ||
| 89 | - | ||
| 90 | - | ||
| 91 | - | ||
| 92 | - | ||
| 93 | - | ||
| 94 | - | ||
| 95 | - | ||
| 96 | - | ||
| 97 | - | ||
| 98 | - | ||
| 99 | - | ||
| 100 | - | ||
| 101 | - | ||
| 102 | - | ||
| 103 | - | ||
| 104 | - | ||
| 105 | - | ||
| 106 | - | ||
| 107 | - | ||
| 108 | - | ||
| 109 | - | ||
| 110 | - | ||
| 111 | - | ||
| 112 | - | ||
| 113 | - | ||
| 114 | - | ||
| 115 | - | ||
| 116 | - | ||
| 117 | - | ||
| 118 | - | ||
| 119 | - | ||
| 120 | - | ||
| 121 | - | ||
| 122 | - | ||
| 123 | - | ||
| 124 | - | ||
| 125 | - | ||
| 126 | - | ||
| 127 | - | ||
| 128 | - | ||
| 129 | - | ||
| 130 | - | ||
| 131 | - | ||
| 132 | - | ||
| 133 | - | ||
| 134 | - | ||
| 135 | - | ||
| 136 | - | ||
| 137 | - | ||
| 138 | - | ||
| 139 | - | ||
| 140 | - | ||
| 141 | - | ||
| 142 | - | ||
| 143 | - | ||
| 144 | - | ||
| 145 | - | ||
| 146 | - | ||
| 147 | - | ||
| 148 | - | ||
| 149 | - | ||
| 150 | - | ||
| 151 | - | ||
| 152 | - | ||
| 153 | - | ||
| 154 | - | ||
| 155 | - | ||
| 156 | - | ||
| 157 | - | ||
| 158 | - | ||
| 159 | - | ||
| 160 | - | ||
| 161 | - | ||
| 162 | - | ||
| 163 | - | ||
| 164 | - | ||
| 165 | - | ||
| 166 | - | ||
| 167 | - | ||
| 168 | - | ||
| 169 | - | ||
| 170 | - | ||
| 171 | - | ||
| 172 | - | ||
| 173 | - | ||
| 174 | - | ||
| 175 | - | ||
| 176 | - | ||
| 177 | - | ||
| 178 | - | ||
| 179 | - | ||
| 180 | - | ||
| 181 | - | ||
| 182 | - | ||
| 183 | - | ||
| 184 | - | ||
| 185 | - | ||
| 186 | - | ||
| 187 | - | ||
| 188 | - | ||
| 189 | - | ||
| 190 | - | ||
| 191 | - | ||
| 192 | - | ||
| 193 | - | ||
| 194 | - | ||
| 195 | - | ||
| 196 | - | ||
| 197 | - | ||
| 198 | - | ||
| 199 | - | ||
| 200 | - | ||
| 201 | - | ||
| 202 | - | ||
| 203 | - | ||
| 204 | - | ||
| 205 | - | ||
| 206 | - | ||
| 207 | - | ||
| 208 | - | ||
| 209 | - | ||
| 210 | - | ||
| 211 | - | ||
| 212 | - | ||
| 213 | - | ||
| 214 | - | ||
| 215 | - | ||
| 216 | - | ||
| 217 | - | ||
| 218 | - | ||
| 219 | - | ||
| 220 | - | ||
| 221 | - | ||
| 222 | - | ||
| 223 | - | ||
| 224 | - | ||
| 225 | - | ||
| 226 | - | ||
| 227 | - | ||
| 228 | - | ||
| 229 | - | ||
| 230 | - | ||
| 231 | - | ||
| 232 | - | ||
| 233 | - | ||
| 234 | - | ||
| 235 | - | ||
| 236 | - | ||
| 237 | - | ||
| 238 | - | ||
| 239 | - | ||
| 240 | - | ||
| 241 | - | ||
| 242 | - | ||
| 243 | - | ||
| 244 | - | ||
| 245 | - | ||
| 246 | - | ||
| 247 | - | ||
| 248 | - | ||
| 249 | - | ||
| 250 | - | ||
| 251 | - | ||
| 252 | - | ||
| 253 | - | ||
| 254 | - | ||
| 255 | - | ||
| 256 | - | ||
| 257 | - | ||
| 258 | - | ||
| 259 | - | ||
| 260 | - | ||
| 261 | - | ||
| 262 | - | ||
| 263 | - | ||
| 264 | - | ||
| 265 | - | ||
| 266 | - | ||
| 267 | - | ||
| 268 | - | ||
| 269 | - | ||
| 270 | - | ||
| 271 | - | ||
| 272 | - | ||
| 273 | - | ||
| 274 | - | ||
| 275 | - | ||
| 276 | - | ||
| 277 | - | ||
| 278 | - | ||
| 279 | - | ||
| 280 | - | ||
| 281 | - | ||
| 282 | - | ||
| 283 | - | ||
| 284 | - | ||
| 285 | - | ||
| 286 | - | ||
| 287 | - | ||
| 288 | - | ||
| 289 | - | ||
| 290 | - | ||
| 291 | - | ||
| 292 | - | ||
| 293 | - | ||
| 294 | - | ||
| 295 | - | ||
| 296 | - | ||
| 297 | - | ||
| 298 | - | ||
| 299 | - | ||
| 300 | - | ||
| 301 | - | ||
| 302 | - | ||
| 303 | - | ||
| 304 | - | ||
| 305 | - | ||
| 306 | - | ||
| 307 | - | ||
| 308 | - | ||
| 309 | - | ||
| 310 | - | ||
| 311 | - | ||
| 312 | - | ||
| 313 | - | ||
| 314 | - | ||
| 315 | - | ||
| 316 | - | ||
| 317 | - | ||
| 318 | - | ||
| 319 | - | ||
| 320 | - | ||
| 321 | - | ||
| 322 | - | ||
| 323 | - | ||
| 324 | - | ||
| 325 | - | ||
| 326 | - | ||
| 327 | - | ||
| 328 | - | ||
| 329 | - | ||
| 330 | - | ||
| 331 | - | ||
| 332 | - | ||
| 333 | - | ||
| 334 | - | ||
| 335 | - | ||
| 336 | - | ||
| 337 | - | ||
| 338 | - | ||
| 339 | - | ||
| 340 | - | ||
| 341 | - | ||
| 342 | - | ||
| 343 | - | ||
| 344 | - | ||
| 345 | - | ||
| 346 | - | ||
| 347 | - | ||
| 348 | - | ||
| 349 | - | ||
| 350 | - | ||
| 351 | - | ||
| 352 | - | ||
| 353 | - | ||
| 354 | - | ||
| 355 | - | ||
| 356 | - | ||
| 357 | - | ||
| 358 | - | ||
| 359 | - | ||
| 360 | - | ||
| 361 | - | ||
| 362 | - | ||
| 363 | - | ||
| 364 | - | ||
| 365 | - | ||
| 366 | - | ||
| 367 | - | ||
| 368 | - | ||
| 369 | - | ||
| 370 | - | ||
| 371 | - | ||
| 372 | - | ||
| 373 | - | ||
| 374 | - | ||
| 375 | - | ||
| 376 | - | ||
| 377 | - | ||
| 378 | - | ||
| 379 | - | ||
| 380 | - | ||
| 381 | - | ||
| 382 | - | ||
| 383 | - | ||
| 384 | - | ||
| 385 | - | ||
| 386 | - | ||
| 387 | - | ||
| 388 | - | ||
| 389 | - | ||
| 390 | - | ||
| 391 | - | ||
| 392 | - | ||
| 393 | - | ||
| 394 | - | ||
| 395 | - | ||
| 396 | - | ||
| 397 | - | ||
| 398 | - | ||
| 399 | - | ||
| 400 | - | ||
| 401 | - | ||
| 402 | - | ||
| 403 | - | ||
| 404 | - | ||
| 405 | - | ||
| 406 | - | ||
| 407 | - | ||
| 408 | - | ||
| 409 | - | ||
| 410 | - | ||
| 411 | - | ||
| 412 | - | ||
| 413 | - | ||
| 414 | - | ||
| 415 | - | ||
| 416 | - | ||
| 417 | - | ||
| 418 | - | ||
| 419 | - | ||
| 420 | - | ||
| 421 | - | ||
| 422 | - | ||
| 423 | - | ||
| 424 | - | ||
| 425 | - | ||
| 426 | - | ||
| 427 | - | ||
| 428 | - | ||
| 429 | - | ||
| 430 | - | ||
| 431 | - | ||
| 432 | - | ||
| 433 | - | ||
| 434 | - | ||
| 435 | - | ||
| 436 | - | ||
| 437 | - | ||
| 438 | - | ||
| 439 | - | ||
| 440 | - | ||
| 441 | - | ||
| 442 | - | ||
| 443 | - | ||
| 444 | - | ||
| 445 | - | ||
| 446 | - | ||
| 447 | - | ||
| 448 | - | ||
| 449 | - | ||
| 450 | - | ||
| 451 | - | ||
| 452 | - | ||
| 453 | - | ||
| 454 | - | ||
| 455 | - | ||
| 456 | - | ||
| 457 | - | ||
| 458 | - | ||
| 459 | - | ||
| 460 | - | ||
| 461 | - | ||
| 462 | - | ||
| 463 | - | ||
| 464 | - | ||
| 465 | - | ||
| 466 | - | ||
| 467 | - | ||
| 468 | - | ||
| 469 | - | ||
| 470 | - | ||
| 471 | - | ||
| 472 | - | ||
| 473 | - | ||
| 474 | - | ||
| 475 | - | ||
| 476 | - | ||
| 477 | - | ||
| 478 | - | ||
| 479 | - | ||
| 480 | - | ||
| 481 | - | ||
| 482 | - | ||
| 483 | - | ||
| 484 | - | ||
| 485 | - | ||
| 486 | - | ||
| 487 | - | ||
| 488 | - | ||
| 489 | - | ||
| 490 | - | ||
| 491 | - | ||
| 492 | - | ||
| 493 | - | ||
| 494 | - | ||
| 495 | - | ||
| 496 | - | ||
| 497 | - | ||
| 498 | - | ||
| 499 | - | ||
| 500 | - | ||
| 501 | - | ||
| 502 | - | ||
| 503 | - | ||
| 504 | - | ||
| 505 | - | ||
| 506 | - | ||
| 507 | - | ||
| 508 | - | ||
| 509 | - | ||
| 510 | - | ||
| 511 | - | ||
| 512 | - | ||
| 513 | - | ||
| 514 | - | ||
| 515 | - | ||
| 516 | - | ||
| 517 | - | ||
| 518 | - | ||
| 519 | - | ||
| 520 | - | ||
| 521 | - | ||
| 522 | - | ||
| 523 | - | ||
| 524 | - | ||
| 525 | - | ||
| 526 | - | ||
| 527 | - | ||
| 528 | - | ||
| 529 | - | ||
| 530 | - | ||
| 531 | - | ||
| 532 | - | ||
| 533 | - | ||
| 534 | - | ||
| 535 | - | ||
| 536 | - | ||
| 537 | - | ||
| 538 | - | ||
| 539 | - | ||
| 540 | - | ||
| 541 | - | ||
| 542 | - | ||
| 543 | - | ||
| 544 | - | ||
| 545 | - | ||
| 546 | - | ||
| 547 | - | ||
| 548 | - | ||
| 549 | - | ||
| 550 | - | ||
| 551 | - | ||
| 552 | - | ||
| 553 | - | ||
| 554 | - | ||
| 555 | - | ||
| 556 | - | ||
| 557 | - | ||
| 558 | - | ||
| 559 | - | ||
| 560 | - | ||
| 561 | - | ||
| 562 | - | ||
| 563 | - | ||
| 564 | - | ||
| 565 | - | ||
| 566 | - | ||
| 567 | - | ||
| 568 | - | ||
| 569 | - | ||
| 570 | - | ||
| 571 | - | ||
| 572 | - | ||
| 573 | - | ||
| 574 | - | ||
| 575 | - | ||
| 576 | - | ||
| 577 | - | ||
| 578 | - | ||
| 579 | - | ||
| 580 | - | ||
| 581 | - | ||
| 582 | - | ||
| 583 | - | ||
| 584 | - | ||
| 585 | - | ||
| 586 | - | ||
| 587 | - | ||
| 588 | - | ||
| 589 | - | ||
| 590 | - | ||
| 591 | - | ||
| 592 | - | ||
| 593 | - | ||
| 594 | - | ||
| 595 | - | ||
| 596 | - | ||
| 597 | - | ||
| 598 | - | ||
| 599 | - | ||
| 600 | - | ||
| 601 | - | ||
| 602 | - | ||
| 603 | - | ||
| 604 | - | ||
| 605 | - | ||
| 606 | - | ||
| 607 | - | ||
| 608 | - | ||
| 609 | - | ||
| 610 | - | ||
| 611 | - | ||
| 612 | - | ||
| 613 | - | ||
| 614 | - | ||
| 615 | - | ||
| 616 | - | ||
| 617 | - | ||
| 618 | - | ||
| 619 | - | ||
| 620 | - | ||
| 621 | - | ||
| 622 | - | ||
| 623 | - | ||
| 624 | - | ||
| 625 | - | ||
| 626 | - | ||
| 627 | - | ||
| 628 | - | ||
| 629 | - | ||
| 630 | - | ||
| 631 | - | ||
| 632 | - | ||
| 633 | - | ||
| 634 | - | ||
| 635 | - | ||
| 636 | - | ||
| 637 | - | ||
| 638 | - | ||
| 639 | - | ||
| 640 | - | ||
| 641 | - | ||
| 642 | - | ||
| 643 | - | ||
| 644 | - | ||
| 645 | - | ||
| 646 | - | ||
| 647 | - | ||
| 648 | - | ||
| 649 | - | ||
| 650 | - | ||
| 651 | - | ||
| 652 | - | ||
| 653 | - | ||
| 654 | - | ||
| 655 | - | ||
| 656 | - | ||
| 657 | - | ||
| 658 | - | ||
| 659 | - | ||
| 660 | - | ||
| 661 | - | ||
| 662 | - | ||
| 663 | - | ||
| 664 | - | ||
| 665 | - | ||
| 666 | - | ||
| 667 | - | ||
| 668 | - | ||
| 669 | - | ||
| 670 | - | ||
| 671 | - | ||
| 672 | - | ||
| 673 | - | ||
| 674 | - | ||
| 675 | - | ||
| 676 | - | ||
| 677 | - | ||
| 678 | - | ||
| 679 | - | ||
| 680 | - | ||
| 681 | - | ||
| 682 | - | ||
| 683 | - | ||
| 684 | - | ||
| 685 | - | ||
| 686 | - | ||
| 687 | - | ||
| 688 | - | ||
| 689 | - | ||
| 690 | - | ||
| 691 | - | ||
| 692 | - | ||
| 693 | - | ||
| 694 | - | ||
| 695 | - | ||
| 696 | - | ||
| 697 | - | ||
| 698 | - | ||
| 699 | - | ||
| 700 | - | ||
| 701 | - | ||
| 702 | - | ||
| 703 | - | ||
| 704 | - | ||
| 705 | - | ||
| 706 | - | ||
| 707 | - | ||
| 708 | - | ||
| 709 | - | ||
| 710 | - | ||
| 711 | - | ||
| 712 | - | ||
| 713 | - | ||
| 714 | - | ||
| 715 | - | ||
| 716 | - | ||
| 717 | - | ||
| 718 | - | ||
| 719 | - | ||
| 720 | - | ||
| 721 | - | ||
| 722 | - | ||
| 723 | - | ||
| 724 | - | ||
| 725 | - | ||
| 726 | - | ||
| 727 | - | ||
| 728 | - | ||
| 729 | - | ||
| 730 | - | ||
| 731 | - | ||
| 732 | - | ||
| 733 | - | ||
| 734 | - | ||
| 735 | - | ||
| 736 | - | ||
| 737 | - | ||
| 738 | - | ||
| 739 | - | ||
| 740 | - | ||
| 741 | - | ||
| 742 | - | ||
| 743 | - | ||
| 744 | - | ||
| 745 | - | ||
| 746 | - | ||
| 747 | - | ||
| 748 | - | ||
| 749 | - | ||
| 750 | - | ||
| 751 | - | ||
| 752 | - | ||
| 753 | - | ||
| 754 | - | ||
| 755 | - | ||
| 756 | - | ||
| 757 | - | ||
| 758 | - | ||
| 759 | - | ||
| 760 | - | ||
| 761 | - | ||
| 762 | - | ||
| 763 | - | ||
| 764 | - | ||
| 765 | - | ||
| 766 | - | ||
| 767 | - | ||
| 768 | - | ||
| 769 | - | ||
| 770 | - | ||
| 771 | - | ||
| 772 | - | ||
| 773 | - | ||
| 774 | - | ||
| 775 | - | ||
| 776 | - | ||
| 777 | - | ||
| 778 | - | ||
| 779 | - | ||
| 780 | - | ||
| 781 | - | ||
| 782 | - | ||
| 783 | - | ||
| 784 | - | ||
| 785 | - | ||
| 786 | - | ||
| 787 | - | ||
| 788 | - | ||
| 789 | - | ||
| 790 | - | ||
| 791 | - | ||
| 792 | - | ||
| 793 | - | ||
| 794 | - | ||
| 795 | - | ||
| 796 | - | ||
| 797 | - | ||
| 798 | - | ||
| 799 | - | ||
| 800 | - | ||
| 801 | - | ||
| 802 | - | ||
| 803 | - | ||
| 804 | - | ||
| 805 | - | ||
| 806 | - | ||
| 807 | - | ||
| 808 | - | ||
| 809 | - | ||
| 810 | - | ||
| 811 | - | ||
| 812 | - | ||
| 813 | - | ||
| 814 | - | ||
| 815 | - | ||
| 816 | - | ||
| 817 | - | ||
| 818 | - | ||
| 819 | - | ||
| 820 | - | ||
| 821 | - | ||
| 822 | - | ||
| 823 | - | ||
| 824 | - | ||
| 825 | - | ||
| 826 | - | ||
| 827 | - | ||
| 828 | - | ||
| 829 | - | ||
| 830 | - | ||
| 831 | - | ||
| 832 | - | ||
| 833 | - | ||
| 834 | - | ||
| 835 | - | ||
| 836 | - | ||
| 837 | - | ||
| 838 | - | ||
| 839 | - | ||
| 840 | - | ||
| 841 | - | ||
| 842 | - | ||
| 843 | - | ||
| 844 | - | ||
| 845 | - | ||
| 846 | - | ||
| 847 | - | ||
| 848 | - | ||
| 849 | - | ||
| 850 | - | ||
| 851 | - | ||
| 852 | - | ||
| 853 | - | ||
| 854 | - | ||
| 855 | - | ||
| 856 | - | ||
| 857 | - | ||
| 858 | - | ||
| 859 | - | ||
| 860 | - | ||
| 861 | - | ||
| 862 | - | ||
| 863 | - | ||
| 864 | - | ||
| 865 | - | ||
| 866 | - | ||
| 867 | - | ||
| 868 | - | ||
| 869 | - | ||
| 870 | - | ||
| 871 | - | ||
| 872 | - | ||
| 873 | - | ||
| 874 | - | ||
| 875 | - | ||
| 876 | - | ||
| 877 | - | ||
| 878 | - | ||
| 879 | - | ||
| 880 | - | ||
| 881 | - | ||
| 882 | - | ||
| 883 | - | ||
| 884 | - | ||
| 885 | - | ||
| 886 | - | ||
| 887 | - | ||
| 888 | - | ||
| 889 | - | ||
| 890 | - | ||
| 891 | - | ||
| 892 | - | ||
| 893 | - | ||
| 894 | - | ||
| 895 | - | ||
| 896 | - | ||
| 897 | - | ||
| 898 | - | ||
| 899 | - | ||
| 900 | - | ||
| 901 | - | ||
| 902 | - | ||
| 903 | - | ||
| 904 | - | ||
| 905 | - | ||
| 906 | - | ||
| 907 | - | ||
| 908 | - | ||
| 909 | - | ||
| 910 | - | ||
| 911 | - | ||
| 912 | - | ||
| 913 | - | ||
| 914 | - | ||
| 915 | - | ||
| 916 | - | ||
| 917 | - | ||
| 918 | - | ||
| 919 | - | ||
| 920 | - | ||
| 921 | - | ||
| 922 | - | ||
| 923 | - | ||
| 924 | - | ||
| 925 | - | ||
| 926 | - | ||
| 927 | - | ||
| 928 | - | ||
| 929 | - | ||
| 930 | - | ||
| 931 | - | ||
| 932 | - | ||
| 933 | - | ||
| 934 | - | ||
| 935 | - | ||
| 936 | - | ||
| 937 | - | ||
| 938 | - | ||
| 939 | - | ||
| 940 | - | ||
| 941 | - | ||
| 942 | - | ||
| 943 | - | ||
| 944 | - | ||
| 945 | - | ||
| 946 | - | ||
| 947 | - | ||
| 948 | - | ||
| 949 | - | ||
| 950 | - | ||
| 951 | - | ||
| 952 | - | ||
| 953 | - | ||
| 954 | - | ||
| 955 | - | ||
| 956 | - | ||
| 957 | - | ||
| 958 | - | ||
| 959 | - | ||
| 960 | - | ||
| 961 | - | ||
| 962 | - | ||
| 963 | - | ||
| 964 | - | ||
| 965 | - | ||
| 966 | - | ||
| 967 | - | ||
| 968 | - | ||
| 969 | - | ||
| 970 | - | ||
| 971 | - | ||
| 972 | - | ||
| 973 | - | ||
| 974 | - | ||
| 975 | - | ||
| 976 | - | ||
| 977 | - | ||
| 978 | - | ||
| 979 | - | ||
| 980 | - | ||
| 981 | - | ||
| 982 | - | ||
| 983 | - | ||
| 984 | - | ||
| 985 | - | ||
| 986 | - | ||
| 987 | - | ||
| 988 | - | ||
| 989 | - | ||
| 990 | - | ||
| 991 | - | ||
| 992 | - | ||
| 993 | - | ||
| 994 | - | ||
| 995 | - | ||
| 996 | - | ||
| 997 | - | ||
| 998 | - | ||
| 999 | - | ||
| 1000 | - | ||
| 1001 | - | ||
| 1002 | - | ||
| 1003 | - | ||
| 1004 | - | ||
| 1005 | - | ||
| 1006 | - | ||
| 1007 | - | ||
| 1008 | - | ||
| 1009 | - | ||
| 1010 | - | ||
| 1011 | - | ||
| 1012 | - | ||
| 1013 | - | ||
| 1014 | - | ||
| 1015 | - | ||
| 1016 | - | ||
| 1017 | - | ||
| 1018 | - | ||
| 1019 | - | ||
| 1020 | - | ||
| 1021 | - | ||
| 1022 | - | ||
| 1023 | - | ||
| 1024 | - | ||
| 1025 | - | ||
| 1026 | - | ||
| 1027 | - | ||
| 1028 | - | ||
| 1029 | - | ||
| 1030 | - | ||
| 1031 | - | ||
| 1032 | - | ||
| 1033 | - | ||
| 1034 | - | ||
| 1035 | - | ||
| 1036 | - | ||
| 1037 | - | ||
| 1038 | - | ||
| 1039 | - | ||
| 1040 | - | ||
| 1041 | - | ||
| 1042 | - | ||
| 1043 | - | ||
| 1044 | - | ||
| 1045 | - | ||
| 1046 | - | ||
| 1047 | - | ||
| 1048 | - | ||
| 1049 | - | ||
| 1050 | - | ||
| 1051 | - | ||
| 1052 | - | ||
| 1053 | - | ||
| 1054 | - | ||
| 1055 | - | ||
| 1056 | - | ||
| 1057 | - | ||
| 1058 | - | ||
| 1059 | - | ||
| 1060 | - | ||
| 1061 | - | ||
| 1062 | - | ||
| 1063 | - | ||
| 1064 | - | ||
| 1065 | - | ||
| 1066 | - | ||
| 1067 | - | ||
| 1068 | - | ||
| 1069 | - | ||
| 1070 | - | ||
| 1071 | - | ||
| 1072 | - | ||
| 1073 | - | ||
| 1074 | - | ||
| 1075 | - | ||
| 1076 | - | ||
| 1077 | - | ||
| 1078 | - | ||
| 1079 | - | ||
| 1080 | - | ||
| 1081 | - | ||
| 1082 | - | ||
| 1083 | - | ||
| 1084 | - | ||
| 1085 | - | ||
| 1086 | - | ||
| 1087 | - | ||
| 1088 | - | ||
| 1089 | - | ||
| 1090 | - | ||
| 1091 | - | ||
| 1092 | - | ||
| 1093 | - | ||
| 1094 | - | ||
| 1095 | - | ||
| 1096 | - | ||
| 1097 | - | ||
| 1098 | - | ||
| 1099 | - | ||
| 1100 | - | ||
| 1101 | - | ||
| 1102 | - | ||
| 1103 | - | ||
| 1104 | - | ||
| 1105 | - | ||
| 1106 | - | ||
| 1107 | - | ||
| 1108 | - | ||
| 1109 | - | ||
| 1110 | - | ||
| 1111 | - | ||
| 1112 | - | ||
| 1113 | - | ||
| 1114 | - | ||
| 1115 | - | ||
| 1116 | - | ||
| 1117 | - | ||
| 1118 | - | ||
| 1119 | - | ||
| 1120 | - | ||
| 1121 | - | ||
| 1122 | - | ||
| 1123 | - | ||
| 1124 | - | ||
| 1125 | - | ||
| 1126 | - | ||
| 1127 | - | ||
| 1128 | - | ||
| 1129 | - | ||
| 1130 | - | ||
| 1131 | - | ||
| 1132 | - | ||
| 1133 | - | ||
| 1134 | - | ||
| 1135 | - | ||
| 1136 | - | ||
| 1137 | - | ||
| 1138 | - | ||
| 1139 | - | ||
| 1140 | - | ||
| 1141 | - | ||
| 1142 | - | ||
| 1143 | - | ||
| 1144 | - | ||
| 1145 | - | ||
| 1146 | - | ||
| 1147 | - | ||
| 1148 | - | ||
| 1149 | - | ||
| 1150 | - | ||
| 1151 | - | ||
| 1152 | - | ||
| 1153 | - | ||
| 1154 | - | ||
| 1155 | - | ||
| 1156 | - | ||
| 1157 | - | ||
| 1158 | - | ||
| 1159 | - | ||
| 1160 | - | ||
| 1161 | - | ||
| 1162 | - | ||
| 1163 | - | ||
| 1164 | - | ||
| 1165 | - | ||
| 1166 | - | ||
| 1167 | - | ||
| 1168 | - | ||
| 1169 | - | ||
| 1170 | - | ||
| 1171 | - | ||
| 1172 | - | ||
| 1173 | - | ||
| 1174 | - | ||
| 1175 | - | ||
| 1176 | - | ||
| 1177 | - | ||
| 1178 | - | ||
| 1179 | - | ||
| 1180 | - | ||
| 1181 | - | ||
| 1182 | - | ||
| 1183 | - | ||
| 1184 | - | ||
| 1185 | - | ||
| 1186 | - | ||
| 1187 | - | ||
| 1188 | - | ||
| 1189 | - | ||
| 1190 | - | ||
| 1191 | - | ||
| 1192 | - | ||
| 1193 | - | ||
| 1194 | - | ||
| 1195 | - | ||
| 1196 | - | ||
| 1197 | - | ||
| 1198 | - | ||
| 1199 | - | ||
| 1200 | - | ||
| 1201 | - | ||
| 1202 | - | ||
| 1203 | - | ||
| 1204 | - | ||
| 1205 | - | ||
| 1206 | - | ||
| 1207 | - | ||
| 1208 | - | ||
| 1209 | - | ||
| 1210 | - | ||
| 1211 | - | ||
| 1212 | - | ||
| 1213 | - | ||
| 1214 | - | ||
| 1215 | - | ||
| 1216 | - | ||
| 1217 | - | ||
| 1218 | - | ||
| 1219 | - | ||
| 1220 | - | ||
| 1221 | - | ||
| 1222 | - | ||
| 1223 | - | ||
| 1224 | - | ||
| 1225 | - | ||
| 1226 | - | ||
| 1227 | - | ||
| 1228 | - | ||
| 1229 | - | ||
| 1230 | - | ||
| 1231 | - | ||
| 1232 | - | ||
| 1233 | - | ||
| 1234 | - | ||
| 1235 | - | ||
| 1236 | - | ||
| 1237 | - | ||
| 1238 | - | ||
| 1239 | - | ||
| 1240 | - | ||
| 1241 | - | ||
| 1242 | - | ||
| 1243 | - | ||
| 1244 | - | ||
| 1245 | - | ||
| 1246 | - | ||
| 1247 | - | ||
| 1248 | - | ||
| 1249 | - | ||
| 1250 | - | ||
| 1251 | - | ||
| 1252 | - | ||
| 1253 | - | ||
| 1254 | - | ||
| 1255 | - | ||
| 1256 | - | ||
| 1257 | - | ||
| 1258 | - | ||
| 1259 | - | ||
| 1260 | - | ||
| 1261 | - | ||
| 1262 | - | ||
| 1263 | - | ||
| 1264 | - | ||
| 1265 | - | ||
| 1266 | - | ||
| 1267 | - | ||
| 1268 | - | ||
| 1269 | - | ||
| 1270 | - | ||
| 1271 | - | ||
| 1272 | - | ||
| 1273 | - | ||
| 1274 | - | ||
| 1275 | - | ||
| 1276 | - | ||
| 1277 | - | ||
| 1278 | - | ||
| 1279 | - | ||
| 1280 | - | ||
| 1281 | - | ||
| 1282 | - | ||
| 1283 | - | ||
| 1284 | - | ||
| 1285 | - | ||
| 1286 | - | ||
| 1287 | - | ||
| 1288 | - | ||
| 1289 | - | ||
| 1290 | - | ||
| 1291 | - | ||
| 1292 | - | ||
| 1293 | - | ||
| 1294 | - | ||
| 1295 | - | ||
| 1296 | - | ||
| 1297 | - | ||
| 1298 | - | ||
| 1299 | - | ||
| 1300 | - | ||
| 1301 | - | ||
| 1302 | - | ||
| 1303 | - | ||
| 1304 | - | ||
| 1305 | - | ||
| 1306 | - | ||
| 1307 | - | ||
| 1308 | - | ||
| 1309 | - | ||
| 1310 | - | ||
| 1311 | - | ||
| 1312 | - | ||
| 1313 | - | ||
| 1314 | - | ||
| 1315 | - | ||
| 1316 | - | ||
| 1317 | - | ||
| 1318 | - | ||
| 1319 | - | ||
| 1320 | - | ||
| 1321 | - | ||
| 1322 | - | ||
| 1323 | - | ||
| 1324 | - | ||
| 1325 | - | ||
| 1326 | - | ||
| 1327 | - | ||
| 1328 | - | ||
| 1329 | - | ||
| 1330 | - | ||
| 1331 | - | ||
| 1332 | - | ||
| 1333 | - | ||
| 1334 | - | ||
| 1335 | - | ||
| 1336 | - | ||
| 1337 | - | ||
| 1338 | - | ||
| 1339 | - | ||
| 1340 | - | ||
| 1341 | - | ||
| 1342 | - | ||
| 1343 | - | ||
| 1344 | - | ||
| 1345 | - | ||
| 1346 | - | ||
| 1347 | - | ||
| 1348 | - | ||
| 1349 | - | ||
| 1350 | - | ||
| 1351 | - | ||
| 1352 | - | ||
| 1353 | - | ||
| 1354 | - | ||
| 1355 | - | ||
| 1356 | - | ||
| 1357 | - | ||
| 1358 | - | ||
| 1359 | - | ||
| 1360 | - | ||
| 1361 | - | ||
| 1362 | - | ||
| 1363 | - | ||
| 1364 | - | ||
| 1365 | - | ||
| 1366 | - | ||
| 1367 | - | ||
| 1368 | - | ||
| 1369 | - | ||
| 1370 | - | ||
| 1371 | - | ||
| 1372 | - | ||
| 1373 | - | ||
| 1374 | - | ||
| 1375 | - | ||
| 1376 | - | ||
| 1377 | - | ||
| 1378 | - | ||
| 1379 | - | ||
| 1380 | - | ||
| 1381 | - | ||
| 1382 | - | ||
| 1383 | - | ||
| 1384 | - | ||
| 1385 | - | ||
| 1386 | - | ||
| 1387 | - | ||
| 1388 | - | ||
| 1389 | - | ||
| 1390 | - | ||
| 1391 | - | ||
| 1392 | - | ||
| 1393 | - | ||
| 1394 | - | ||
| 1395 | - | ||
| 1396 | - | ||
| 1397 | - | ||
| 1398 | - | ||
| 1399 | - | ||
| 1400 | - | ||
| 1401 | - | ||
| 1402 | - | ||
| 1403 | - | ||
| 1404 | - | ||
| 1405 | - | ||
| 1406 | - | ||
| 1407 | - | ||
| 1408 | - | ||
| 1409 | - | ||
| 1410 | - | ||
| 1411 | - | ||
| 1412 | - | ||
| 1413 | - | ||
| 1414 | - | ||
| 1415 | - | ||
| 1416 | - | ||
| 1417 | - | ||
| 1418 | - | ||
| 1419 | - | ||
| 1420 | - | ||
| 1421 | - | ||
| 1422 | - | ||
| 1423 | - | ||
| 1424 | - | ||
| 1425 | - | ||
| 1426 | - | ||
| 1427 | - | ||
| 1428 | - | ||
| 1429 | - | ||
| 1430 | - | ||
| 1431 | - | ||
| 1432 | - | ||
| 1433 | - | ||
| 1434 | - | ||
| 1435 | - | ||
| 1436 | - | ||
| 1437 | - | ||
| 1438 | - | ||
| 1439 | - | ||
| 1440 | - | ||
| 1441 | - | ||
| 1442 | - | ||
| 1443 | - | ||
| 1444 | - | ||
| 1445 | - | ||
| 1446 | - | ||
| 1447 | - | ||
| 1448 | - | ||
| 1449 | - | ||
| 1450 | - | ||
| 1451 | - | ||
| 1452 | - | ||
| 1453 | - | ||
| 1454 | - | ||
| 1455 | - | ||
| 1456 | - | ||
| 1457 | - | ||
| 1458 | - | ||
| 1459 | - | ||
| 1460 | - | ||
| 1461 | - | ||
| 1462 | - | ||
| 1463 | - | ||
| 1464 | - | ||
| 1465 | - | ||
| 1466 | - | ||
| 1467 | - | ||
| 1468 | - | ||
| 1469 | - | ||
| 1470 | - | ||
| 1471 | - | ||
| 1472 | - | ||
| 1473 | - | ||
| 1474 | - | ||
| 1475 | - | ||
| 1476 | - | ||
| 1477 | - | ||
| 1478 | - | ||
| 1479 | - | ||
| 1480 | - | ||
| 1481 | - | ||
| 1482 | - | ||
| 1483 | - | ||
| 1484 | - | ||
| 1485 | - | ||
| 1486 | - | ||
| 1487 | - | ||
| 1488 | - | ||
| 1489 | - | ||
| 1490 | - | ||
| 1491 | - | ||
| 1492 | - | ||
| 1493 | - | ||
| 1494 | - | ||
| 1495 | - | ||
| 1496 | - | ||
| 1497 | - | ||
| 1498 | - | ||
| 1499 | - | ||
| 1500 | - | ||
| 1501 | - | ||
| 1502 | - | ||
| 1503 | - | ||
| 1504 | - | ||
| 1505 | - | ||
| 1506 | - | ||
| 1507 | - | ||
| 1508 | - | ||
| 1509 | - | ||
| 1510 | - | ||
| 1511 | - | ||
| 1512 | - | ||
| 1513 | - | ||
| 1514 | - | ||
| 1515 | - | ||
| 1516 | - | ||
| 1517 | - | ||
| 1518 | - | ||
| 1519 | - | ||
| 1520 | - | ||
| 1521 | - | ||
| 1522 | - | ||
| 1523 | - | ||
| 1524 | - | ||
| 1525 | - | ||
| 1526 | - | ||
| 1527 | - | ||
| 1528 | - | ||
| 1529 | - | ||
| 1530 | - | ||
| 1531 | - | ||
| 1532 | - | ||
| 1533 | - | ||
| 1534 | - | ||
| 1535 | - | ||
| 1536 | - | ||
| 1537 | - | ||
| 1538 | - | ||
| 1539 | - | ||
| 1540 | - | ||
| 1541 | - | ||
| 1542 | - | ||
| 1543 | - | ||
| 1544 | - | ||
| 1545 | - | ||
| 1546 | - | ||
| 1547 | - | ||
| 1548 | - | ||
| 1549 | - | ||
| 1550 | - | ||
| 1551 | - | ||
| 1552 | - | ||
| 1553 | - | ||
| 1554 | - | ||
| 1555 | - | ||
| 1556 | - | ||
| 1557 | - | ||
| 1558 | - | ||
| 1559 | - | ||
| 1560 | - | ||
| 1561 | - | ||
| 1562 | - | ||
| 1563 | - | ||
| 1564 | - | ||
| 1565 | - | ||
| 1566 | - | ||
| 1567 | - | ||
| 1568 | - | ||
| 1569 | - | ||
| 1570 | - | ||
| 1571 | - | ||
| 1572 | - | ||
| 1573 | - | ||
| 1574 | - | ||
| 1575 | - | ||
| 1576 | - | ||
| 1577 | - | ||
| 1578 | - | ||
| 1579 | - | ||
| 1580 | - | ||
| 1581 | - | ||
| 1582 | - | ||
| 1583 | - | ||
| 1584 | - | ||
| 1585 | - | ||
| 1586 | - | ||
| 1587 | - | ||
| 1588 | - | ||
| 1589 | - | ||
| 1590 | - | ||
| 1591 | - | ||
| 1592 | - | ||
| 1593 | - | ||
| 1594 | - | ||
| 1595 | - | ||
| 1596 | - | ||
| 1597 | - | ||
| 1598 | - | ||
| 1599 | - | ||
| 1600 | - | ||
| 1601 | - | ||
| 1602 | - | ||
| 1603 | - | ||
| 1604 | - | ||
| 1605 | - | ||
| 1606 | - | ||
| 1607 | - | ||
| 1608 | - | ||
| 1609 | - | ||
| 1610 | - | ||
| 1611 | - | ||
| 1612 | - | ||
| 1613 | - | ||
| 1614 | - | ||
| 1615 | - | ||
| 1616 | - | ||
| 1617 | - | ||
| 1618 | - | ||
| 1619 | - | ||
| 1620 | - | ||
| 1621 | - | ||
| 1622 | - | ||
| 1623 | - | ||
| 1624 | - | ||
| 1625 | - | ||
| 1626 | - | ||
| 1627 | - | ||
| 1628 | - | ||
| 1629 | - | ||
| 1630 | - | ||
| 1631 | - | ||
| 1632 | - | ||
| 1633 | - | ||
| 1634 | - | ||
| 1635 | - | ||
| 1636 | - | ||
| 1637 | - | ||
| 1638 | - | ||
| 1639 | - | ||
| 1640 | - | ||
| 1641 | - | ||
| 1642 | - | ||
| 1643 | - | ||
| 1644 | - | ||
| 1645 | - | ||
| 1646 | - | ||
| 1647 | - | ||
| 1648 | - | ||
| 1649 | - | ||
| 1650 | - | ||
| 1651 | - | ||
| 1652 | - | ||
| 1653 | - | ||
| 1654 | - | ||
| 1655 | - | ||
| 1656 | - | ||
| 1657 | - | ||
| 1658 | - | ||
| 1659 | - | ||
| 1660 | - | ||
| 1661 | - | ||
| 1662 | - | ||
| 1663 | - | ||
| 1664 | - | ||
| 1665 | - | ||
| 1666 | - | ||
| 1667 | - | ||
| 1668 | - | ||
| 1669 | - | ||
| 1670 | - | ||
| 1671 | - | ||
| 1672 | - | ||
| 1673 | - | ||
| 1674 | - | ||
| 1675 | - | ||
| 1676 | - | ||
| 1677 | - | ||
| 1678 | - | ||
| 1679 | - | ||
| 1680 | - | ||
| 1681 | - | ||
| 1682 | - | ||
| 1683 | - | ||
| 1684 | - | ||
| 1685 | - | ||
| 1686 | - | ||
| 1687 | - | ||
| 1688 | - | ||
| 1689 | - | ||
| 1690 | - | ||
| 1691 | - | ||
| 1692 | - | ||
| 1693 | - | ||
| 1694 | - | ||
| 1695 | - | ||
| 1696 | - | ||
| 1697 | - | ||
| 1698 | - | ||
| 1699 | - | ||
| 1700 | - | ||
| 1701 | - | ||
| 1702 | - | ||
| 1703 | - | ||
| 1704 | - | ||
| 1705 | - | ||
| 1706 | - | ||
| 1707 | - | ||
| 1708 | - | ||
| 1709 | - | ||
| 1710 | - | ||
| 1711 | - | ||
| 1712 | - | ||
| 1713 | - | ||
| 1714 | - | ||
| 1715 | - | ||
| 1716 | - | ||
| 1717 | - | ||
| 1718 | - | ||
| 1719 | - | ||
| 1720 | - | ||
| 1721 | - | ||
| 1722 | - | ||
| 1723 | - | ||
| 1724 | - | ||
| 1725 | - | ||
| 1726 | - | ||
| 1727 | - | ||
| 1728 | - | ||
| 1729 | - | ||
| 1730 | - | ||
| 1731 | - | ||
| 1732 | - | ||
| 1733 | - | ||
| 1734 | - | ||
| 1735 | - | ||
| 1736 | - | ||
| 1737 | - | ||
| 1738 | - | ||
| 1739 | - | ||
| 1740 | - | ||
| 1741 | - | ||
| 1742 | - | ||
| 1743 | - | ||
| 1744 | - | ||
| 1745 | - | ||
| 1746 | - | ||
| 1747 | - | ||
| 1748 | - | ||
| 1749 | - | ||
| 1750 | - | ||
| 1751 | - | ||
| 1752 | - | ||
| 1753 | - | ||
| 1754 | - | ||
| 1755 | - | ||
| 1756 | - | ||
| 1757 | - | ||
| 1758 | - | ||
| 1759 | - | ||
| 1760 | - | ||
| 1761 | - | ||
| 1762 | - | ||
| 1763 | - | ||
| 1764 | - | ||
| 1765 | - | ||
| 1766 | - | ||
| 1767 | - | ||
| 1768 | - | ||
| 1769 | - | ||
| 1770 | - | ||
| 1771 | - | ||
| 1772 | - | ||
| 1773 | - | ||
| 1774 | - | ||
| 1775 | - | ||
| 1776 | - | ||
| 1777 | - | ||
| 1778 | - | ||
| 1779 | - | ||
| 1780 | - | ||
| 1781 | - | ||
| 1782 | - | ||
| 1783 | - | ||
| 1784 | - | ||
| 1785 | - | ||
| 1786 | - | ||
| 1787 | - | ||
| 1788 | - | ||
| 1789 | - | ||
| 1790 | - | ||
| 1791 | - | ||
| 1792 | - | ||
| 1793 | - | ||
| 1794 | - | ||
| 1795 | - | ||
| 1796 | - | ||
| 1797 | - | ||
| 1798 | - | ||
| 1799 | - | ||
| 1800 | - | ||
| 1801 | - | ||
| 1802 | - | ||
| 1803 | - | ||
| 1804 | - | ||
| 1805 | - | ||
| 1806 | - | ||
| 1807 | - | ||
| 1808 | - | ||
| 1809 | - | ||
| 1810 | - | ||
| 1811 | - | ||
| 1812 | - | ||
| 1813 | - | ||
| 1814 | - | ||
| 1815 | - | ||
| 1816 | - | ||
| 1817 | - | ||
| 1818 | - | ||
| 1819 | - | ||
| 1820 | - | ||
| 1821 | - | ||
| 1822 | - | ||
| 1823 | - | ||
| 1824 | - | ||
| 1825 | - | ||
| 1826 | - | ||
| 1827 | - | ||
| 1828 | - | ||
| 1829 | - | ||
| 1830 | - | ||
| 1831 | - | ||
| 1832 | - | ||
| 1833 | - | ||
| 1834 | - | ||
| 1835 | - | ||
| 1836 | - | ||
| 1837 | - | ||
| 1838 | - | ||
| 1839 | - | ||
| 1840 | - | ||
| 1841 | - | ||
| 1842 | - | ||
| 1843 | - | ||
| 1844 | - | ||
| 1845 | - | ||
| 1846 | - | ||
| 1847 | - | ||
| 1848 | - | ||
| 1849 | - | ||
| 1850 | - | ||
| 1851 | - | ||
| 1852 | - | ||
| 1853 | - | ||
| 1854 | - | ||
| 1855 | - | ||
| 1856 | - | ||
| 1857 | - | ||
| 1858 | - | ||
| 1859 | - | ||
| 1860 | - | ||
| 1861 | - | ||
| 1862 | - | ||
| 1863 | - | ||
| 1864 | - | ||
| 1865 | - | ||
| 1866 | - | ||
| 1867 | - | ||
| 1868 | - | ||
| 1869 | - | ||
| 1870 | - | ||
| 1871 | - | ||
| 1872 | - | ||
| 1873 | - | ||
| 1874 | - | ||
| 1875 | - | ||
| 1876 | - | ||
| 1877 | - | ||
| 1878 | - | ||
| 1879 | - | ||
| 1880 | - | ||
| 1881 | - | ||
| 1882 | - | ||
| 1883 | - | ||
| 1884 | - | ||
| 1885 | - | ||
| 1886 | - | ||
| 1887 | - | ||
| 1888 | - | ||
| 1889 | - | ||
| 1890 | - | ||
| 1891 | - | ||
| 1892 | - | ||
| 1893 | - | ||
| 1894 | - | ||
| 1895 | - | ||
| 1896 | - | ||
| 1897 | - | ||
| 1898 | - | ||
| 1899 | - | ||
| 1900 | - | ||
| 1901 | - | ||
| 1902 | - | ||
| 1903 | - | ||
| 1904 | - | ||
| 1905 | - | ||
| 1906 | - | ||
| 1907 | - | ||
| 1908 | - | ||
| 1909 | - | ||
| 1910 | - | ||
| 1911 | - | ||
| 1912 | - | ||
| 1913 | - | ||
| 1914 | - | ||
| 1915 | - | ||
| 1916 | - | ||
| 1917 | - | ||
| 1918 | - | ||
| 1919 | - | ||
| 1920 | - | ||
| 1921 | - | ||
| 1922 | - | ||
| 1923 | - | ||
| 1924 | - | ||
| 1925 | - | ||
| 1926 | - | ||
| 1927 | - | ||
| 1928 | - | ||
| 1929 | - | ||
| 1930 | - | ||
| 1931 | - | ||
| 1932 | - | ||
| 1933 | - | ||
| 1934 | - | ||
| 1935 | - | ||
| 1936 | - | ||
| 1937 | - | ||
| 1938 | - | ||
| 1939 | - | ||
| 1940 | - | ||
| 1941 | - | ||
| 1942 | - | ||
| 1943 | - | ||
| 1944 | - | ||
| 1945 | - | ||
| 1946 | - | ||
| 1947 | - | ||
| 1948 | - | ||
| 1949 | - | ||
| 1950 | - | ||
| 1951 | - | ||
| 1952 | - | ||
| 1953 | - | ||
| 1954 | - | ||
| 1955 | - | ||
| 1956 | - | ||
| 1957 | - | ||
| 1958 | - | ||
| 1959 | - | ||
| 1960 | - | ||
| 1961 | - | ||
| 1962 | - | ||
| 1963 | - | ||
| 1964 | - | ||
| 1965 | - | ||
| 1966 | - | ||
| 1967 | - | ||
| 1968 | - | ||
| 1969 | - | ||
| 1970 | - | ||
| 1971 | - | ||
| 1972 | - | ||
| 1973 | - | ||
| 1974 | - | ||
| 1975 | - | ||
| 1976 | - | ||
| 1977 | - | ||
| 1978 | - | ||
| 1979 | - | ||
| 1980 | - | ||
| 1981 | - | ||
| 1982 | - | ||
| 1983 | - | ||
| 1984 | - | ||
| 1985 | - | ||
| 1986 | - | ||
| 1987 | - | ||
| 1988 | - | ||
| 1989 | - | ||
| 1990 | - | ||
| 1991 | - | ||
| 1992 | - | ||
| 1993 | - | ||
| 1994 | - | ||
| 1995 | - | ||
| 1996 | - | ||
| 1997 | - | ||
| 1998 | - | ||
| 1999 | - | ||
| 2000 | - | ||
| 2001 | - | ||
| 2002 | - | ||
| 2003 | - | ||
| 2004 | - | ||
| 2005 | - | ||
| 2006 | - | ||
| 2007 | - | ||
| 2008 | - | ||
| 2009 | - | ||
| 2010 | - | ||
| 2011 | - | ||
| 2012 | - | ||
| 2013 | - | ||
| 2014 | - | ||
| 2015 | - | ||
| 2016 | - | ||
| 2017 | - | ||
| 2018 | - | ||
| 2019 | - | ||
| 2020 | - | ||
| 2021 | - | ||
| 2022 | - | ||
| 2023 | - | ||
| 2024 | - | ||
| 2025 | - | ||
| 2026 | - | ||
| 2027 | - | ||
| 2028 | - | ||
| 2029 | - | ||
| 2030 | - | ||
| 2031 | - | ||
| 2032 | - | ||
| 2033 | - | ||
| 2034 | - | ||
| 2035 | - | ||
| 2036 | - | ||
| 2037 | - | ||
| 2038 | - | ||
| 2039 | - | ||
| 2040 | - | ||
| 2041 | - | ||
| 2042 | - | ||
| 2043 | - | ||
| 2044 | - | ||
| 2045 | - | ||
| 2046 | - | ||
| 2047 | - | ||
| 2048 | - | ||
| 2049 | - | ||
| 2050 | - | ||
| 2051 | - | ||
| 2052 | - | ||
| 2053 | - | ||
| 2054 | - | ||
| 2055 | - | ||
| 2056 | - | ||
| 2057 | - | ||
| 2058 | - | ||
| 2059 | - | ||
| 2060 | - | ||
| 2061 | - | ||
| 2062 | - | ||
| 2063 | - | ||
| 2064 | - | ||
| 2065 | - | ||
| 2066 | - | ||
| 2067 | - | ||
| 2068 | - | ||
| 2069 | - | ||
| 2070 | - | ||
| 2071 | - | ||
| 2072 | - | ||
| 2073 | - | ||
| 2074 | - | ||
| 2075 | - | ||
| 2076 | - | ||
| 2077 | - | ||
| 2078 | - | ||
| 2079 | - | ||
| 2080 | - | ||
| 2081 | - | ||
| 2082 | - | ||
| 2083 | - | ||
| 2084 | - | ||
| 2085 | - | ||
| 2086 | - | ||
| 2087 | - | ||
| 2088 | - | ||
| 2089 | - | ||
| 2090 | - | ||
| 2091 | - | ||
| 2092 | - | ||
| 2093 | - | ||
| 2094 | - | ||
| 2095 | - | ||
| 2096 | - | ||
| 2097 | - | ||
| 2098 | - | ||
| 2099 | - | ||
| 2100 | - | ||
| 2101 | - | ||
| 2102 | - | ||
| 2103 | - | ||
| 2104 | - | ||
| 2105 | - | ||
| 2106 | - | ||
| 2107 | - | ||
| 2108 | - | ||
| 2109 | - | ||
| 2110 | - | ||
| 2111 | - | ||
| 2112 | - | ||
| 2113 | - | ||
| 2114 | - | ||
| 2115 | - | ||
| 2116 | - | ||
| 2117 | - | ||
| 2118 | - | ||
| 2119 | - | ||
| 2120 | - | ||
| 2121 | - | ||
| 2122 | - | ||
| 2123 | - | ||
| 2124 | - | ||
| 2125 | - | ||
| 2126 | - | ||
| 2127 | - | ||
| 2128 | - | ||
| 2129 | - | ||
| 2130 | - | ||
| 2131 | - | ||
| 2132 | - | ||
| 2133 | - | ||
| 2134 | - | ||
| 2135 | - | ||
| 2136 | - | ||
| 2137 | - | ||
| 2138 | - | ||
| 2139 | - | ||
| 2140 | - | ||
| 2141 | - | ||
| 2142 | - | ||
| 2143 | - | ||
| 2144 | - | ||
| 2145 | - | ||
| 2146 | - | ||
| 2147 | - | ||
| 2148 | - | ||
| 2149 | - | ||
| 2150 | - | ||
| 2151 | - | ||
| 2152 | - | ||
| 2153 | - | ||
| 2154 | - | ||
| 2155 | - | ||
| 2156 | - | ||
| 2157 | - | ||
| 2158 | - | ||
| 2159 | - | ||
| 2160 | - | ||
| 2161 | - | ||
| 2162 | - | ||
| 2163 | - | ||
| 2164 | - | ||
| 2165 | - | ||
| 2166 | - | ||
| 2167 | - | ||
| 2168 | - | ||
| 2169 | - | ||
| 2170 | - | ||
| 2171 | - | ||
| 2172 | - | ||
| 2173 | - | ||
| 2174 | - | ||
| 2175 | - | ||
| 2176 | - | ||
| 2177 | - | ||
| 2178 | - | ||
| 2179 | - | ||
| 2180 | - | ||
| 2181 | - | ||
| 2182 | - | ||
| 2183 | - | ||
| 2184 | - | ||
| 2185 | - | ||
| 2186 | - | ||
| 2187 | - | ||
| 2188 | - | ||
| 2189 | - | ||
| 2190 | - | ||
| 2191 | - | ||
| 2192 | - | ||
| 2193 | - | ||
| 2194 | - | ||
| 2195 | - | ||
| 2196 | - | ||
| 2197 | - | ||
| 2198 | - | ||
| 2199 | - | ||
| 2200 | - | ||
| 2201 | - | ||
| 2202 | - | ||
| 2203 | - | ||
| 2204 | - | ||
| 2205 | - | ||
| 2206 | - | ||
| 2207 | - | ||
| 2208 | - | ||
| 2209 | - | ||
| 2210 | - | ||
| 2211 | - | ||
| 2212 | - | ||
| 2213 | - | ||
| 2214 | - | ||
| 2215 | - | ||
| 2216 | - | ||
| 2217 | - | ||
| 2218 | - | ||
| 2219 | - | ||
| 2220 | - | ||
| 2221 | - | ||
| 2222 | - | ||
| 2223 | - | ||
| 2224 | - | ||
| 2225 | - | ||
| 2226 | - | ||
| 2227 | - | ||
| 2228 | - | ||
| 2229 | - | ||
| 2230 | - | ||
| 2231 | - | ||
| 2232 | - | ||
| 2233 | - | ||
| 2234 | - | ||
| 2235 | - | ||
| 2236 | - | ||
| 2237 | - | ||
| 2238 | - | ||
| 2239 | - | ||
| 2240 | - | ||
| 2241 | - | ||
| 2242 | - | ||
| 2243 | - | ||
| 2244 | - | ||
| 2245 | - | ||
| 2246 | - | ||
| 2247 | - | ||
| 2248 | - | ||
| 2249 | - | ||
| 2250 | - | ||
| 2251 | - | ||
| 2252 | - | ||
| 2253 | - | ||
| 2254 | - | ||
| 2255 | - | ||
| 2256 | - | ||
| 2257 | - | ||
| 2258 | - | ||
| 2259 | - | ||
| 2260 | - | ||
| 2261 | - | ||
| 2262 | - | ||
| 2263 | - | ||
| 2264 | - | ||
| 2265 | - | ||
| 2266 | - | ||
| 2267 | - | ||
| 2268 | - | ||
| 2269 | - | ||
| 2270 | - | ||
| 2271 | - | ||
| 2272 | - | ||
| 2273 | - | ||
| 2274 | - | ||
| 2275 | - | ||
| 2276 | - | ||
| 2277 | - | ||
| 2278 | - | ||
| 2279 | - | ||
| 2280 | - | ||
| 2281 | - | ||
| 2282 | - | ||
| 2283 | - | ||
| 2284 | - | ||
| 2285 | - | ||
| 2286 | - | ||
| 2287 | - | ||
| 2288 | - | ||
| 2289 | - | ||
| 2290 | - | ||
| 2291 | - | ||
| 2292 | - | ||
| 2293 | - | ||
| 2294 | - | ||
| 2295 | - | ||
| 2296 | - | ||
| 2297 | - | ||
| 2298 | - | ||
| 2299 | - | ||
| 2300 | - | ||
| 2301 | - | ||
| 2302 | - | ||
| 2303 | - | ||
| 2304 | - | ||
| 2305 | - | ||
| 2306 | - | ||
| 2307 | - | ||
| 2308 | - | ||
| 2309 | - | ||
| 2310 | - | ||
| 2311 | - | ||
| 2312 | - | ||
| 2313 | - | ||
| 2314 | - | ||
| 2315 | - | ||
| 2316 | - | ||
| 2317 | - | ||
| 2318 | - | ||
| 2319 | - | ||
| 2320 | - | ||
| 2321 | - | ||
| 2322 | - | ||
| 2323 | - | ||
| 2324 | - | ||
| 2325 | - | ||
| 2326 | - | ||
| 2327 | - | ||
| 2328 | - | ||
| 2329 | - | ||
| 2330 | - | ||
| 2331 | - | ||
| 2332 | - | ||
| 2333 | - | ||
| 2334 | - | ||
| 2335 | - | ||
| 2336 | - | ||
| 2337 | - | ||
| 2338 | - | ||
| 2339 | - | ||
| 2340 | - | ||
| 2341 | - | ||
| 2342 | - | ||
| 2343 | - | ||
| 2344 | - | ||
| 2345 | - | ||
| 2346 | - | ||
| 2347 | - | ||
| 2348 | - | ||
| 2349 | - | ||
| 2350 | - | ||
| 2351 | - | ||
| 2352 | - | ||
| 2353 | - | ||
| 2354 | - | ||
| 2355 | - | ||
| 2356 | - | ||
| 2357 | - | ||
| 2358 | - | ||
| 2359 | - | ||
| 2360 | - | ||
| 2361 | - | ||
| 2362 | - | ||
| 2363 | - | ||
| 2364 | - | ||
| 2365 | - | ||
| 2366 | - | ||
| 2367 | - | ||
| 2368 | - | ||
| 2369 | - | ||
| 2370 | - | ||
| 2371 | - | ||
| 2372 | - | ||
| 2373 | - | ||
| 2374 | - | ||
| 2375 | - | ||
| 2376 | - | ||
| 2377 | - | ||
| 2378 | - | ||
| 2379 | - | ||
| 2380 | - | ||
| 2381 | - | ||
| 2382 | - | ||
| 2383 | - | ||
| 2384 | - | ||
| 2385 | - | ||
| 2386 | - | ||
| 2387 | - | ||
| 2388 | - | ||
| 2389 | - | ||
| 2390 | - | ||
| 2391 | - | ||
| 2392 | - | ||
| 2393 | - | ||
| 2394 | - | ||
| 2395 | - | ||
| 2396 | - | ||
| 2397 | - | ||
| 2398 | - | ||
| 2399 | - | ||
| 2400 | - | ||
| 2401 | - | ||
| 2402 | - | ||
| 2403 | - | ||
| 2404 | - | ||
| 2405 | - | ||
| 2406 | - | ||
| 2407 | - | ||
| 2408 | - | ||
| 2409 | - | ||
| 2410 | - | ||
| 2411 | - | ||
| 2412 | - | ||
| 2413 | - | ||
| 2414 | - | ||
| 2415 | - | ||
| 2416 | - | ||
| 2417 | - | ||
| 2418 | - | ||
| 2419 | - | ||
| 2420 | - | ||
| 2421 | - | ||
| 2422 | - | ||
| 2423 | - | ||
| 2424 | - | ||
| 2425 | - | ||
| 2426 | - | ||
| 2427 | - | ||
| 2428 | - | ||
| 2429 | - | ||
| 2430 | - | ||
| 2431 | - | ||
| 2432 | - | ||
| 2433 | - | ||
| 2434 | - | ||
| 2435 | - | ||
| 2436 | - | ||
| 2437 | - | ||
| 2438 | - | ||
| 2439 | - | ||
| 2440 | - | ||
| 2441 | - | ||
| 2442 | - | ||
| 2443 | - | ||
| 2444 | - | ||
| 2445 | - | ||
| 2446 | - | ||
| 2447 | - | ||
| 2448 | - | ||
| 2449 | - | ||
| 2450 | - | ||
| 2451 | - | ||
| 2452 | - | ||
| 2453 | - | ||
| 2454 | - | ||
| 2455 | - | ||
| 2456 | - | ||
| 2457 | - | ||
| 2458 | - | ||
| 2459 | - | ||
| 2460 | - | ||
| 30 | + | ```text | |
| 31 | + | code(); | |
| 32 | + | ``` | |
| 33 | + | ||
| 34 | + | will be changed to line with 2 leading spaces: | |
| 35 | + | ||
| 36 | + | ```text | |
| 37 | + | //code(); | |
| 38 | + | ``` | |
| 39 | + | ||
| 40 | + | After uncommenting, line will be restored to original, with 4 leading spaces. | |
| 41 | + | ||
| 42 | + | **(Line "at non-space") If selected few lines, insert comment at maximal common indent** | |
| 43 | + | ||
| 44 | + | Affects commands: | |
| 45 | + | ||
| 46 | + | - "Toggle line comment, at non-space char" | |
| 47 | + | - "Add line comment, at non-space char" | |
| 48 | + | ||
| 49 | + | With option on, this selected block of lines in C++: | |
| 50 | + | ||
| 51 | + | ```text | |
| 52 | + | code1(); | |
| 53 | + | code2(); | |
| 54 | + | code3(); | |
| 55 | + | ``` | |
| 56 | + | ||
| 57 | + | will be changed to: | |
| 58 | + | ||
| 59 | + | ```text | |
| 60 | + | // code1(); | |
| 61 | + | //code2(); | |
| 62 | + | // code3(); | |
| 63 | + | ``` | |
| 64 | + | ||
| 65 | + | With option off, block will be changed to: | |
| 66 | + | ||
| 67 | + | ```text | |
| 68 | + | //code1(); | |
| 69 | + | //code2(); | |
| 70 | + | //code3(); | |
| 71 | + | ``` | |
| 72 | + | ||
| 73 | + | **(All) Move caret to next line** | |
| 74 | + | ||
| 75 | + | Affects commands for line-comments, when they are called without selection. | |
| 76 | + | ||
| 77 | + | With option on, caret will be moved 1 line down. This allows to call the command many times repeatedly, to change many lines. | |
| 78 | + | ||
| 79 | + | **(Line commands) Skip blank lines** | |
| 80 | + | ||
| 81 | + | Affects commands for line-comments, when they are called without selection. | |
| 82 | + | ||
| 83 | + | With option on, and the previous option "Move caret to next line" on, command will skip lines containing only space/tab chars. | |
| 84 | + | ||
| 85 | + | **"Toggle line comment" detects action by first non-blank line** | |
| 86 | + | ||
| 87 | + | Affects command "Toggle line comment". | |
| 88 | + | ||
| 89 | + | With option on, command detects its action (to comment or to uncomment) by the first non-blank line of the selected multi-line block. | |
| 90 | + | ||
| 91 | + | Here is selected block of code, selection is shown by square brackets, first selected line is blank line: | |
| 92 | + | ||
| 93 | + | ```text | |
| 94 | + | [ | |
| 95 | + | ||
| 96 | + | //code1(); | |
| 97 | + | code2(); | |
| 98 | + | //code3(); | |
| 99 | + | code4(); | |
| 100 | + | ] | |
| 101 | + | ``` | |
| 102 | + | ||
| 103 | + | With option off, block will be changed it to: | |
| 104 | + | ||
| 105 | + | ```text | |
| 106 | + | [// | |
| 107 | + | // | |
| 108 | + | //code1(); | |
| 109 | + | //code2(); | |
| 110 | + | //code3(); | |
| 111 | + | //code4(); | |
| 112 | + | ] | |
| 113 | + | ``` | |
| 114 | + | ||
| 115 | + | With option on, block will be changed to: | |
| 116 | + | ||
| 117 | + | ```text | |
| 118 | + | [ | |
| 119 | + | ||
| 120 | + | code1(); | |
| 121 | + | code2(); | |
| 122 | + | code3(); | |
| 123 | + | code4(); | |
| 124 | + | ] | |
| 125 | + | ``` | |
| 126 | + | ||
| 127 | + | ## Macros | |
| 128 | + | ||
| 129 | + | Macro is a sequence of CudaText actions, which can be saved to a file and invoked later by some command. To use macros, you must install plugin "Macros" from Addon Manager. It adds "Macros" menu to CudaText main menu bar. This menu gives items: | |
| 130 | + | ||
| 131 | + | - Macros... | |
| 132 | + | - Start/stop recording | |
| 133 | + | - Playback last recorded macro | |
| 134 | + | - Export... | |
| 135 | + | - Import... | |
| 136 | + | - items for saved macros | |
| 137 | + | ||
| 138 | + | 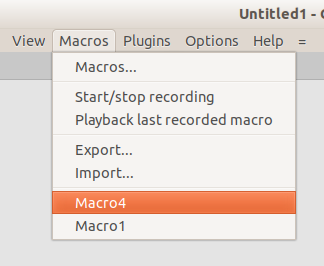 | |
| 139 | + | ||
| 140 | + | To record a macro: | |
| 141 | + | ||
| 142 | + | - Call menu item "Macros / Start/stop recording", or use dialog "Macros / Macros..." which gives the button for this. | |
| 143 | + | - Perform some actions in CudaText: | |
| 144 | + | - built-in commands, plugin commands (invoked by hotkey, by menu, by Command Palette) | |
| 145 | + | - some mouse actions (clicks/selections, they save/playback relative to caret position) | |
| 146 | + | - calling of Find/Replace dialog, "Go to" dialog | |
| 147 | + | - actions in Find/Replace dialog | |
| 148 | + | - Call menu item "Macros / Start/stop recording" again, plugin will ask for macro name. | |
| 149 | + | ||
| 150 | + | During recording, CudaText shows reddish border around the editor field. | |
| 151 | + | ||
| 152 | + | 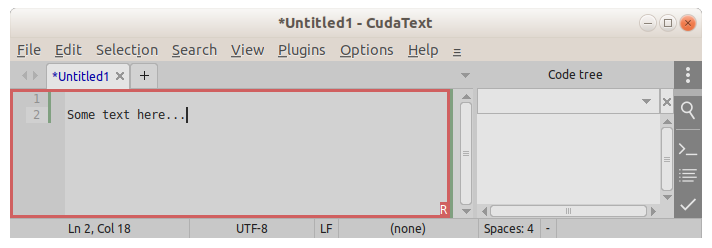 | |
| 153 | + | ||
| 154 | + | Macro saves action(s) performed inside its original editor ui-tab (but not other ui-tabs). Calling of additional dialogs (including plugin dialogs) will be recorded too. But macro doesn't save actions inside those dialogs. | |
| 155 | + | ||
| 156 | + | To playback macro: | |
| 157 | + | ||
| 158 | + | - Call menu item "Macros / macro_name", the end of this menu lists all available/saved macros. | |
| 159 | + | - Or call dialog "Macros / Macros...", which allows to run all available macros: | |
| 160 | + | - running 1 time | |
| 161 | + | - running specified count of times | |
| 162 | + | - running in the loop, by options: | |
| 163 | + | - While text changes | |
| 164 | + | - Until caret on last line | |
| 165 | + | ||
| 166 | + | ### Macro example | |
| 167 | + | ||
| 168 | + | For example, we have text line with HTML tags like this ("\|" shows the caret): | |
| 169 | + | ||
| 170 | + | ```text | |
| 171 | + | ....<tag>....|...........</tag>.... | |
| 172 | + | ``` | |
| 173 | + | ||
| 174 | + | For example, we need a macro which selects text from lefter "\>" char to righter "\<" char (ie text inside HTML tag). This action can be done via "markers" commands in Command Palette: "drop marker at caret" and "select to last marker". | |
| 175 | + | ||
| 176 | + | So, during macro recording, run these commands: | |
| 177 | + | ||
| 178 | + | - call Find dialog (or focus it with mouse), search for "\>" with "Find previous" button | |
| 179 | + | - right-arrow key (to reset the selection) | |
| 180 | + | - "markers: drop marker at caret" | |
| 181 | + | - call Find dialog again (or focus it with mouse), search for "\<" with "Find next" button | |
| 182 | + | - left-arrow key, 2 times (to reset the selection) | |
| 183 | + | - "markers: select to last marker" | |
| 184 | + | - "markers: remove all" | |
| 185 | + | ||
| 186 | + | ## Project Manager | |
| 187 | + | ||
| 188 | + | This plugin is preinstalled in CudaText. It shows panel "Project" in the sidebar (to show this panel, call plugin by any command, or call "File / Open folder..." menu item which opens any folder as a "project"). On the project panel, on its tree-view, you can add several "root nodes", each node must be existing file or folder. For folder nodes, plugin auto shows all nested folders. You cannot add nodes on other levels, sub-nodes are auto populated from root folder nodes. | |
| 189 | + | ||
| 190 | + | Plugin has context menu on its panel, with items: | |
| 191 | + | ||
| 192 | + | - **Project file** | |
| 193 | + | - New project | |
| 194 | + | - Open project | |
| 195 | + | - Recent projects | |
| 196 | + | - Save project as... | |
| 197 | + | - Go to file... - this shows menu with all project files, and then tree-view selection jumps on selected file | |
| 198 | + | - Project properties... - this shows dialog with current project's options | |
| 199 | + | - Config... - this shows dialog with global Project Manager options | |
| 200 | + | - **Root nodes** - commands for nodes on the project's root level | |
| 201 | + | - Add folder... | |
| 202 | + | - Add file... | |
| 203 | + | - Clear project | |
| 204 | + | - Remove node | |
| 205 | + | - **Selected file** - it's shown only for files | |
| 206 | + | - **Selected directory** - it's shown only for folders | |
| 207 | + | - **Refresh** - it re-reads state of files/folders from disk | |
| 208 | + | ||
| 209 | + | To manage the selected file/folder, use context menu items "Selected file"/"Selected directory". They give useful sub-items for file operations, like shown on the picture: | |
| 210 | + | ||
| 211 | + | 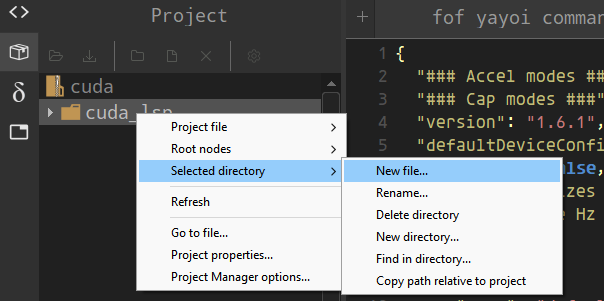 | |
| 212 | + | ||
| 213 | + | Any project can have **main file**, you can choose it in the context menu: "Selected file / Set as main file". Main file's path is used by plugin External Tools, when some tool is configured with macro {ProjMainFile}. This allows tools to run compilation of the main file. | |
| 214 | + | ||
| 215 | + | Sometimes you may want **to forget the "temporary" project** which CudaText may create from Windows Explorer context menu. To do this, just call "Project file / New project" from the right-click menu over the project panel. This does not delete the file "settings/temporary.cuda-proj", but that file will be overwritten soon. | |
| 216 | + | ||
| 217 | + | ### Project Manager options dialog | |
| 218 | + | ||
| 219 | + | "Ignore files" | |
| 220 | + | ";"-separated shell wildcards, which are [documented here](https://docs.python.org/3/library/fnmatch.html). If file name (without path) matches any of these wildcards, it will not be listed in the treeview. | |
| 221 | + | ||
| 222 | + | "Ignore folders" | |
| 223 | + | ";"-separated shell wildcards. If folder name matches any of these wildcards, it will not be listed in the treeview. | |
| 224 | + | ||
| 225 | + | "Ignore all hidden files/folders" | |
| 226 | + | Additionally don't list all hidden items. On Unix, hidden mean "beginning with dot". On Windows, hidden means having file-system "hidden" attribute. | |
| 227 | + | ||
| 228 | + | "Open file after "Go to file" command" | |
| 229 | + | If turned on, command "Project Manager: Go to file" will not only jump to chosen file in the treeview, but also open that file in editor. | |
| 230 | + | ||
| 231 | + | "Use 'preview tab' on item clicking" | |
| 232 | + | If option is on, single click on treeview file item, will open file in "preview tab". Preview tab is single such tab, it's shared by all files, it has italic+underlined tab title. If option is off, clicking file item will open normal tab, separate normal tabs per each file. | |
| 233 | + | ||
| 234 | + | "Open files by double-click" | |
| 235 | + | If turned on, only double-click in the treeview will open file for editing, but not the single click. | |
| 236 | + | ||
| 237 | + | "On opening file in Git/SVN repo..." | |
| 238 | + | On opening a file in CudaText, Project Manager will check if this file is in the Git/SVN repository (by presence of the folder ".git" or ".svn" near the file, or in upper level folders). If yes, Project Manager will create the project from that repository and open it. This gives some slowdown of course. | |
| 239 | + | ||
| 240 | + | "Suggest to close tabs not belonging to project" | |
| 241 | + | See #Sessions embedded to project. | |
| 242 | + | ||
| 243 | + | And options for icons: | |
| 244 | + | ||
| 245 | + | "File type icons" | |
| 246 | + | Set of file/folder icons for treeview. You can install additional themes from Addons Manager, see category "filetypeicons" there. Example of such theme: "VSCode Material 24x24". This option shows themes, which are present in the folder "data/filetypeicons". | |
| 247 | + | ||
| 248 | + | "Toolbar icons" | |
| 249 | + | Set of icons for Project Manager toolbar buttons. You can install additional themes from Addon Manager, see the category "projtoolbaricons" there. This option shows themes, which are present in the folder "data/projtoolbaricons". | |
| 250 | + | ||
| 251 | + | ### Preview tab | |
| 252 | + | ||
| 253 | + | To see the "preview tab", call "File / Open folder" and choose a folder with some files. Folder will be opened in the side panel "Project". Make single click on a file in this project, it will open in the "preview tab". Single "preview tab" is shared by all clicked (in the project) files. It has italic font style of the caption (font style is customizable). When you begin to edit file in the "preview tab", tab becomes "normal" and looses its special status. | |
| 254 | + | ||
| 255 | + | "Preview tab" is always **created in the first tab-group**, even if the focused editor is located in different tab-group. It was made on purpose, to avoid the situation when "preview tab" jumps from one tab-group to another. | |
| 256 | + | ||
| 257 | + | Again, if you click different items in the Project Manager, and files are opened **in the first tab-group**, it's not a bug. If you need to open clicked files in different tab-groups, you can do it - by unchecking the option "Use preview tab on item clicking" in the Project Manager options. | |
| 258 | + | ||
| 259 | + | "Preview tab" can be dragged to another tab-group, it should work there too. | |
| 260 | + | ||
| 261 | + | ### Switch between projects | |
| 262 | + | ||
| 263 | + | 1\) To switch to different project, Plugin Manager gives the context menu: "Project File / Recent projects / name.cuda-proj". | |
| 264 | + | ||
| 265 | + | 2\) Another way is using the plugin "Favorites". It gives the dialog (can be called by a hotkey), with 2 tabs: "Files" and "Projects", so you can choose one of your favorite projects from a listbox. | |
| 266 | + | ||
| 267 | + | 3\) There is also a way to quickly switch between projects: | |
| 268 | + | ||
| 269 | + | - Install plugins: "Config Toolbar", "External Tools" and "Session Manager". Restart CudaText. | |
| 270 | + | - Set CudaText option "ui_one_instance": true. | |
| 271 | + | - In "External Tools" make a tool which starts CudaText (yes, from within CudaText) with parameter: full path of a project. The command line can look like: "c:\Apps\cudatext.exe "c:\Apps\some_project.cuda-proj"". You can add here additional parameter: full path of a session file, *.cuda-session / *.json. So this external tool will open given project (and maybe a session too). It will open it inside the same CudaText instance (because "ui_one_instance":true). | |
| 272 | + | - Add more such tools in the "External Tools", for different projects (and maybe sessions). | |
| 273 | + | ||
| 274 | + | 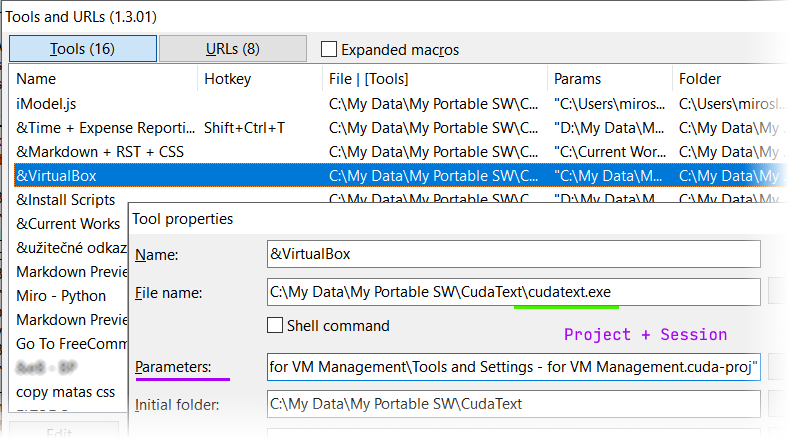 | |
| 275 | + | ||
| 276 | + | - In the plugin "Config Toolbar", add the toolbar drop-down menu, with menu-items referring to different tools. Or add the individual menu-items for separate tools. | |
| 277 | + | ||
| 278 | + | 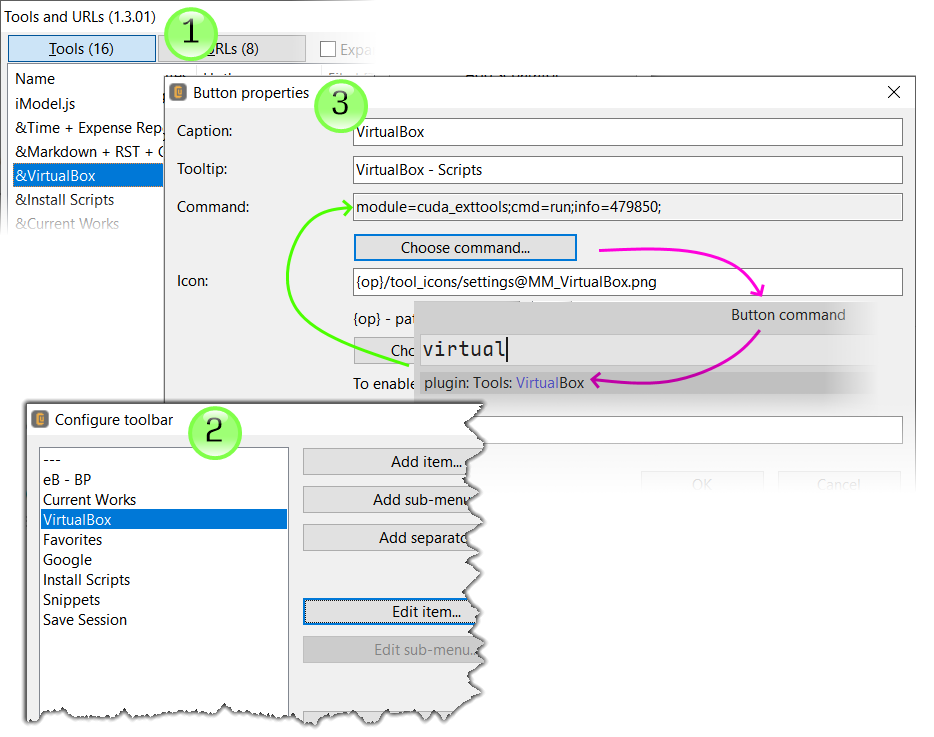 | |
| 279 | + | ||
| 280 | + | 4\) | |
| 281 | + | ||
| 282 | + | - Install plugin "Config Toolbar" (only 1 plugin here, comparing to the previous method). | |
| 283 | + | - CudaText option "ui_one_instance" can be any. | |
| 284 | + | - In the plugin "Config Toolbar", add the toolbar button which will switch the project and/or session. The properties of this button are tricky. In the "Command" property of the button, you must enter "exec=path_of_project_file path_of_session file". You cannot type this directly to the dialog field, but you should press the "Enter command line..." button in the dialog and enter the command line contents (full path of .cuda-proj file and/or full path of .cuda-session file). "Config Toolbar" will store your command line with the "exec=" prefix. | |
| 285 | + | - CudaText will use the new command-line which you entered after "exec=". | |
| 286 | + | ||
| 287 | + | ### Sessions embedded to project | |
| 288 | + | ||
| 289 | + | CudaText supports sessions which are not separate JSON files (*.cuda-session or *.json) but are embedded into project file (*.cuda-proj). Session is still having the same JSON format, but it's nested 2 levels into the project JSON file. Such embedded sessions are visible only to the Project Manager. When an embedded session is active, CudaText window title shows this in curly brackets: "{project_name:session_name}". | |
| 290 | + | ||
| 291 | + | To control sessions, use the "gear" button on the Project Manager toolbar. Several menu items are there: | |
| 292 | + | ||
| 293 | + | - "Project session: name". One or more menu items, one item per each session. | |
| 294 | + | - "Save session...". Shows text input prompt, to name a session (you will be warned if you use incorrect characters or session already exists). | |
| 295 | + | - "Delete session". Shows menu to choose which session to delete from the project. | |
| 296 | + | - "Set default session". After you choose a session here, it will be marked in the project file, and will be auto-loaded on next project opening. | |
| 297 | + | - "Forget session, close all tabs". | |
| 298 | + | ||
| 299 | + | Project Manager has the option checkbox "Suggest to close tabs not belonging to project". When option is on, you will see such confirmation message box: | |
| 300 | + | ||
| 301 | + | ```text | |
| 302 | + | CudaText has opened 3 tab(s) not belonging to the project "name". Close them? | |
| 303 | + | /path/to/file1 | |
| 304 | + | /path2/to/file2 | |
| 305 | + | *Untitled1 | |
| 306 | + | ``` | |
| 307 | + | ||
| 308 | + | You will see this confirmation when doing: | |
| 309 | + | ||
| 310 | + | - "New project" action (from Project Manager context menu, or from Command Palette) | |
| 311 | + | - "Save session..." action (from "gear" popup menu, or from Command Palette) | |
| 312 | + | ||
| 313 | + | You can disable that option (or press "Cancel" in the confirmation), to save even "not belonging" opened files to embedded session. | |
| 314 | + | ||
| 315 | + | ## How to bind a hotkey to insert a snippet | |
| 316 | + | ||
| 317 | + | You can create plugin to insert any text fragment by any hotkey. First, create the plugin which gives the command to insert your fragment. Next, find this plugin in the Command Palette, press F9 and assign a hotkey there. | |
| 318 | + | ||
| 319 | + | Let's show how to make a primitive plugin which has 2 primitive commands: | |
| 320 | + | ||
| 321 | + | - Insert snippet "AA" at the caret position (supporting multi-carets). | |
| 322 | + | - Surround current line with square brackets. | |
| 323 | + | ||
| 324 | + | Make a new plugin by calling menu item "Plugins / Make Plugin". Fieds of dialog: | |
| 325 | + | ||
| 326 | + | - "Plugin name": set to "My plugin". | |
| 327 | + | - "Python module name": set to "my_snippet". | |
| 328 | + | - "Commands caption\>method": set 2 lines: | |
| 329 | + | ||
| 330 | + | ```text | |
| 331 | + | My snippet>my_snippet | |
| 332 | + | My edit>my_edit | |
| 333 | + | ``` | |
| 334 | + | ||
| 335 | + | This will generate new plugin with 2 methods in the file "__init__.py": my_snippet and my_edit. Code will be like this: | |
| 336 | + | ||
| 337 | + | ``` python | |
| 338 | + | def my_snippet(self): | |
| 339 | + | # | |
| 340 | + | # | |
| 341 | + | # | |
| 342 | + | msg_box(s, MB_OK) | |
| 343 | + | ||
| 344 | + | def my_edit(self): | |
| 345 | + | pass | |
| 346 | + | ``` | |
| 347 | + | ||
| 348 | + | At the top of the Python file, near "import" operators, add: | |
| 349 | + | ||
| 350 | + | ``` python | |
| 351 | + | import cudatext_cmd as cmds | |
| 352 | + | ``` | |
| 353 | + | ||
| 354 | + | Now edit methods my_snippet / my_edit: | |
| 355 | + | ||
| 356 | + | ``` python | |
| 357 | + | def my_snippet(self): | |
| 358 | + | ''' Insert my snippet ''' | |
| 359 | + | ed.cmd(cmds.cCommand_TextInsert, 'AA') | |
| 360 | + | ||
| 361 | + | def my_edit(self): | |
| 362 | + | ''' Surround line with brackets ''' | |
| 363 | + | x, y, x1, y1 = ed.get_carets()[0] | |
| 364 | + | s = ed.get_text_line(y) | |
| 365 | + | s = '[' + s + ']' | |
| 366 | + | ed.set_text_line(y, s) | |
| 367 | + | msg_status('Edited!') | |
| 368 | + | ``` | |
| 369 | + | ||
| 370 | + | All done. Restart CudaText. You must have new menu items: | |
| 371 | + | ||
| 372 | + | - "Plugins / My plugin / My snippet" | |
| 373 | + | - "Plugins / My plugin / My edit" | |
| 374 | + | ||
| 375 | + | In the Command Palette, find these new commands, press F9 to set hotkey for them. | |
| 376 | + | ||
| 377 | + | ## Snippets | |
| 378 | + | ||
| 379 | + | To use snippets you need: | |
| 380 | + | ||
| 381 | + | - Plugin "Snippets" (install from Addon Manager) | |
| 382 | + | - Snippet package for needed lexer (install from Addon Manager) | |
| 383 | + | ||
| 384 | + | Each snippet has a name (shown in the dialog when Snippets plugin is called) and short id (letters, digits, '_', dot). You can type id in the editor and press the Tab key: snippet for this id will be inserted into text. You can also call the menu of snippets: menu item "Plugins / Snippets / Snippets menu...". | |
| 385 | + | ||
| 386 | + | Only those snippets are enabled, which are suitable for the current lexer. Snippet's "lexer" property can be "C,C++,Objective C" - then snippet is enabled only when one of these 3 lexers is active. If snippet has empty "lexer" property, it is always enabled. | |
| 387 | + | ||
| 388 | + | Dialog of Snippets plugin: | |
| 389 | + | ||
| 390 | + | 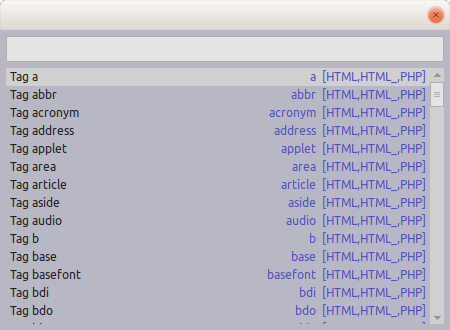 | |
| 391 | + | ||
| 392 | + | Texts of snippets usually have tab-stop(s), e.g. \${1:some_text}. Plugin Snippets finds tab-stops and places "markers" for them. After markers are placed, Tab-key works specially: it jumps to the next marker. See detailed information in the [[CudaText|CudaText#Markers]]. | |
| 393 | + | ||
| 394 | + | Plugin supports two snippets folder, but formats of data are the same, VSCode JSON format: | |
| 395 | + | ||
| 396 | + | - CudaText snippets. These are packages with prefix "snippets_ct" in the Addons Manager. They are installed into folder CudaText/data/snippets_ct. | |
| 397 | + | - VSCode snippets. These are VSCode packages located in the VSCode repositories. Read the separate topic about them below. They are installed to folder CudaText/data/snippets_vs. | |
| 398 | + | ||
| 399 | + | ### Snippets from VSCode | |
| 400 | + | ||
| 401 | + | Since recent versions, Snippets plugin supports snippets from VSCode editor. It gives menu items in "Plugins / Snippets": | |
| 402 | + | ||
| 403 | + | - "Install VSCode snippets..." - this suggests to install packages with snippets (packages usually contain more functionality, and CudaText plugin will install only snippets). | |
| 404 | + | ||
| 405 | + | 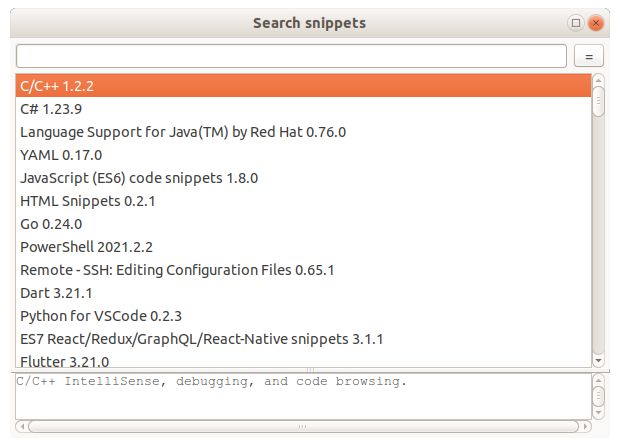 | |
| 406 | + | ||
| 407 | + | - "Remove VSCode snippets" | |
| 408 | + | - "Visit homepage of VSCode snippets..." | |
| 409 | + | - "Convert snippets package from old format" - this takes snippets in old .cuda-snippet format (if you have some old ones) and converts them to VSCode JSON format. | |
| 410 | + | ||
| 411 | + | Plugin also gives the fully featured snippet editor dialog, in menu item "Add/edit snippets...". | |
| 412 | + | ||
| 413 | + | 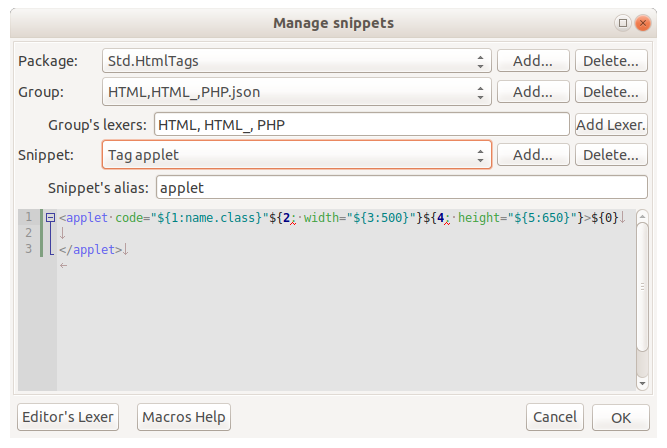 | |
| 414 | + | ||
| 415 | + | You can create group of snippets (in the "Manage snippets" dialog) for all lexers. To do so, enter "*" value in the "Group's lexers" field of dialog. | |
| 416 | + | ||
| 417 | + | Currently most of VSCode/TextMate "macros" are supported in snippets body, but not all. Refer to readme file of the plugin. | |
| 418 | + | ||
| 419 | + | ### Snippets for HTML tags | |
| 420 | + | ||
| 421 | + | CudaText has preinstalled 120+ snippets for HTML tags. (You still need to install Snippets plugin.) They are enabled with HTML lexer. Just type tag name without a bracket, press Tab, and snippet is inserted. E.g. "a"\<Tab\> will insert: | |
| 422 | + | ||
| 423 | + | ```text | |
| 424 | + | <a href="http" title="Title" target="_blank"></a> | |
| 425 | + | ``` | |
| 426 | + | ||
| 427 | + | These snippets have markers, so Tab key jumps to the next marker. Last marker is usually placed after the entire tag, ie after "\>" bracket. | |
| 428 | + | ||
| 429 | + | ### Format of snippet files | |
| 430 | + | ||
| 431 | + | #### Snippets tab-stops | |
| 432 | + | ||
| 433 | + | Specify tab-stops in the snippet text like this: | |
| 434 | + | ||
| 435 | + | - \${NN} | |
| 436 | + | - \${NN:default text} | |
| 437 | + | ||
| 438 | + | This places markers (AKA tab-stops) in the editor, marker index NN should be from 0 to 40. After snippet insertion, tab-key goes to next marker(s) and deletes it. | |
| 439 | + | ||
| 440 | + | - Markers can be listed in any order (e.g. marker 4 can be between 1 and 2). | |
| 441 | + | - Tab-key first goes to marker 1, 2, 3... and marker 0 is always the last. | |
| 442 | + | - Markers with the same indexes will place multi-carets. | |
| 443 | + | - Nested markers (with default text) are allowed, but only with one nesting level, e.g. \${2:text is {\$3:here}}. | |
| 444 | + | - Marker with default text \${NN:...} can specify multi-line default text (character "}" is on another line of snippet). | |
| 445 | + | ||
| 446 | + | #### Snippets macros | |
| 447 | + | ||
| 448 | + | Special macros are handled by Snippets plugin in snippet text: | |
| 449 | + | ||
| 450 | + | - \${sel} - Text selected before snippet insertion (if snippet called with Tab key, it's empty string) | |
| 451 | + | - \${cp} - Current clipboard contents | |
| 452 | + | ||
| 453 | + | - \${cmt_start} - Current lexer's "block comment" start symbols (or empty string) | |
| 454 | + | - \${cmt_end} - Current lexer's "block comment" end symbols (or empty string) | |
| 455 | + | - \${cmt_line} - Current lexer's "line comment" symbols (or empty string) | |
| 456 | + | ||
| 457 | + | - \${fname} - File name only, without path | |
| 458 | + | - \${fpath} - Full file name, with path | |
| 459 | + | - \${fdir} - Directory of file | |
| 460 | + | - \${fext} - Extension of file | |
| 461 | + | - \${psep} - OS path separator: backslash on Windows, slash on Unix | |
| 462 | + | ||
| 463 | + | - \${date:nnnn} - Current date/time formatted by string "nnnn"; see [Python docs](http://strftime.org/) | |
| 464 | + | - \${env:nnnn} - Value of OS environment variable "nnnn" | |
| 465 | + | - \${cmd:nnnn} - Execute shell command "nnnn" and get its output (space-separated arguments are supported, '~' for home-directory is supported on Unix) | |
| 466 | + | ||
| 467 | + | The following macros from Sublime Text editor are supported. They can be written as \$NAME or as \${NAME}. | |
| 468 | + | ||
| 469 | + | - \$TM_SELECTED_TEXT - The currently selected text or the empty string | |
| 470 | + | - \$TM_CURRENT_LINE - The contents of the current line | |
| 471 | + | - \$TM_CURRENT_WORD - The contents of the word under cursor or the empty string | |
| 472 | + | - \$TM_LINE_INDEX - The zero-based line number | |
| 473 | + | - \$TM_LINE_NUMBER - The one-based line number | |
| 474 | + | - \$TM_FILEPATH - The full file path of the current document | |
| 475 | + | - \$TM_DIRECTORY - The directory of the current document | |
| 476 | + | - \$TM_FILENAME - The filename of the current document | |
| 477 | + | - \$TM_FILENAME_BASE - The filename of the current document without its extensions | |
| 478 | + | - \$CLIPBOARD - The contents of your clipboard | |
| 479 | + | - \$WORKSPACE_NAME - The name of the opened workspace or folder | |
| 480 | + | ||
| 481 | + | - \$BLOCK_COMMENT_START - Current lexer's "block comment" start symbols (or empty string) | |
| 482 | + | - \$BLOCK_COMMENT_END - Current lexer's "block comment" end symbols (or empty string) | |
| 483 | + | - \$LINE_COMMENT - Current lexer's "line comment" symbols (or empty string) | |
| 484 | + | ||
| 485 | + | For inserting the current date and time: | |
| 486 | + | ||
| 487 | + | - \$CURRENT_YEAR - The current year | |
| 488 | + | - \$CURRENT_YEAR_SHORT - The current year's last two digits | |
| 489 | + | - \$CURRENT_MONTH - The month as two digits (e.g. '02') | |
| 490 | + | - \$CURRENT_MONTH_NAME - The full name of the month (e.g. 'July') | |
| 491 | + | - \$CURRENT_MONTH_NAME_SHORT - The short name of the month (e.g. 'Jul') | |
| 492 | + | - \$CURRENT_DATE - The day of the month | |
| 493 | + | - \$CURRENT_DAY_NAME - The name of day (e.g. 'Monday') | |
| 494 | + | - \$CURRENT_DAY_NAME_SHORT - The short name of the day (e.g. 'Mon') | |
| 495 | + | - \$CURRENT_HOUR - The current hour in 24-hour clock format | |
| 496 | + | - \$CURRENT_MINUTE - The current minute | |
| 497 | + | - \$CURRENT_SECOND - The current second | |
| 498 | + | - \$CURRENT_SECONDS_UNIX - The number of seconds since the Unix epoch | |
| 499 | + | ||
| 500 | + | ## Snippet Panel | |
| 501 | + | ||
| 502 | + | Plugin "Snippet Panel" is preinstalled in CudaText. It gives an alternative way to use short text fragments (only simple ones) in editor. It adds button to sidebar, and command "Plugins / Snippet Panel". When called, plugin shows panel in the sidebar, with a drop-down list of folders, which contain several "snippets". You can double-click snippets to insert them into text (multi-carets are supported). | |
| 503 | + | ||
| 504 | + | Preinstalled folders: | |
| 505 | + | ||
| 506 | + | - Arrows | |
| 507 | + | - Currency symbols | |
| 508 | + | - Greek alphabet (lower) | |
| 509 | + | - Greek alphabet (upper) | |
| 510 | + | - HTML - Arrows | |
| 511 | + | - HTML - Color names | |
| 512 | + | - HTML - Color names+values | |
| 513 | + | - HTML - Letters | |
| 514 | + | - HTML - Math symbols | |
| 515 | + | - HTML - Special characters | |
| 516 | + | - Math symbols | |
| 517 | + | - Quote selection | |
| 518 | + | - Special characters | |
| 519 | + | ||
| 520 | + | Plugin looks for its folders in two places: | |
| 521 | + | ||
| 522 | + | - Folder "clips" in the plugin folder. | |
| 523 | + | - Folder CudaText/data/clips, which is absent by default, for custom user folders. | |
| 524 | + | ||
| 525 | + | Each snippet folder can contain one or more .txt files, in UTF-8 (no BOM) or UTF-16 (with BOM) encoding. Files have snippet per line, in the form "name=value" or simply "name" (if value missed, it equals to name). Each snippet can be simple short string, or string with \${sel} macro to replace selected text. This allows to quote currently selected text by calling snippets from "Quote selection" folder. | |
| 526 | + | ||
| 527 | + | ## CudaLint | |
| 528 | + | ||
| 529 | + | CudaLint plugin allows to check correctness of documents in many syntaxes. It was initially ported from SublimeLinter 2.x plugin for Sublime Text. Each lexer must be supported with additionally installed linter, for example: | |
| 530 | + | ||
| 531 | + | - JavaScript is supported with linter based on JSLint tool, | |
| 532 | + | - HTML is supported with linter based on HTML Tidy tool, | |
| 533 | + | - CSS is supported with linter based on CSSLint tool, | |
| 534 | + | - etc | |
| 535 | + | ||
| 536 | + | You will find all linters in the Addon Manager: "Plugins / Addon Manager / Install". Linters are installable like other plugins but they don't add commands, they only add folders "\[CudaText\]/py/cuda_lint_*", which are automatically used by CudaLint. After you install a linter, see readme in its folder, maybe how-to-use info is written there. | |
| 537 | + | ||
| 538 | + | ### Linters - usage | |
| 539 | + | ||
| 540 | + | To run linting, use menu item "Plugins / CudaLint / Lint", or set hotkey to this command (in CudaText Command Palette, press F9). You will see statusbar message, which tells how many errors linter found. For each found error, you'll see yellow/red bookmark (you can use usual commands for these bookmarks). Plugin also shows list of errors in the "Validate" panel (to show Validate panel, click V icon on the CudaText sidebar). | |
| 541 | + | ||
| 542 | + | Linting can also be run by events: | |
| 543 | + | ||
| 544 | + | - after opening file | |
| 545 | + | - on saving file | |
| 546 | + | - after text is changed + pause passed | |
| 547 | + | ||
| 548 | + | Events aren't used by default (to not slowdown usual work). To use events, you must enable them in config. Call config by menu item in "Options / Settings-plugins". | |
| 549 | + | ||
| 550 | + | ### Linters - Node.js | |
| 551 | + | ||
| 552 | + | Some linters require Node.js, so for those linters, you must install Node first. Those linters are sometimes shipped with Node modules preinstalled (in plugin folder) and sometimes you need to install Node modules via NPM. See linter's readme file for details. | |
| 553 | + | ||
| 554 | + | - Windows: "node.exe" must be in PATH, command "node -v" must work in console. | |
| 555 | + | - Linux: "nodejs" package must be installed, command "nodejs -v" must work in terminal. | |
| 556 | + | ||
| 557 | + | ### Linters - authoring | |
| 558 | + | ||
| 559 | + | To support more lexers, it's a good idea to port linter from SublimeLinter. To port a linter, most you need is: | |
| 560 | + | ||
| 561 | + | - Fix "imports" to use "cuda_lint" module, instead of SublimeLinter modules. cuda_lint gives almost the same classes which SublimeLinter gives. Except Node.js linter class - it's not supported yet. Usual Linter and PythonLinter classes are supported. | |
| 562 | + | - Change syntax name (for Sublime Text) to CudaText lexer name, names are often different. If no such lexer for CudaText exists yet, ask for it. | |
| 563 | + | - Remove in linter usage of Sublime Text API to read settings (often used in linters). You can add usage of settings via CudaText API ini_read, or via json module. | |
| 564 | + | - If linter was using Node.js, take some code to run Node, from cuda_lint_csslint linter. | |
| 565 | + | ||
| 566 | + | ### Linters - per project | |
| 567 | + | ||
| 568 | + | How to configure linters per project? In your project (Project Manager plugin), right-click root node of project treeview, call menu item "Project file / Project properties...". In this dialog, in the "Variablies" field, enter variable(s) like this: | |
| 569 | + | ||
| 570 | + | ```text | |
| 571 | + | linter_css=csslint | |
| 572 | + | ``` | |
| 573 | + | ||
| 574 | + | Variable prefix "linter_" required, after goes lower-case lexer name (CSS). Value of variable must be name of linter's folder (in "py" folder) without "cuda_lint_". So if linter's folder is py/cuda_lint_aaa, specify value "aaa". | |
| 575 | + | ||
| 576 | + | In this example, CudaLint plugin allows, for mentioned lexer CSS, only linter "csslint", even if another CSS linter (e.g. "csstree") is installed and found first. | |
| 577 | + | ||
| 578 | + | ### Linters - method split_match | |
| 579 | + | ||
| 580 | + | Linters have RegEx property in class, which must find named groups: | |
| 581 | + | ||
| 582 | + | - "line": Line index. | |
| 583 | + | - "col": Column index. | |
| 584 | + | - "error": If found then CudaLint will force "error" gutter icon. | |
| 585 | + | - "warning": If found then CudaLint will force "warning" gutter icon. | |
| 586 | + | - "message": Message text. | |
| 587 | + | ||
| 588 | + | Group "file" or "filename" is not used by CudaLint, but it may present for internal linter's handling, e.g. to ignore the line containing wrong filename. | |
| 589 | + | ||
| 590 | + | Example from SublimeLinter's linter for "Luau": | |
| 591 | + | ||
| 592 | + | ``` python | |
| 593 | + | class Luau(Linter): | |
| 594 | + | cmd = 'luau-analyze --formatter=gnu -' | |
| 595 | + | regex = r'^stdin:(?P<line>\d+)\.(?P<col>\d+)\-(?P<end_line>\d+)\.(?P<end_col>\d+): (?P<code>\w+): (?P<message>.+)' | |
| 596 | + | ``` | |
| 597 | + | ||
| 598 | + | Sometimes, finding "error"/"warning" named groups is hard, and class method "split_match" can help here. Example from SublimeLinter's linter for "Luau": | |
| 599 | + | ||
| 600 | + | ``` python | |
| 601 | + | def split_match(self, match): | |
| 602 | + | error = super().split_match(match) | |
| 603 | + | error['error_type'] = 'error' if error['code'].endswith('Error') else 'warning' | |
| 604 | + | return error | |
| 605 | + | ``` | |
| 606 | + | ||
| 607 | + | If CudaLint linter uses "split_match" it must be different. We cannot read error\['code'\] and cannot write error\['error_type'\]. We must adapt code to this: | |
| 608 | + | ||
| 609 | + | ``` python | |
| 610 | + | def split_match(self, match): | |
| 611 | + | matches, line, col, error, warning, message, near = super().split_match(match) | |
| 612 | + | is_error = matches.group('code').endswith('Error') | |
| 613 | + | error = is_error | |
| 614 | + | warning = not is_error | |
| 615 | + | return matches, line, col, error, warning, message, '' | |
| 616 | + | ``` | |
| 617 | + | ||
| 618 | + | CudaLint needs 7 tuple items in split_match() result: | |
| 619 | + | ||
| 620 | + | - matches: RegEx match object | |
| 621 | + | - line: Line index | |
| 622 | + | - col: Column index | |
| 623 | + | - error: Error state; if casted to True, line will have "error" icon (red) | |
| 624 | + | - warning: Warning state; if casted to True, line will have "warning" icon (yellow) | |
| 625 | + | - message: Message string | |
| 626 | + | - near: Ignored in CudaLint | |
| 627 | + | ||
| 628 | + | Example from CudaLint linter for Java. We override method because javac lints all referenced files, and we only want errors from the linted file. | |
| 629 | + | ||
| 630 | + | ``` python | |
| 631 | + | def split_match(self, match): | |
| 632 | + | if match: | |
| 633 | + | if match.group('file') != self.filename: | |
| 634 | + | match = None | |
| 635 | + | return super().split_match(match) | |
| 636 | + | ``` | |
| 637 | + | ||
| 638 | + | Example from CudaLint linter for Haml. We override method to set the line/col to 0 if a linter error occurs and there is no line number. | |
| 639 | + | ||
| 640 | + | ``` python | |
| 641 | + | def split_match(self, match): | |
| 642 | + | match, line, col, error, warning, message, near = super().split_match(match) | |
| 643 | + | if line is None: | |
| 644 | + | line = col = 0 | |
| 645 | + | return match, line, col, error, warning, message, near | |
| 646 | + | ``` | |
| 647 | + | ||
| 648 | + | Example from CudaLint linter for AutoIt. Here we modify the message/error/warning. | |
| 649 | + | ||
| 650 | + | ``` python | |
| 651 | + | def split_match(self, match): | |
| 652 | + | split_match = super(AutoIt, self).split_match(match) | |
| 653 | + | match, line, col, error, warning, message, near = split_match | |
| 654 | + | message = '{} (Col {})'.format(message, col) | |
| 655 | + | ||
| 656 | + | if match and match.group('type') == 'error': | |
| 657 | + | error = 1 | |
| 658 | + | message = 'Error: ' + message | |
| 659 | + | elif match and match.group('type') == 'warning': | |
| 660 | + | warning = 1 | |
| 661 | + | message = 'Warning: ' + message | |
| 662 | + | ||
| 663 | + | return match, line, col, error, warning, message, '' | |
| 664 | + | ``` | |
| 665 | + | ||
| 666 | + | Example from CudaLint linter for JavaScript using ESLint. We override this method to silent warning by .eslintignore settings. | |
| 667 | + | ||
| 668 | + | ``` python | |
| 669 | + | def split_match(self, match): | |
| 670 | + | v1message = 'File ignored because of your .eslintignore file. Use --no-ignore to override.' | |
| 671 | + | v2message = 'File ignored because of a matching ignore pattern. Use --no-ignore to override.' | |
| 672 | + | ||
| 673 | + | match, line, col, error, warning, message, near = super().split_match(match) | |
| 674 | + | if message and (message == v1message or message == v2message): | |
| 675 | + | return match, None, None, None, None, '', None | |
| 676 | + | ||
| 677 | + | return match, line, col, error, warning, message, near | |
| 678 | + | ``` | |
| 679 | + | ||
| 680 | + | Example from CudaLint linter for PowerShell using PSScriptAnalyzer. We return the match with \` quotes transformed to '. We supress one message. | |
| 681 | + | ||
| 682 | + | ``` python | |
| 683 | + | def split_match(self, match): | |
| 684 | + | match, line, col, error, warning, message, near = super().split_match(match) | |
| 685 | + | ||
| 686 | + | if message == 'no PowerShell code found at all': | |
| 687 | + | match = None | |
| 688 | + | else: | |
| 689 | + | message = message.replace('`', '\'') | |
| 690 | + | ||
| 691 | + | # If the message contains a complaint about a function | |
| 692 | + | # and near looks like a function reference, remove the trailing | |
| 693 | + | # () so it can be found. | |
| 694 | + | if 'function \'' in message and near and near.endswith('()'): | |
| 695 | + | near = near[:-2] | |
| 696 | + | ||
| 697 | + | return match, line, col, error, warning, message, near | |
| 698 | + | ``` | |
| 699 | + | ||
| 700 | + | Example from CudaLint linter for Ruby. We override method because unrelated library files can throw errors, and we only want errors from the linted file. | |
| 701 | + | ||
| 702 | + | ``` python | |
| 703 | + | def split_match(self, match): | |
| 704 | + | if match: | |
| 705 | + | if match.group('file') != '-': | |
| 706 | + | match = None | |
| 707 | + | return super(Ruby,self).split_match(match) | |
| 708 | + | ``` | |
| 709 | + | ||
| 710 | + | Example from CudaLint linter for CSSLint. We override method so that general errors that do not have a line number can be placed at the beginning of the code. | |
| 711 | + | ||
| 712 | + | ``` python | |
| 713 | + | def split_match(self, match): | |
| 714 | + | match, line, col, error, warning, message, near = super().split_match(match) | |
| 715 | + | if line is None and message: | |
| 716 | + | line = 0 | |
| 717 | + | col = 0 | |
| 718 | + | return match, line, col, error, warning, message, near | |
| 719 | + | ``` | |
| 720 | + | ||
| 721 | + | Example from CudaLint linter for Haskell. We override method to ignore errors reported in imported files. | |
| 722 | + | ||
| 723 | + | ``` python | |
| 724 | + | def split_match(self, match): | |
| 725 | + | match, line, col, error, warning, message, near = super().split_match(match) | |
| 726 | + | match_filename = os.path.basename(match.groupdict()['filename']) | |
| 727 | + | if not match_filename.startswith('_CudaLint_'): | |
| 728 | + | return None, None, None, None, None, '', None | |
| 729 | + | return match, line, col, error, warning, message, near | |
| 730 | + | ``` | |
| 731 | + | ||
| 732 | + | ## CudaFormatter | |
| 733 | + | ||
| 734 | + | CudaFormatter is plugin which uses 2nd-level plugins, "formatters", to change the source code. Each "formatter" supports one or more lexers, and provides one or more actions. For example, the Addon Manager contains two formatters for XML: XML IndentX and XML Pretty Print. | |
| 735 | + | ||
| 736 | + | CudaFormatter is located in the "plugins" category of Addons Manager install list. 2nd-level "formatters" are located in the "formatter" category of Addons Manager install list. | |
| 737 | + | ||
| 738 | + | For example, how to format code in XML? | |
| 739 | + | ||
| 740 | + | - Use "Plugins / Addon Manager / Install" to install the CudaFormatter, and formatter(s) for XML. Restart CudaText. | |
| 741 | + | - Open XML file (normal or "lite" lexer XML must activate). | |
| 742 | + | - Use "Plugins / CudaFormatter / Formatter (menu)". This will show the menu of actions from appropriate formatter(s) for the XML (normal or "lite") lexer. | |
| 743 | + | ||
| 744 | + | Formatters may change the entire file text or only selected text. If selection is made, formatter changes only the selection, otherwise the entire text. And special formatters called "minifiers" puts the resulting text to a separate ui-tab. | |
| 745 | + | ||
| 746 | + | ### CudaFormatter commands | |
| 747 | + | ||
| 748 | + | Formatter (menu) | |
| 749 | + | Runs formatter for current editor file. If several suitable formatters are found, menu-like dialog will suggest to choose one of them. If only single formatter is found, it will be run without confirmation. | |
| 750 | + | ||
| 751 | + | Formatter per-lexer A...D | |
| 752 | + | Runs formatter for current editor file, which has per-lexer label (A, B, C, D). Labels are configurable by another command. For example, for the label "B" you can have one formatter for C++, another formatter for HTML, and the 3rd one for CSS. All 3 formatters will be callable by the same command "Formatter per-lexer B". | |
| 753 | + | ||
| 754 | + | Formatter cross-lexer 1...4 | |
| 755 | + | Runs formatter for current editor file, which has cross-lexer label (1, 2, 3, 4). For example, when you have a formatter XY assigned to the label "2", the command "Formatter cross-lexer: 2" always runs XY, ignoring the current lexer. | |
| 756 | + | ||
| 757 | + | Minify to separate file | |
| 758 | + | Finds the "minifier" formatter for the current lexer, and runs it. The resulting text is stored to separate file with name like "filename.min.css" (.css for CSS lexer). Command needs that some formatter for the current lexer is marked as "minifier" (in the formatter's install.inf file). | |
| 759 | + | ||
| 760 | + | Configure on_save | |
| 761 | + | Chooses which formatters are active on file saving. The first formatter, which is suitable for current lexer, and which has the flag "on_save" attached (via plugin configuration), will be used. | |
| 762 | + | ||
| 763 | + | Configure per-lexer labels | |
| 764 | + | Allows to assign per-lexer labels (A, B, C, D) to formatters. Labels allow to use commands "Formatter per-lexer A"..."Formatter per-lexer D", also via hotkeys. | |
| 765 | + | ||
| 766 | + | Configure formatter | |
| 767 | + | For those formatters which have configuration file, command will suggest to open global config file (in the folder "settings" of CudaText). | |
| 768 | + | ||
| 769 | + | Configure formatter (local) | |
| 770 | + | For those formatters which have configuration file, command will suggest to open "local" config (in the folder of current editor file). If local config not exists, plugin will suggest to create it from the global config. | |
| 771 | + | ||
| 772 | + | ### How to run formatter ESLint on saving | |
| 773 | + | ||
| 774 | + | - Install from Addons Manager: "CudaFormatter" | |
| 775 | + | - Install from Addons Manager: "formatter: JavaScript_JSON" | |
| 776 | + | ||
| 777 | + | You have package "formatter.JavaScript_JSON" installed and this package gives the formatter named "... ESLint" (for JavaScript lexer). How you can auto-run this formatter on saving? | |
| 778 | + | ||
| 779 | + | - Activate lexer JavaScript in the current document (can be empty). | |
| 780 | + | - Call menu item "Plugins / CudaFormatter / Configure on_save...". | |
| 781 | + | - Menu-like dialog appears. Choose item "... ESLint" and see that menu appears again, now showing that "... ESLint" item has "on_save" label. Now cancel the auto-shown menu. | |
| 782 | + | ||
| 783 | + | 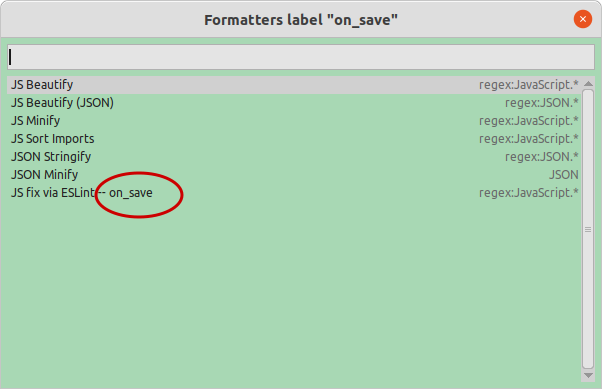 | |
| 784 | + | ||
| 785 | + | Now for all documents with JavaScript (and "JavaScript Babel") lexer, file saving will call ESLint formatter. Note: ESLint handles only named files, and files which have ESLint configuration created in the file's folder. Document "(CudaText)/py/cuda_fmt_js/readme/readme.txt" tells more details. | |
| 786 | + | ||
| 787 | + | ### How formatter can know filename | |
| 788 | + | ||
| 789 | + | Some formatters need to know the processing filename and/or lexer. For example, ESLint formatter must know full filename, to make the temporary file there. How can formatter know it? Module "cuda_fmt" has submodule "fmtconfig", which has variables "ed_filename" and "ed_lexer". Python code: | |
| 790 | + | ||
| 791 | + | ```text | |
| 792 | + | from cuda_fmt import fmtconfig | |
| 793 | + | fn = fmtconfig.ed_filename | |
| 794 | + | ``` | |
| 795 | + | ||
| 796 | + | ## External Tools | |
| 797 | + | ||
| 798 | + | ### Introduction to External Tools | |
| 799 | + | ||
| 800 | + | Plugin "External Tools" (ExtTools) can be installed from Addon Manager. It allows to run external programs, catch their output, and then it can: | |
| 801 | + | ||
| 802 | + | - Display this output in the Output or Console panel of CudaText. | |
| 803 | + | - Replace current editor selection with the output. | |
| 804 | + | - Copy this output to a new document. | |
| 805 | + | - Copy this output to Clipboard. | |
| 806 | + | - And more. | |
| 807 | + | ||
| 808 | + | Plugin adds "Tools" top menu (near "Plugins"), which has menu item "Config" to configure all tools (in the single dialog), and menu items to run all individual tools. | |
| 809 | + | ||
| 810 | + | 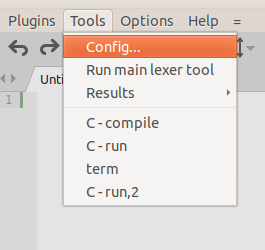 | |
| 811 | + | ||
| 812 | + | Some external tools configs are shown in the Wiki topics below. Enter these strings in the "Tool properties" dialog. | |
| 813 | + | ||
| 814 | + | 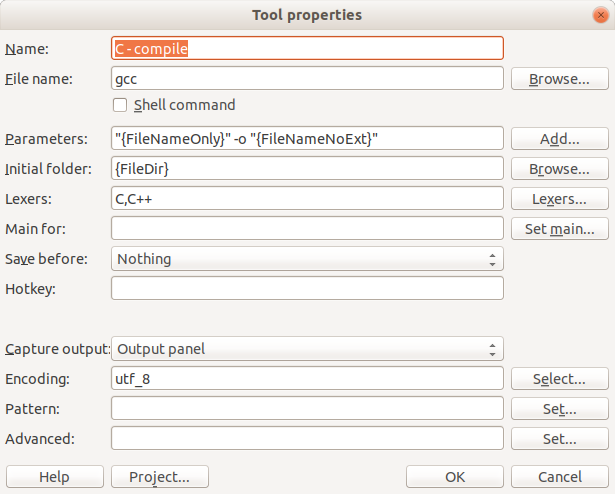 | |
| 815 | + | ||
| 816 | + | Plugin allows to customize hotkeys for all individual tools, or to use the single hotkey for different tools. The single hotkey is the hotkey of the plugin's command "Tools / Run main lexer tool". What is the "main lexer tool"? For example, you have 2 tools for lexer C++, and 3 tools for lexer HTML. You open the "Tool properties" dialog for some C++ tool, and press "Set main" button to mark that tool as "main" for C++. Then you open properties of some HTML tool, press "Set main" button to mark that tool as "main" for HTML. So now the "Tools / Run main lexer tool" can determine what is the main tool for C++ and HTML. | |
| 817 | + | ||
| 818 | + | 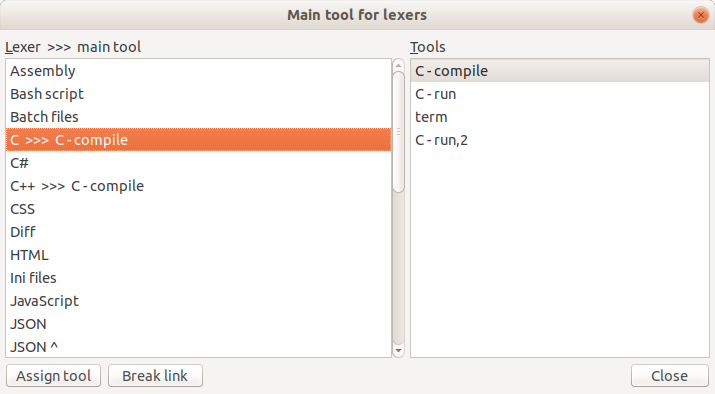 | |
| 819 | + | ||
| 820 | + | Notes: | |
| 821 | + | ||
| 822 | + | - The disadvantage of the plugin: it cannot show tool output lines immediately when they appear, it waits until tool is terminated. Use the #Runner plugin which supports that feature. | |
| 823 | + | - If you see that running of tools makes the Output panel visible, you need to fix the "Capture output" option of those tools, set it to "Ignore". | |
| 824 | + | ||
| 825 | + | ### Tool to compile by GCC | |
| 826 | + | ||
| 827 | + | You can test how this tool works on any Linux, because GCC is preinstalled. Test the tool on C++ example, which is created from CudaText by menu "File / New from template / C++". | |
| 828 | + | ||
| 829 | + | Properties: | |
| 830 | + | ||
| 831 | + | - Name: C - compile | |
| 832 | + | - File name: gcc | |
| 833 | + | - Shell command: unchecked | |
| 834 | + | - Parameters: "{FileNameOnly}" -o "{FileNameNoExt}" | |
| 835 | + | - Initial folder: {FileDir} | |
| 836 | + | - Lexers: C,C++ | |
| 837 | + | - Capture output: Output panel | |
| 838 | + | - Encoding: utf_8 | |
| 839 | + | ||
| 840 | + | Optionally, configure "Pattern", so double click in the Output panel will put caret to the source code. Example of GCC error line in the Output panel, it will be handled by double click: "new.cpp:10:3: error: 'zz' was not declared in this scope". | |
| 841 | + | ||
| 842 | + | - Pattern: (?P\<file\>\[^:\]+):(?P\<line\>\d+):(?P | |
| 843 | + | \d+): .+ | |
| 844 | + | ||
| 845 | + | ### Tool to run C program | |
| 846 | + | ||
| 847 | + | Tool is for Linux, so "File name" don't have an extension. For Windows, change "File name" field to "{FileNameNoExt}.exe". | |
| 848 | + | ||
| 849 | + | Tool will catch the program output in the Output panel, program text input will not work. | |
| 850 | + | ||
| 851 | + | - Name: C - run | |
| 852 | + | - File name: "./{FileNameNoExt}" | |
| 853 | + | - Shell command: checked | |
| 854 | + | - Parameters: (empty) | |
| 855 | + | - Initial folder: {FileDir} | |
| 856 | + | - Lexers: C,C++ | |
| 857 | + | - Capture output: Output panel | |
| 858 | + | - Encoding: utf_8 | |
| 859 | + | - Pattern: (empty) | |
| 860 | + | ||
| 861 | + | ### Tool to run C program, on Windows, with input in terminal | |
| 862 | + | ||
| 863 | + | Tool is for Windows, it allows to run compiled C/C++ program in new console window. Text input will work in this console. | |
| 864 | + | ||
| 865 | + | Example C++ program: | |
| 866 | + | ||
| 867 | + | ``` C++ | |
| 868 | + | #include <stdio.h> | |
| 869 | + | int main () | |
| 870 | + | { | |
| 871 | + | int c; | |
| 872 | + | puts ("Enter text. Include a dot ('.') in a sentence to exit:"); | |
| 873 | + | do { | |
| 874 | + | c=getchar(); | |
| 875 | + | putchar (c); | |
| 876 | + | } while (c != '.'); | |
| 877 | + | return 0; | |
| 878 | + | } | |
| 879 | + | ``` | |
| 880 | + | ||
| 881 | + | Tool props: | |
| 882 | + | ||
| 883 | + | - Name: C - run | |
| 884 | + | - File name: cmd | |
| 885 | + | - Shell command: unchecked | |
| 886 | + | - Parameters: /K "{FileNameNoExt}.exe" | |
| 887 | + | - Alternative value: /C "{FileNameNoExt}.exe" && pause | |
| 888 | + | - Initial folder: {FileDir} | |
| 889 | + | - Lexers: C,C++ | |
| 890 | + | - Capture output: Ignore | |
| 891 | + | - Encoding: utf_8 | |
| 892 | + | - Pattern: (empty) | |
| 893 | + | ||
| 894 | + | ### Tool to run C program, on Linux, with input in terminal | |
| 895 | + | ||
| 896 | + | Tool is for Linux, it allows to run compiled C/C++ program in new terminal window. Text input will work in this terminal window. | |
| 897 | + | ||
| 898 | + | Example C++ program: | |
| 899 | + | ||
| 900 | + | ``` C++ | |
| 901 | + | #include <stdio.h> | |
| 902 | + | int main () | |
| 903 | + | { | |
| 904 | + | int c; | |
| 905 | + | puts ("Enter text. Include a dot ('.') in a sentence to exit:"); | |
| 906 | + | do { | |
| 907 | + | c=getchar(); | |
| 908 | + | putchar (c); | |
| 909 | + | } while (c != '.'); | |
| 910 | + | return 0; | |
| 911 | + | } | |
| 912 | + | ``` | |
| 913 | + | ||
| 914 | + | Tool props: | |
| 915 | + | ||
| 916 | + | - Name: C - run | |
| 917 | + | - Variant for xterm: | |
| 918 | + | - File name: xterm | |
| 919 | + | - Parameters: -hold -e "./{FileNameNoExt}" | |
| 920 | + | - Variant for gnome-terminal: | |
| 921 | + | - File name: gnome-terminal | |
| 922 | + | - Parameters: -- bash -c "./{FileNameNoExt}; read -s -n1 -r -p 'Press any key... '; echo" | |
| 923 | + | - Shell command: unchecked | |
| 924 | + | - Initial folder: {FileDir} | |
| 925 | + | - Lexers: C,C++ | |
| 926 | + | - Capture output: Ignore | |
| 927 | + | - Encoding: utf_8 | |
| 928 | + | - Pattern: (empty) | |
| 929 | + | ||
| 930 | + | ### Tool to compile+run C program | |
| 931 | + | ||
| 932 | + | In the External Tools dialog, press Join button, to join 2 tools created in above steps. Properties of joined tool: | |
| 933 | + | ||
| 934 | + | - Name: C - make+run | |
| 935 | + | - Series: C - compile; C - run | |
| 936 | + | - Lexers: C,C++ | |
| 937 | + | ||
| 938 | + | ### Tool to run current Batch file | |
| 939 | + | ||
| 940 | + | Tool properties: | |
| 941 | + | ||
| 942 | + | - Name: Run batch file | |
| 943 | + | - File name: cmd.exe | |
| 944 | + | - Shell command: unchecked | |
| 945 | + | - Parameters: /c "{FileName}" | |
| 946 | + | - Initial folder: {FileDir} | |
| 947 | + | - Lexers: Batch files | |
| 948 | + | - Capture output: Output panel | |
| 949 | + | - Encoding: the same as file's encoding: e.g. utf_8 or cp1251 (cp1251 is Russian ANSI codepage) | |
| 950 | + | ||
| 951 | + | ### Tool to compile by Free Pascal | |
| 952 | + | ||
| 953 | + | This tool is for Free Pascal 3.x on Linux x64. | |
| 954 | + | ||
| 955 | + | Properties: | |
| 956 | + | ||
| 957 | + | - Name: FPC - compile | |
| 958 | + | - File name: | |
| 959 | + | - for FPC installed system-wide: fpc | |
| 960 | + | - for FPC installed via fpcupdeluxe: /home/user/fpcupdeluxe/fpcupdeluxe/fpc/bin/x86_64-linux/fpc.sh | |
| 961 | + | - Shell command: unchecked | |
| 962 | + | - Parameters: {FileNameOnly} | |
| 963 | + | - Initial folder: {FileDir} | |
| 964 | + | - Lexers: Pascal | |
| 965 | + | - Capture output: Output panel | |
| 966 | + | - Encoding: utf_8 | |
| 967 | + | ||
| 968 | + | Optionally, configure "Pattern", so double click in the Output panel will put caret to the source code. In the "Tool properties" dialog, press "Set" button near the "Pattern" and choose there ready preset for Free Pascal. | |
| 969 | + | ||
| 970 | + | ### Tool to call file-compare utility | |
| 971 | + | ||
| 972 | + | Tools, which call file-compare utility, to compare 2 files: active files in group-1 and group-2. | |
| 973 | + | ||
| 974 | + | #### WinMerge, KDiff, Kompare | |
| 975 | + | ||
| 976 | + | - Name: Compare files in G1, G2 | |
| 977 | + | - File name: (full name of executable file) | |
| 978 | + | - Shell command: unchecked | |
| 979 | + | - Parameters: "{FileName_g1}" "{FileName_g2}" | |
| 980 | + | - Initial folder: (empty) | |
| 981 | + | - Capture output: Ignore | |
| 982 | + | ||
| 983 | + | #### Meld | |
| 984 | + | ||
| 985 | + | - Name: Compare files in G1, G2 | |
| 986 | + | - File name: (full name of executable file) | |
| 987 | + | - Shell command: unchecked | |
| 988 | + | - Parameters: --newtab "{FileName_g1}" "{FileName_g2}" | |
| 989 | + | - Initial folder: (empty) | |
| 990 | + | - Capture output: Ignore | |
| 991 | + | ||
| 992 | + | #### diff | |
| 993 | + | ||
| 994 | + | - Name: Compare files in G1, G2 | |
| 995 | + | - File name: diff | |
| 996 | + | - Shell command: unchecked | |
| 997 | + | - Parameters: -Nau "{FileName_g1}" "{FileName_g2}" | |
| 998 | + | - Initial folder: (empty) | |
| 999 | + | - Capture output: Copy to new document | |
| 1000 | + | ||
| 1001 | + | ### Tool to run Python scripts | |
| 1002 | + | ||
| 1003 | + | - Name: Python3 | |
| 1004 | + | - File name: | |
| 1005 | + | - on Windows: full path to "python.exe" | |
| 1006 | + | - on Unix: python3 | |
| 1007 | + | - Shell command: | |
| 1008 | + | - on Windows: checked | |
| 1009 | + | - on Unix: unchecked | |
| 1010 | + | - Parameters: "{FileNameOnly}" | |
| 1011 | + | - Initial folder: {FileDir} | |
| 1012 | + | - Lexers: Python | |
| 1013 | + | - Capture output: Output panel | |
| 1014 | + | - Encoding: utf_8 | |
| 1015 | + | - Pattern: \s*File "(?P\<file\>.+)", line (?P\<line\>\d+) | |
| 1016 | + | ||
| 1017 | + | ### Tool to preview HTML file in Chrome | |
| 1018 | + | ||
| 1019 | + | - Name: Preview in Chrome | |
| 1020 | + | - File name: | |
| 1021 | + | - on Windows: C:\Program Files\Google\Chrome\Application\chrome.exe | |
| 1022 | + | - Shell command: | |
| 1023 | + | - on Windows: unchecked | |
| 1024 | + | - Parameters: "{FileName}" | |
| 1025 | + | - Initial folder: (empty) | |
| 1026 | + | - Lexers: HTML | |
| 1027 | + | - Capture output: Ignore | |
| 1028 | + | ||
| 1029 | + | ### Tool to open PHP documentation with given topic | |
| 1030 | + | ||
| 1031 | + | Tool to open PHP documentation, in .chm format, for the word under editor's caret. For Windows only. You need to install KeyHH from <http://keyworks.helpmvp.com/> , it is stable tool mentioned on several sites. Program "keyhh.exe" will be in your system PATH. | |
| 1032 | + | ||
| 1033 | + | Before making the tool, add "\$" char to word chars for PHP lexer. To do it, call "Plugins / Options Editor", in the Options Editor dialog find option "word_chars" and set it to "\$". You must save option to PHP lexer-specific config, so in the dialog you must check flag "For \[x\] Lexer", and choose lexer "PHP", and then write option value "\$" and press Enter. | |
| 1034 | + | ||
| 1035 | + | Download PHP documentation in .chm format from PHP.net, google for "php_manual_en chm", it is 16M file. | |
| 1036 | + | ||
| 1037 | + | Tool properties: | |
| 1038 | + | ||
| 1039 | + | - Name: PHP Help | |
| 1040 | + | - File name: keyhh.exe | |
| 1041 | + | - Shell command: unchecked | |
| 1042 | + | - Parameters: -MyHelp -#klink {CurrentWord} "C:\Work\php_manual_en.chm" | |
| 1043 | + | - Initial folder: (empty) | |
| 1044 | + | - Lexers: PHP | |
| 1045 | + | - Save before: Nothing | |
| 1046 | + | - Capture output: Ignore | |
| 1047 | + | ||
| 1048 | + | ### Tool to open AutoIt documentation with given topic | |
| 1049 | + | ||
| 1050 | + | Tool to open AutoIt documentation, in .chm format, for the word under editor's caret. For Windows only. You need to install KeyHH from <http://keyworks.helpmvp.com/> , it is stable tool mentioned on several sites. Program "keyhh.exe" will be in your system PATH. | |
| 1051 | + | ||
| 1052 | + | With AutoIt installed, you also have .chm documentation, its path is usually "C:\Program Files (x86)\AutoIt3\AutoIt.chm". | |
| 1053 | + | ||
| 1054 | + | Tool properties: | |
| 1055 | + | ||
| 1056 | + | - Name: AutoIt Help | |
| 1057 | + | - File name: keyhh.exe | |
| 1058 | + | - Shell command: unchecked | |
| 1059 | + | - Parameters: -MyHelp -#klink {CurrentWord} "C:\Program Files (x86)\AutoIt3\AutoIt.chm" | |
| 1060 | + | - Initial folder: (empty) | |
| 1061 | + | - Lexers: AutoIt | |
| 1062 | + | - Save before: Nothing | |
| 1063 | + | - Capture output: Ignore | |
| 1064 | + | ||
| 1065 | + | ### Tool to open .chm documentation for all lexers | |
| 1066 | + | ||
| 1067 | + | See above example about tool for PHP documentation. Create the similar tool | |
| 1068 | + | ||
| 1069 | + | - File name: keyhh.exe | |
| 1070 | + | - Shell command: unchecked | |
| 1071 | + | - Parameters: -MyHelp -#klink "{CurrentWord}" "{AppDir}\\..\Docs\\{Lexer}.chm" | |
| 1072 | + | - Lexers: (empty) | |
| 1073 | + | ||
| 1074 | + | This tool needs renamed .chm files: for lexer AutoIt it needs "AutoIt.chm" and so on. It needs .chm files in a single folder relative to CudaText folder. | |
| 1075 | + | ||
| 1076 | + | ### Tool for Google search | |
| 1077 | + | ||
| 1078 | + | This is URL (special kind of tool). In the External Tools dialog, press the "URL" button, then press "Add" to add a new URL. | |
| 1079 | + | ||
| 1080 | + | - Name: Google find | |
| 1081 | + | - URL: | |
| 1082 | + | ||
| 1083 | + | ```text | |
| 1084 | + | http://google.com/search?q={SelectedText|q} | |
| 1085 | + | ``` | |
| 1086 | + | ||
| 1087 | + | ### Tool to open folder of current file in Windows Explorer | |
| 1088 | + | ||
| 1089 | + | Tool properties: | |
| 1090 | + | ||
| 1091 | + | - Name: Open cur dir in Explorer | |
| 1092 | + | - File name: explorer.exe | |
| 1093 | + | - Shell command: unchecked | |
| 1094 | + | - Parameters: {FileDir} | |
| 1095 | + | - Initial folder: {FileDir} | |
| 1096 | + | ||
| 1097 | + | ### Tool to go to current file in FreeCommander | |
| 1098 | + | ||
| 1099 | + | - Name: Go to file in FreeCommander | |
| 1100 | + | - File name: path\to\FreeCommander.exe | |
| 1101 | + | - Shell command: unchecked | |
| 1102 | + | - Parameters: "/L={FileName}" /C | |
| 1103 | + | - Initial folder: {FileDir} | |
| 1104 | + | ||
| 1105 | + | # Runner | |
| 1106 | + | ||
| 1107 | + | Plugin Runner was written as an alternative to External Tools. | |
| 1108 | + | ||
| 1109 | + | - Runner is more light weight. | |
| 1110 | + | - Runner supports Sublime Text 3 build-systems. | |
| 1111 | + | - Runner displays tool output immediately line-by-line as it appears (External Tools can only show the entire ready output). | |
| 1112 | + | ||
| 1113 | + | Many build-systems from Sublime Text 3 were packaged and put to add-on collection, search for add-on "Many Build Systems". Only few build-systems were packaged into own separate packages because they have big EXE/Binary files. Some ST3 plugins have build-systems paired with some Python code - they are not supported. | |
| 1114 | + | ||
| 1115 | + | See the [Runner documentation on GitHub](https://github.com/halfbrained/cuda_runner/blob/main/readme/readme.txt). | |
| 1116 | + | ||
| 1117 | + | Here is the GIF animation which shows reaction of Runner to PHP script running: | |
| 1118 | + | ||
| 1119 | + | ``` php | |
| 1120 | + | <?php | |
| 1121 | + | for($i=0; $i<10; $i++) { | |
| 1122 | + | sleep(1); | |
| 1123 | + | echo "$i is here\n"; | |
| 1124 | + | } | |
| 1125 | + | ?> | |
| 1126 | + | ``` | |
| 1127 | + | ||
| 1128 | + | 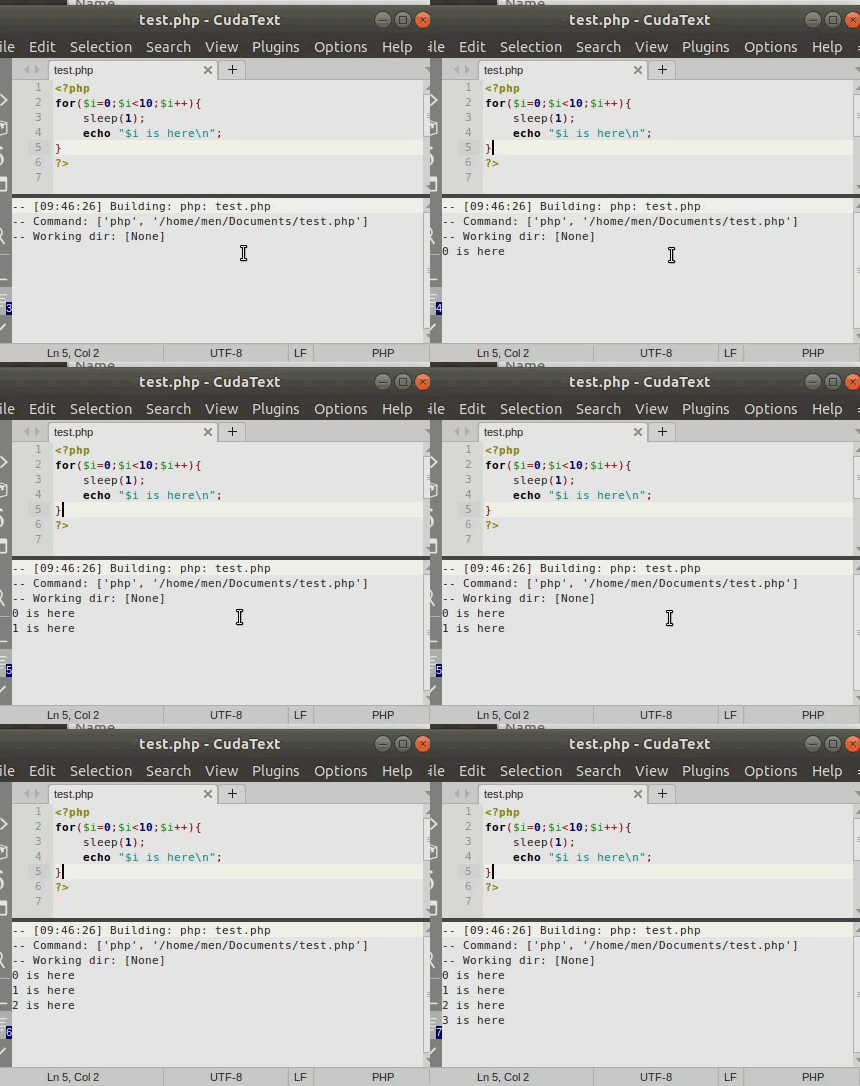 | |
| 1129 | + | ||
| 1130 | + | ## Runner limitation for input | |
| 1131 | + | ||
| 1132 | + | If your Python script contains the input() function: | |
| 1133 | + | ||
| 1134 | + | ``` python | |
| 1135 | + | s=input('enter text: ') | |
| 1136 | + | print('entered:', s) | |
| 1137 | + | ``` | |
| 1138 | + | ||
| 1139 | + | it will run with a runtime error like this: | |
| 1140 | + | ||
| 1141 | + | ```text | |
| 1142 | + | enter text: Traceback (most recent call last): | |
| 1143 | + | File "/home/user/a.py", line 3, in <module> | |
| 1144 | + | s=input('enter text: ') | |
| 1145 | + | EOFError: EOF when reading a line | |
| 1146 | + | ``` | |
| 1147 | + | ||
| 1148 | + | This is the limitation of the Runner plugin. To run your Python script in this case, you should call "ExTerminal" plugin (or "Terminal Plus" plugin), and enter there: "python3 myscript.py". And make sure, that ExTerminal prompt appeared in the proper folder, with your script. | |
| 1149 | + | ||
| 1150 | + | ## Runner tool for C | |
| 1151 | + | ||
| 1152 | + | Install the add-on "build-system: Many Build Systems from ST4". It supports C lexer using GCC compiler. It works on Linux/macOS out-of-the-box, on Windows you need the command "gcc" to be in the system PATH. | |
| 1153 | + | ||
| 1154 | + | This build-system has 2 commands: | |
| 1155 | + | ||
| 1156 | + | - Build: only compiles | |
| 1157 | + | - Run: compiles and then runs the binary | |
| 1158 | + | ||
| 1159 | + | Example C file: | |
| 1160 | + | ||
| 1161 | + | ``` cpp | |
| 1162 | + | #include <stdio.h> | |
| 1163 | + | int main(){ | |
| 1164 | + | printf("Hello world"); | |
| 1165 | + | return 0; | |
| 1166 | + | } | |
| 1167 | + | ``` | |
| 1168 | + | ||
| 1169 | + | Example output in the CudaText Output panel (Linux): | |
| 1170 | + | ||
| 1171 | + | -- [10:34:08] Building: C via GCC: a.c | |
| 1172 | + | -- Command: gcc "/home/user/a.c" -o "/home/user/a" && "/home/user/a" | |
| 1173 | + | -- Working dir: /home/user | |
| 1174 | + | Hello world | |
| 1175 | + | -- Done (0.2s), return code: 0 | |
| 1176 | + | ||
| 1177 | + | ## Runner tool for C++ | |
| 1178 | + | ||
| 1179 | + | Install the add-on "build-system: C++ using G++". It supports C++ lexer using GNU C++ compiler. It works on Linux/macOS out-of-the-box, on Windows you need the command "g++" to be in the system PATH. | |
| 1180 | + | ||
| 1181 | + | This build-system has 2 commands: | |
| 1182 | + | ||
| 1183 | + | - compile, then run the compiled binary (default command) | |
| 1184 | + | - only run the compiled binary (it should be called from "Plugins / Runner / Build with..."). | |
| 1185 | + | ||
| 1186 | + | Example C++ file: | |
| 1187 | + | ||
| 1188 | + | ``` cpp | |
| 1189 | + | #include <iostream> | |
| 1190 | + | ||
| 1191 | + | int main() { | |
| 1192 | + | std::cout << "Hello World!"; | |
| 1193 | + | return 0; | |
| 1194 | + | } | |
| 1195 | + | ``` | |
| 1196 | + | ||
| 1197 | + | Example output in the CudaText Output panel (Linux): | |
| 1198 | + | ||
| 1199 | + | -- [16:41:55] Building: C++: new.cpp | |
| 1200 | + | -- Command: g++ -std=c++11 -Wall "/home/user/new.cpp" -o "/home/user/new" && "/home/user/new" | |
| 1201 | + | -- Working dir: /home/user | |
| 1202 | + | Hello World! | |
| 1203 | + | -- Done (0.8s), return code: 0 | |
| 1204 | + | ||
| 1205 | + | ## Runner tool for PHP | |
| 1206 | + | ||
| 1207 | + | How to debug for example PHP file, with Runner. Create file "\[CudaText\]/data/buildsystems/php.sublime-build" with such text: | |
| 1208 | + | ||
| 1209 | + | ``` json | |
| 1210 | + | { | |
| 1211 | + | "file_patterns": ["*.php"], | |
| 1212 | + | "linux": { | |
| 1213 | + | "cmd": ["php", "$file"] | |
| 1214 | + | }, | |
| 1215 | + | "windows": { | |
| 1216 | + | "cmd": ["C:\\PHP_folder\\php-win.exe", "$file"] | |
| 1217 | + | } | |
| 1218 | + | } | |
| 1219 | + | ``` | |
| 1220 | + | ||
| 1221 | + | Restart CudaText. | |
| 1222 | + | ||
| 1223 | + | After opening a PHP file, call Runner main command "Build", that's it. It must show script output (in the Output panel) line-by-line, as it appears. | |
| 1224 | + | ||
| 1225 | + | Example script to test: | |
| 1226 | + | ||
| 1227 | + | ``` php | |
| 1228 | + | <?php | |
| 1229 | + | for($i=0; $i<10; $i++) { | |
| 1230 | + | sleep(1); | |
| 1231 | + | echo "$i is here\n"; | |
| 1232 | + | } | |
| 1233 | + | ?> | |
| 1234 | + | ``` | |
| 1235 | + | ||
| 1236 | + | ## Runner tool for Python | |
| 1237 | + | ||
| 1238 | + | In Addons Mananger, install the add-on "buildsystem: Many Build Systems from ST4". It contains the Python build-system. It even contains 2 items in the build-system: | |
| 1239 | + | ||
| 1240 | + | - Build | |
| 1241 | + | - Syntax Check | |
| 1242 | + | ||
| 1243 | + | After opening a Python file, call Runner main command "Build", that's it. It must show script output (in the Output panel) line-by-line, as it appears. | |
| 1244 | + | ||
| 1245 | + | Example script to test: | |
| 1246 | + | ||
| 1247 | + | ``` python | |
| 1248 | + | import time | |
| 1249 | + | ||
| 1250 | + | for i in range(5): | |
| 1251 | + | time.sleep(1) | |
| 1252 | + | print(str(i) + " is here", flush=True) | |
| 1253 | + | ``` | |
| 1254 | + | ||
| 1255 | + | ## Runner tool for Free Pascal | |
| 1256 | + | ||
| 1257 | + | In Addons Manager, install the add-on "buildsystem: Free Pascal". It installs the file "\[CudaText\]/data/buildsystems/Free Pascal.sublime-build" with text like this: | |
| 1258 | + | ||
| 1259 | + | ``` json | |
| 1260 | + | { | |
| 1261 | + | "file_patterns": ["*.pp", "*.pas"], | |
| 1262 | + | "file_regex": "(.+?)\\((\\d+),(\\d+)\\)\\s(.+)$", | |
| 1263 | + | "working_dir": "$file_path", | |
| 1264 | + | "name": "Compile", | |
| 1265 | + | "cmd": ["/home/user/fpcupdeluxe/fpcupdeluxe32/fpc/bin/x86_64-linux/fpc.sh", "$file_name"], | |
| 1266 | + | "variants": [ | |
| 1267 | + | { | |
| 1268 | + | "name": "Run", | |
| 1269 | + | "cmd": ["./$file_base_name"] | |
| 1270 | + | } | |
| 1271 | + | ] | |
| 1272 | + | } | |
| 1273 | + | ``` | |
| 1274 | + | ||
| 1275 | + | In this file, you need to adjust the path to "fpc.sh", according to your [[fpcupdeluxe]] folder. Restart CudaText. | |
| 1276 | + | ||
| 1277 | + | After opening a Pascal file, call Runner main command "Build", that's it. The "Build" command example output: | |
| 1278 | + | ||
| 1279 | + | -- [20:07:55] Building: Free Pascal: new.pas | |
| 1280 | + | -- Command: ['/home/user/fpcupdeluxe/fpcupdeluxe32/fpc/bin/x86_64-linux/fpc.sh', 'new.pas'] | |
| 1281 | + | -- Working dir: /home/user | |
| 1282 | + | Free Pascal Compiler version 3.2.3-425-gebc55c0f4e-dirty [2021/09/09] for x86_64 | |
| 1283 | + | Copyright (c) 1993-2021 by Florian Klaempfl and others | |
| 1284 | + | Target OS: Linux for x86-64 | |
| 1285 | + | Compiling new.pas | |
| 1286 | + | Linking new | |
| 1287 | + | 3 lines compiled, 0.1 sec | |
| 1288 | + | -- Done (0.2s), return code: 0 | |
| 1289 | + | ||
| 1290 | + | The config above also gives the "Run" command for the compiled binary - in the menu of "Plugins / Runner / Build with...". The "Run" command example output: | |
| 1291 | + | ||
| 1292 | + | -- [20:09:09] Building: Free Pascal: new.pas | |
| 1293 | + | -- Command: ['./new'] | |
| 1294 | + | -- Working dir: /home/user | |
| 1295 | + | Hello world. | |
| 1296 | + | -- Done (-0.0s), return code: 0 | |
| 1297 | + | ||
| 1298 | + | ## Runner tool for Cobol | |
| 1299 | + | ||
| 1300 | + | In Addons Manager, install the lexer "Cobol". | |
| 1301 | + | ||
| 1302 | + | Let's make build-system for GnuCOBOL on Windows. Install GnuCOBOL, usually [from this webpage](https://www.arnoldtrembley.com/GnuCOBOL.htm), to "C:\GnuCOBOL". You must have file "C:\GnuCOBOL\bin\cobc.exe". | |
| 1303 | + | ||
| 1304 | + | Create Batch script "c:\GnuCOBOL\bin\runcobol.cmd" with such content: | |
| 1305 | + | ||
| 1306 | + | set Path=c:\gnucobol\bin | |
| 1307 | + | set COB_CONFIG_DIR=c:\gnucobol\config | |
| 1308 | + | set COB_COPY_DIR=c:\gnucobol\copy | |
| 1309 | + | set COB_INCLUDE_PATH=c:\gnucobol\include | |
| 1310 | + | set COB_LIB_PATH=c:\gnucobol\lib | |
| 1311 | + | cobc -x -std=mf %1 | |
| 1312 | + | ||
| 1313 | + | Create build-system file "\[CudaText\]\data\buildsystems\cobol.sublime-build": | |
| 1314 | + | ||
| 1315 | + | ``` json | |
| 1316 | + | { | |
| 1317 | + | "file_patterns": ["*.cob", "*.cbl", "*.cpy"], | |
| 1318 | + | "name": "Compile", | |
| 1319 | + | "cmd": ["cmd.exe", "/c", "c:\\GnuCOBOL\\bin\\runcobol.cmd", "$file"], | |
| 1320 | + | "working_dir": "$file_path", | |
| 1321 | + | "file_regex": "^([^:]+):([0-9]+):", | |
| 1322 | + | "variants": [ | |
| 1323 | + | { | |
| 1324 | + | "name": "Run", | |
| 1325 | + | "cmd": ["$file_path/$file_base_name.exe"] | |
| 1326 | + | } | |
| 1327 | + | ] | |
| 1328 | + | } | |
| 1329 | + | ``` | |
| 1330 | + | ||
| 1331 | + | Note: the build-system gives usual command "Build" and additional command "Run" to execute the .exe file, and "Run" has forward slash (Unix slash): "\$file_path/\$file_base_name.exe". Forward slash is required here, because with backslash Runner will fail to run the .exe (it will not expand the macro \$file_base_name). | |
| 1332 | + | ||
| 1333 | + | Now running the "Plugins / Runner / Build" can give text in the "Output panel" like this: | |
| 1334 | + | ||
| 1335 | + | -- [07:49:02] Building: cobol: test.cbl | |
| 1336 | + | -- Command: ['cmd.exe', '/c', 'c:\\GnuCOBOL\\bin\\runcobol.cmd', 'C:\\Work\\test.cbl'] | |
| 1337 | + | -- Working dir: C:\Work | |
| 1338 | + | ||
| 1339 | + | C:\Work>set Path=c:\gnucobol\bin | |
| 1340 | + | C:\Work>set COB_CONFIG_DIR=c:\gnucobol\config | |
| 1341 | + | C:\Work>set COB_COPY_DIR=c:\gnucobol\copy | |
| 1342 | + | C:\Work>set COB_INCLUDE_PATH=c:\gnucobol\include | |
| 1343 | + | C:\Work>set COB_LIB_PATH=c:\gnucobol\lib | |
| 1344 | + | C:\Work>cobc -x -std=mf C:\Work\test.cbl | |
| 1345 | + | C:\Work\test.cbl:1: error: invalid indicator 'u' at column 7 | |
| 1346 | + | C:\Work\test.cbl:2: warning: line not terminated by a newline [-Wmissing-newline] | |
| 1347 | + | C:\Work\test.cbl:3: warning: PROGRAM-ID header missing [-Wothers] | |
| 1348 | + | -- Done (0.3s), return code: 1 | |
| 1349 | + | ||
| 1350 | + | # FindInFiles | |
| 1351 | + | ||
| 1352 | + | This plugin implements searching in many files, starting from custom folder. CudaText doesn't have the built-in feature to search in many files, and seems it will not have it in future, because FindInFiles is so powerful, it even has the Configuration dialog with dozens of options. | |
| 1353 | + | ||
| 1354 | + | Project Manager plugin allows to call FindInFiles functionality. Focus a folder in Project Manager, call context menu, and then "Selected directory / Find in directory..." menu item. | |
| 1355 | + | ||
| 1356 | + | ## How to find/replace in all UI-tabs | |
| 1357 | + | ||
| 1358 | + | FindInFiles 4 supports search inside all UI-tabs. Hover mouse over "From:" label in the dialog, tooltip will appear. Tooltip says what to enter in the nearest input-field. Enter one of these strings in the "From" field: | |
| 1359 | + | ||
| 1360 | + | ```text | |
| 1361 | + | <tabs> | |
| 1362 | + | {t} | |
| 1363 | + | ``` | |
| 1364 | + | ||
| 1365 | + | 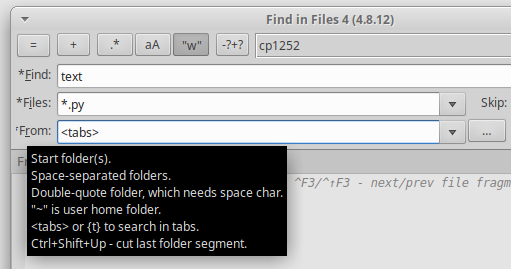 | |
| 1366 | + | ||
| 1367 | + | And in the "Files" field, enter "*" for all files. | |
| 1368 | + | ||
| 1369 | + | To discover more features of FindInFiles dialog, hover mouse over other labels/buttons. | |
| 1370 | + | ||
| 1371 | + | You can also **replace in all UI-tabs**, of course. To do it, fill all input fields in the FindInFiles main dialog, but instead of pressing "Find" - press "=" button and then choose "Replace with..." from appeared popup menu. Additional dialog will appear to confirm you replacement request, press "Replace" button there. | |
| 1372 | + | ||
| 1373 | + | Additionally, CudaText gives built-in "Replace in all tabs" feature, it is the button "Rep global" in the built-in Find/Replace dialog. This is documented in the main CudaText wiki page. | |
| 1374 | + | ||
| 1375 | + | ## How to use FindInFiles 4 | |
| 1376 | + | ||
| 1377 | + | FindInFiles v4 has two panels. Top panel shows found filenames, line by line. Bottom panel shows the entire document of one of the selected filenames. When you single click on a line of top panel, the bottom panel shows the content of a clicked file. When you double click the line again, the main editor of CudaText jumps to that location. | |
| 1378 | + | ||
| 1379 | + | ## FiF3 and FiF4: comparison and future | |
| 1380 | + | ||
| 1381 | + | CudaText has two plugins to search in files/tabs: | |
| 1382 | + | ||
| 1383 | + | - FindInFiles v3 (FiF3) | |
| 1384 | + | - FindInFiles v4 (FiF4) | |
| 1385 | + | ||
| 1386 | + | Important: FiF3 is almost frozen. Only serious bugs will be fixed. No plans to hide/delete FiF3. FiF4 supersedes FiF3. | |
| 1387 | + | ||
| 1388 | + | Detailed comparison. | |
| 1389 | + | ||
| 1390 | + | Common features: | |
| 1391 | + | ||
| 1392 | + | - Speed of search. Speed of FiF3 is stable. FiF4 can search faster or slower depending on the settings. In the "slow" mode FiF4 gives more complex Results or uses more complex filters. | |
| 1393 | + | - Encoding detection. FiF4 allows to set more flexible plan (see submenu "=/Encoding plan"). | |
| 1394 | + | - Presets. Both versions allow to define and restore named set of search parameters. FiF4 allows to run dialog and start **immediate search** with parameters from a preset (see main menu command "Find by preset..."). FiF4 allows to restore \[pre\]previous parameters (runtime **auto saving**). | |
| 1395 | + | - Results/Source. FiF3 allows to put Results in old/new tab or in dialog editor control. FiF4 allows to put Results only in dialog editor control and has a command to copy Results to new tab. Both allow to open the source file for specified fragment in new tab. FiF3 can place Results and Source vertically or horizontally. FiF4 has only one way. | |
| 1396 | + | - FiF3 has commands to **count fragments** and to show only filenames. FiF4 skips such commands as unnecessary. | |
| 1397 | + | - FiF3 can save **dialog layouts**. FiF4 saves layout as part of preset. | |
| 1398 | + | - Like FiF3, FiF4 has the "Replace" functionality. | |
| 1399 | + | - Like FiF3, FiF4 can search **in project** folder(s). | |
| 1400 | + | ||
| 1401 | + | Main new features: | |
| 1402 | + | ||
| 1403 | + | - FiF4 can report the found fragment with its **around lines** (see "-?+?" button). | |
| 1404 | + | - FiF4 can search **multi-line fragments** (see "+" button). | |
| 1405 | + | - FiF4 can search in **many start folders**. | |
| 1406 | + | - FiF4 allows to use **lexer data** to filter and report fragments (in/out string/comment, lexer path). | |
| 1407 | + | - FiF4 allows to show lines in the Results with its **lexer colors** from source files. | |
| 1408 | + | - FiF4 allows to use **macro-variables** (OS environments, properties of current file/tab and free-set names) in any editable fields . | |
| 1409 | + | - FiF4 has **statusbar** to show statistics of the last search: folders/files/fragments/timing. | |
| 1410 | + | - FiF4 allows to **reformat Results** (change tree type and more) without new search. | |
| 1411 | + | - FiF4 allows to show **modification time** of files in the Results. | |
| 1412 | + | ||
| 1413 | + | # Terminal | |
| 1414 | + | ||
| 1415 | + | There are currently 3 terminal plugins: | |
| 1416 | + | ||
| 1417 | + | - Terminal: simplest plugin. | |
| 1418 | + | - Terminal Plus: most feature-rich plugin, but its UI may be too complex for beginners. | |
| 1419 | + | - ExTerminal: middle in the feature set, but its UI is very simple. | |
| 1420 | + | ||
| 1421 | + | Let's take ExTerminal plugin, and show how to perform some task with it, under Linux. Task: run Python script which uses 'input()' function. The simpest Terminal plugin cannot handle 'input()' function, but ExTerminal will work good. Let's take Python script with content: | |
| 1422 | + | ||
| 1423 | + | ``` python | |
| 1424 | + | x = int(input('Enter x: ')) | |
| 1425 | + | w = int(input('Enter w: ')) | |
| 1426 | + | print(x*w) | |
| 1427 | + | ``` | |
| 1428 | + | ||
| 1429 | + | Steps: | |
| 1430 | + | ||
| 1431 | + | - Save our script to file ~/myfolder/tt.py | |
| 1432 | + | - Install ExTerminal, restart CudaText | |
| 1433 | + | - Run ExTerminal by clicking its bottom-bar-icon | |
| 1434 | + | - In ExTerminal, enter "cd ~/myfolder", so file tt.py will be in the current directory. You can enter "ls *.py" to see all python files in the current directory. | |
| 1435 | + | - In ExTerminal, enter "python3 tt.py" | |
| 1436 | + | ||
| 1437 | + | Script should work and show 2 input-prompts. | |
| 1438 | + | ||
| 1439 | + | ```text | |
| 1440 | + | user@user:~/myfolder$ ls *.py | |
| 1441 | + | a.py test.py tt.py | |
| 1442 | + | user@user:~/myfolder$ python3 tt.py | |
| 1443 | + | Enter x: 10 | |
| 1444 | + | Enter w: 20 | |
| 1445 | + | 200 | |
| 1446 | + | ``` | |
| 1447 | + | ||
| 1448 | + | How to open ExTerminal in the directory of the current editor file? You can do this: | |
| 1449 | + | ||
| 1450 | + | - Hover mouse over ExTerminal button in the bottom-bar. It must show tooltip like "ExTerminal 1". | |
| 1451 | + | - Right-click this button, popup menu appears, from the popup menu choose "New terminal". This will create another ExTerminal button+panel. New panel has the directory of the current editor file. | |
| 1452 | + | - To not produce too much ExTerminal buttons, use "Close terminal" from the popup menu. | |
| 1453 | + | ||
| 1454 | + | # Configure Menu | |
| 1455 | + | ||
| 1456 | + | Plugin "Configure Menu" (in Addons Manager) allows to change CudaText menus. You can add items to the CudaText top-menu, top menu submenu, editor context-menu, tab header context-menu and dropdown submenu of toolbar buttons. Plugin can create file (settings/menu.json) with default menu configuration, which you edit to customize all menus. File has items like: | |
| 1457 | + | ||
| 1458 | + | ``` json | |
| 1459 | + | ,{"cap":"&Save", "cmd":"cmd_FileSave"} | |
| 1460 | + | ``` | |
| 1461 | + | ||
| 1462 | + | How to add here built-in commands? See identifiers of CudaText commands in the file "py/cudatext_cmd.py", they have prefixes "cCommand_" (low level commands) and "cmd_" (high level commands). For example, "cmd_FileSave" is the command to save current file. | |
| 1463 | + | ||
| 1464 | + | How to add here plugin commands? For example, you have plugin "Comments", it is in the folder "py/cuda_comments". See plugin's file install.inf, and find there needed Python methods. Then add in the "settings/menu.json" item like this: | |
| 1465 | + | ||
| 1466 | + | ``` json | |
| 1467 | + | ,{"cap":"Toggle line comment", "cmd":"module=cuda_comments;cmd=cmt_toggle_line_body;"} | |
| 1468 | + | ``` | |
| 1469 | + | ||
| 1470 | + | Here "cuda_comments" is plugin folder name, and "cmt_toggle_line_body" is Python method from install.inf. | |
| 1471 | + | ||
| 1472 | + | You can add items to the CudaText top-menu and/or context-menu, it is different sections in "menu.json". Possible root sections in "menu.json" are listed in the API wiki page: [[CudaText API|CudaText_API#menu_proc_-_Menu_id]]. | |
| 1473 | + | ||
| 1474 | + | Example screenshot shows how "menu.json" will look with new items for context-menu: | |
| 1475 | + | ||
| 1476 | + | 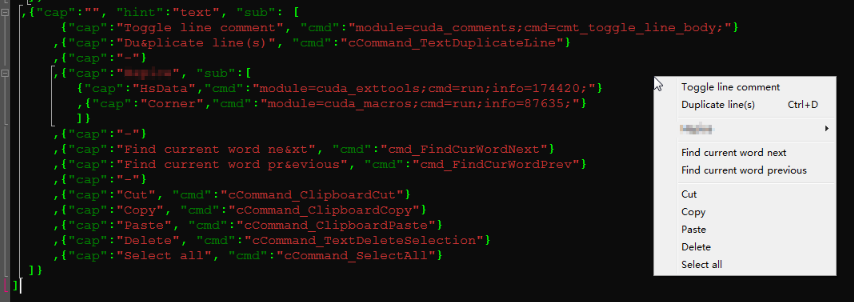 | |
| 1477 | + | ||
| 1478 | + | Example screenshot also shows tricks: how to write items for "External Tools" items and for "Macros" items: see lines with "cuda_exttools" and with "cuda_macros". Here they are: | |
| 1479 | + | ||
| 1480 | + | ``` json | |
| 1481 | + | {"cap": "SomeToolName", "cmd": "module=cuda_exttools;cmd=run;info=174420;"} | |
| 1482 | + | ,{"cap": "SomeMacroName", "cmd": "module=cuda_macros;cmd=run;info=87635;"} | |
| 1483 | + | ``` | |
| 1484 | + | ||
| 1485 | + | These special lines need special integer IDs. You can find these IDs in the config files of both plugins: External Tools / Macros. For example, to find Extertal Tools IDs, open "settings/exttools.json". Here is a fragment of this file, which shows "id" value of the tool "C - compile": | |
| 1486 | + | ||
| 1487 | + | ``` json | |
| 1488 | + | { | |
| 1489 | + | "ver": "20151209", | |
| 1490 | + | "list": [ | |
| 1491 | + | { | |
| 1492 | + | "id": 254653, | |
| 1493 | + | "nm": "C - compile", | |
| 1494 | + | "file": "gcc", | |
| 1495 | + | "ddir": "{FileDir}", | |
| 1496 | + | "shll": false, | |
| 1497 | + | "prms": "\"{FileNameOnly}\" -o \"{FileNameNoExt}\"", | |
| 1498 | + | "savs": "N", | |
| 1499 | + | "rslt": "OP", | |
| 1500 | + | "encd": "utf_8", | |
| 1501 | + | "lxrs": "C,C++", | |
| 1502 | + | "pttn": "(?P<file>[\\w\\.\\-]+):(?P<line>\\d+):(?P<col>\\d+):.+", | |
| 1503 | + | }, | |
| 1504 | + | ``` | |
| 1505 | + | ||
| 1506 | + | # Config Toolbar | |
| 1507 | + | ||
| 1508 | + | Plugin allows to change the content of the main (horizontal) toolbar: hide standard buttons, add user buttons for any actions, customize icons and nesting of menu items. | |
| 1509 | + | ||
| 1510 | + | For example, you installed two plugins: | |
| 1511 | + | ||
| 1512 | + | - Config Toolbar | |
| 1513 | + | - Color Text | |
| 1514 | + | ||
| 1515 | + | And you want to call command "Apply bold" (from "Color Text") via toolbar. How to add such a button? Picture highlights your steps. | |
| 1516 | + | ||
| 1517 | + | 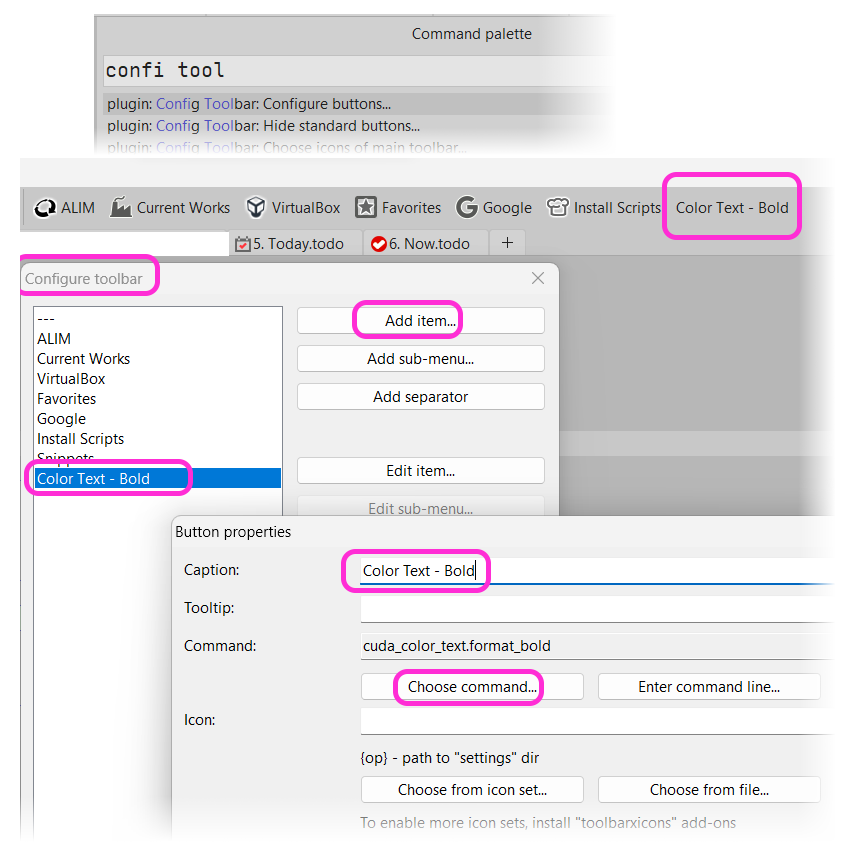 | |
| 1518 | + | ||
| 1519 | + | - From the Command Palette, call the item "Config Toolbar: Configure buttons...". Dialog will appear from the plugin. | |
| 1520 | + | - In the "Configure toolbar" dialog, press "Add item...", and fill fields of new dialog "Button properties". | |
| 1521 | + | - Caption | |
| 1522 | + | - Tooltip (optional) | |
| 1523 | + | - Command: should be "cuda_color_text.format_bold" for our task. You cannot type this text, instead press "Choose command" and find the command there, in the Command Palette-like menu. | |
| 1524 | + | - Icon (optional) | |
| 1525 | + | ||
| 1526 | + | # Intext Bookmarks | |
| 1527 | + | ||
| 1528 | + | Plugin allows to place special marks, and to show Goto dialog for its special marks. These are not usual CudaText bookmarks, but text lines, which are recognized only by this plugin. | |
| 1529 | + | ||
| 1530 | + | Plugin adds menu items in "Plugins / In-text Bookmarks": | |
| 1531 | + | ||
| 1532 | + | - List for current tab -- show all marks in the current document | |
| 1533 | + | - List for all tabs -- show all marks in all opened UI-tabs | |
| 1534 | + | - Go to next | |
| 1535 | + | - Go to previous | |
| 1536 | + | - Add -- add a new mark at caret position | |
| 1537 | + | ||
| 1538 | + | "Special" lines are supported even for files without lexer, and files with lexer if lexer doesn't support comments. For such poor files, plugin will add special lines like "//NOTE: comment_text". | |
| 1539 | + | ||
| 1540 | + | You can customize that special lines, using plugin configuration dialog: menu item "Options / Settings-plugins / In-text Bookmarks". Dialog gives such options: | |
| 1541 | + | ||
| 1542 | + | - Bookmark signs: NOTE: NB! TODO: todo: todo. FIX: | |
| 1543 | + | - Comment sign: // | |
| 1544 | + | ||
| 1545 | + | That configuration means that for "poor" files (without lexer, or with lexer without line comments), plugin uses lines beginning with "//NOTE:" or "//NB!" or "//TODO:" etc. For files with rich lexers, plugin uses lexer's line-comment prefix. | |
| 1546 | + | ||
| 1547 | + | # Color Text | |
| 1548 | + | ||
| 1549 | + | Plugin "Color Text" gives several commands (in the Plugins menu) to add coloring to text ranges. Plugin uses the selected text, without selection it uses word under first caret. On applying the coloring, plugin marks file as "modified". Plugin is suitable for files with any lexer, it adds its colors over the lexer highlight. | |
| 1550 | + | ||
| 1551 | + | 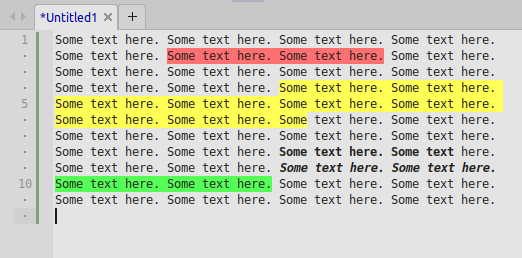 | |
| 1552 | + | ||
| 1553 | + | The data of coloring is saved to additional 'helper file' with extension .cuda-colortext, in the folder of the original file. After you delete this 'helper file', plugin will not load its data on next start. | |
| 1554 | + | ||
| 1555 | + | Not only background color can be changed, but also border color, and font styles (bold, italic, stikeout). To specify colors/styles, you have to edit the plugin config file. To edit the config file, call menu item "Options / Settings-plugins / Color Text". Config file has sections for colors/styles, and usual options: | |
| 1556 | + | ||
| 1557 | + | - "all_words": Colorize all occurrences of fragment. | |
| 1558 | + | - "case_sensitive": Case sensitive search for other occurrences. | |
| 1559 | + | - "whole_words": Colorize only those occurrences, which are whole words. | |
| 1560 | + | - "show_on_map": Show added colored marks also on micro-map. | |
| 1561 | + | ||
| 1562 | + | # Insert Pics | |
| 1563 | + | ||
| 1564 | + | CudaText gives the plugin API to show pictures between the text lines. These spaces between lines are called "gaps". Plugin "Insert Pics" exists to show picture files in gaps. It saves pictures in the helper files (using Base64 encoding), with extension .cuda-pic, near the original text file. Files with pictures look like this: | |
| 1565 | + | ||
| 1566 | + | 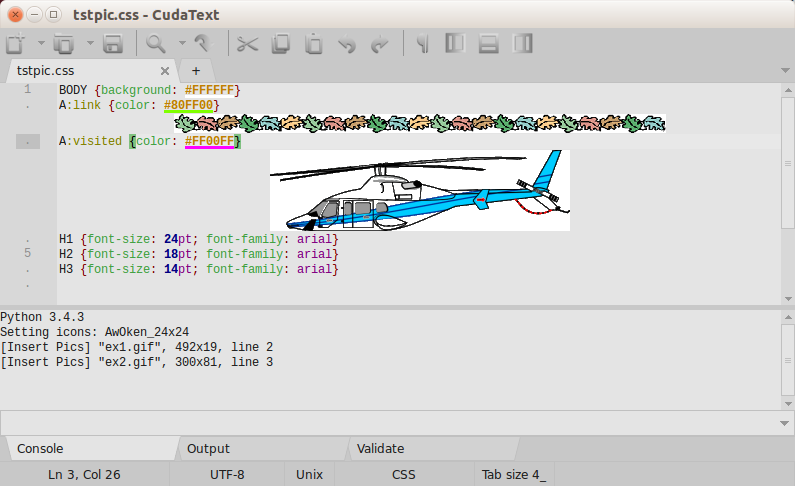 | |
| 1567 | + | ||
| 1568 | + | - You can use any lexer for files with pictures. | |
| 1569 | + | - You can add the unlimited number of pictures. But only one picture per "gap". | |
| 1570 | + | - You can add/delete pictures later, using plugin's commands in menu "Plugins / Insert Pics". | |
| 1571 | + | - When you delete the "helper file" (located in the same folder), all pictures will be lost for plugin. | |
| 1572 | + | ||
| 1573 | + | # Complete From Text | |
| 1574 | + | ||
| 1575 | + | Plugin allows to show auto-completion listbox with words from the current file (or all opened UI-tabs, by option). E.g. if you typed "op" and press Ctrl+Space (default auto-completion hotkey), it may suggest previously mentioned words "operations", "opinion", "option" etc. Plugin is not smart like "LSP Client" plugin, so expect lot of 'false positives' in its listbox. | |
| 1576 | + | ||
| 1577 | + | 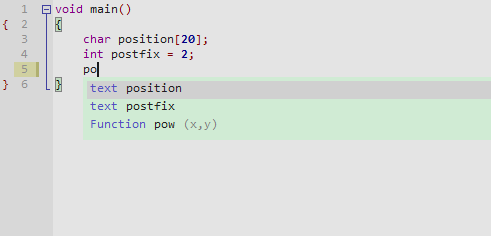 | |
| 1578 | + | ||
| 1579 | + | In the picture above, one word was taken from C lexer's C.acp file (this is a feature). | |
| 1580 | + | ||
| 1581 | + | Plugin is preconfigured to work with small set of lexers: none-lexer, Ini files, Markdown, reStructuredText, Properties. Here is how to use it for let's say "C" lexer: | |
| 1582 | + | ||
| 1583 | + | - Install the plugin | |
| 1584 | + | - Call menu item "Options / Settings-plugins / Complete From Text" | |
| 1585 | + | - This opens the "plugins.ini" file | |
| 1586 | + | - Find section "\[complete_from_text\]", add ",c" (without quotes) to the line "lexers=" | |
| 1587 | + | - Restart CudaText | |
| 1588 | + | ||
| 1589 | + | Plugin has more options in that "plugins.ini" file: | |
| 1590 | + | ||
| 1591 | + | - 'lexers': comma-separated lexer names, ie for which lexers to work; specify none-lexer as '-'. | |
| 1592 | + | - 'min_len': minimal word length, words of smaller length will be ignored. | |
| 1593 | + | - 'max_lines': if document has bigger count of lines, ignore this document. | |
| 1594 | + | - 'case_sens': case-sensitive; words starting with 'A' will be ignored when you typed 'a'. | |
| 1595 | + | - 'no_comments': ignore words inside "syntax comments" (lexer specific). | |
| 1596 | + | - 'no_strings': ignore words inside "syntax strings" (lexer specific). | |
| 1597 | + | - 'what_editors': which documents (ie UI tabs) to read to get words. Values: | |
| 1598 | + | - 0: only current document. | |
| 1599 | + | - 1: all opened documents. | |
| 1600 | + | - 2: all opened documents with the same lexer. | |
| 1601 | + | - 'use_acp': add suggestions from autocomplete files in 'data/autocomplete' | |
| 1602 | + | - 'case_split': expands suggestions, autocompletion for 'AB' will include 'AzzBzz', so to get 'ValueError' just typing 'VE' (or 'VaE', 'VErr', 'ValErr' etc.) and calling on autocompletion will suggest it. | |
| 1603 | + | - 'underscore_split': expands suggestions, autocompletion for 'AB' will include 'AZZ_BZZ', so to get 'supports_bytes_environ' just typing 'sb' (or 'sbe', 'supbyenv' etc.) and calling on autocompletion will suggest it. | |
| 1604 | + | ||
| 1605 | + | Plugin supports CudaText option "nonword_chars", so for example words with '\$' char are also added to completions, if CudaText option is configured so. | |
| 1606 | + | ||
| 1607 | + | # Embedded Editor | |
| 1608 | + | ||
| 1609 | + | Plugin "Embedded Editor" shows "included" file in embedded editor - additional editor UI control is shown between the text lines. For example, you can open included CSS / JS files while editing the HTML file. | |
| 1610 | + | ||
| 1611 | + | 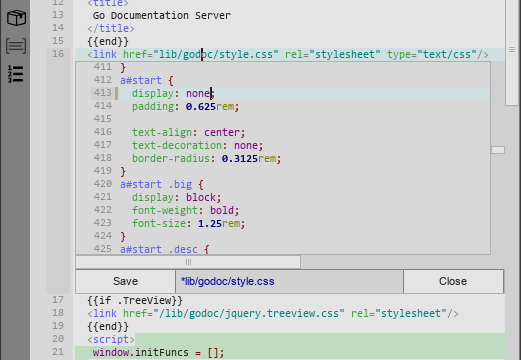 | |
| 1612 | + | ||
| 1613 | + | It adds menu item to show/hide embedded editor in the current document, for the current caret position: "Plugins / Embedded Editor / Toggle". | |
| 1614 | + | ||
| 1615 | + | By default, plugin searches for the included filename inside double-quotes, surrounding the caret position. This works OK for HTML and many other documents. | |
| 1616 | + | ||
| 1617 | + | For example, when you have opened file "/folder/file.html", and placed caret inside first double-quotes: | |
| 1618 | + | ||
| 1619 | + | ``` html | |
| 1620 | + | <link href="css/style.css" rel="stylesheet" type="text/css"/> | |
| 1621 | + | ``` | |
| 1622 | + | ||
| 1623 | + | then embedded editor will be opened for file "/folder/css/style.css". | |
| 1624 | + | ||
| 1625 | + | The search can be configured, though. For example, plugin can be used in Pascal files for include-directives: | |
| 1626 | + | ||
| 1627 | + | ``` pascal | |
| 1628 | + | {$I path/filename.inc} | |
| 1629 | + | ``` | |
| 1630 | + | ||
| 1631 | + | Plugin has 2 config files, you will see 2 menu items in the "Options / Settings-plugins / Embedded Editor". Read more about config files in the readme.txt of plugin. | |
| 1632 | + | ||
| 1633 | + | # Breadcrumbs | |
| 1634 | + | ||
| 1635 | + | Plugin "Breadcrumbs" shows the toolbar widget (modern name is breadcrumb bar) below or on top of the editor for quick file-system navigation. For example, when you have active editor with filename "/home/user/mydir/myfile.ext", widget shows buttons: | |
| 1636 | + | ||
| 1637 | + | [ home / user / mydir / myfile.ext ] | |
| 1638 | + | ||
| 1639 | + | It can also show the "~" button for the home directory (by option): | |
| 1640 | + | ||
| 1641 | + | [ ~ / mydir / myfile.ext ] | |
| 1642 | + | ||
| 1643 | + | 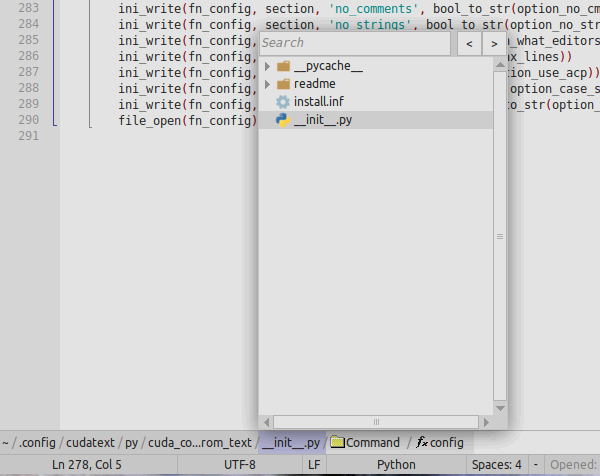 | |
| 1644 | + | ||
| 1645 | + | Clicking on each button shows the popup with file-system listing, showing the folder containing the clicked item. This popup supports basic tree-view navigation, you can click files there to open them in CudaText. | |
| 1646 | + | ||
| 1647 | + | Plugin can also show buttons for Code-Tree nodes. This must be enabled first in the config file - turn on the option "code_navigation". Clicking the buttons from the code-tree shows the same tree-popup but with a different content - with symbols of the documents. Clicking the nodes in the tree-popup scrolls the document to different symbols. | |
| 1648 | + | ||
| 1649 | + | # Spell Checker | |
| 1650 | + | ||
| 1651 | + | Frequent question: how to make spell checking 'live', ie run it after each change? Do this: | |
| 1652 | + | ||
| 1653 | + | - Menu "Options / Settings-plugins / Spell Checker / Configure events": check there all events. | |
| 1654 | + | - Menu "Options / Settings-plugins / Spell Checker / Configure": check that your file-extension is enabled in the option "file_extension_list". Option value "*" means that all extensions are enabled. | |
| 1655 | + | - Restart CudaText. | |
| 1656 | + | ||
| 1657 | + | Now checking should be 'live'. Note: it needs a pause after text editing (about 1 second), because it uses "on_change_slow" to avoid slowdown on editing. | |
| 1658 | + | ||
| 1659 | + | # LSP Client | |
| 1660 | + | ||
| 1661 | + | Plugin "LSP Client" allows to use Microsoft LSP protocol in CudaText with servers for many languages. It requires that CudaText uses Python 3.6 or newer (otherwise you will see the error messagebox). | |
| 1662 | + | ||
| 1663 | + | LSP Client gives several commands in the "Plugins / LSP Client", and all these commands work only if server supports them. Some of LSP commands are: | |
| 1664 | + | ||
| 1665 | + | - Auto-completion: integrated with CudaText command "Auto-completion menu" (in the Command Palette). | |
| 1666 | + | - Go to definition: integrated with CudaText command "Go to definition" (in the Command Palette, and in the editor context menu). | |
| 1667 | + | - Function signature help: integrated with CudaText command "Show function hint" (in the Command Palette). | |
| 1668 | + | - Hover: shows the tooltip when you hover mouse above identifiers. You need the Ctrl key pressed while you hover. | |
| 1669 | + | ||
| 1670 | + | 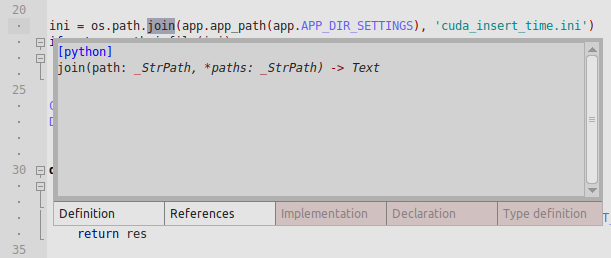 | |
| 1671 | + | ||
| 1672 | + | - Find references: finds all locations where an identifier (under first caret) is used and shows menu with locations. | |
| 1673 | + | ||
| 1674 | + | 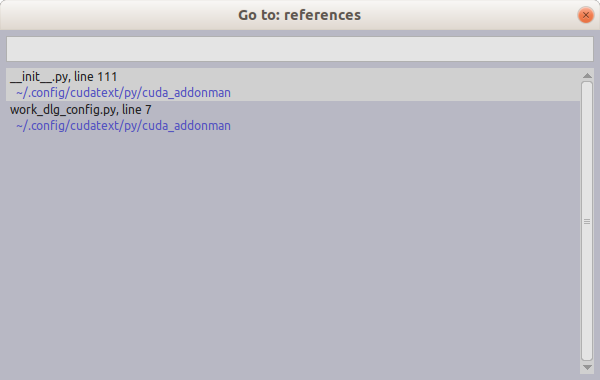 | |
| 1675 | + | ||
| 1676 | + | - Code linting: checking the correctness of the source code, places underlines and/or bookmarks on "incorrect lines". This feature is also implemented in #CudaLint and usually it works better/faster there. | |
| 1677 | + | - Document formatting: formatting of the source code by LSP server. This feature is also implemented in #CudaFormatter and usually it works better/faster there. | |
| 1678 | + | ||
| 1679 | + | All LSP servers should have a homepage with description of their functions, and installation information. | |
| 1680 | + | ||
| 1681 | + | In the server config "lsp_*.json", key "lexers", you need to specify the mapping between CudaText lexer names and LSP language names. For example, while CudaText lexer name is "Bash script", LSP language name is "bash". And while CudaText lexer name is "C#", LSP language name is "csharp". | |
| 1682 | + | ||
| 1683 | + | ``` json | |
| 1684 | + | { | |
| 1685 | + | "lexers": { | |
| 1686 | + | "C#": "csharp" | |
| 1687 | + | }, | |
| 1688 | + | ... | |
| 1689 | + | } | |
| 1690 | + | ``` | |
| 1691 | + | ||
| 1692 | + | LSP Client also has the settings file, use menu item to open it: "Options / Settings-plugins / LSP Client". | |
| 1693 | + | ||
| 1694 | + | ## LSP server for Python | |
| 1695 | + | ||
| 1696 | + | Project homepage is <https://github.com/python-lsp/python-lsp-server> . Note that this is fork of old, unmaintained, project "PyLS". Server supports: | |
| 1697 | + | ||
| 1698 | + | - Auto-completion | |
| 1699 | + | - Go to definition | |
| 1700 | + | - Function signature help | |
| 1701 | + | - Hover | |
| 1702 | + | - Find references | |
| 1703 | + | - Code linting | |
| 1704 | + | - Document formatting | |
| 1705 | + | ||
| 1706 | + | Use "pip" to install the server: | |
| 1707 | + | ||
| 1708 | + | ```text | |
| 1709 | + | pip install python-lsp-server | |
| 1710 | + | ``` | |
| 1711 | + | ||
| 1712 | + | This will expose the command "pylsp" on your PATH. Confirm that installation succeeded by running: | |
| 1713 | + | ||
| 1714 | + | ```text | |
| 1715 | + | pylsp --help | |
| 1716 | + | ``` | |
| 1717 | + | ||
| 1718 | + | Create the file "\[CudaText\]/settings/lsp_py.json" with text like this: | |
| 1719 | + | ||
| 1720 | + | ``` json | |
| 1721 | + | { | |
| 1722 | + | "lexers": { | |
| 1723 | + | "Python": "python" | |
| 1724 | + | }, | |
| 1725 | + | "cmd_windows": ["pylsp.exe"], | |
| 1726 | + | "cmd_macos": ["pylsp"], | |
| 1727 | + | "cmd_unix": ["pylsp"] | |
| 1728 | + | } | |
| 1729 | + | ``` | |
| 1730 | + | ||
| 1731 | + | Open some Python script, and call some commands of LSP Client. It will run the server, and it should work. | |
| 1732 | + | ||
| 1733 | + | ## LSP server for Python, pyright | |
| 1734 | + | ||
| 1735 | + | 1\. Install the server: | |
| 1736 | + | ||
| 1737 | + | ```text | |
| 1738 | + | pip install pyright | |
| 1739 | + | ``` | |
| 1740 | + | ||
| 1741 | + | - On Windows, add folder of "pyright-langserver.exe" to system PATH. | |
| 1742 | + | - On Linux/Unix, get the full path of the program, we will use this path in the next step. | |
| 1743 | + | ||
| 1744 | + | ```text | |
| 1745 | + | which pyright-langserver | |
| 1746 | + | ``` | |
| 1747 | + | ||
| 1748 | + | It outputs on Ubuntu: | |
| 1749 | + | ||
| 1750 | + | ```text | |
| 1751 | + | /home/user/.local/bin/pyright-langserver | |
| 1752 | + | ``` | |
| 1753 | + | ||
| 1754 | + | - On macOS, install pyright via PIP, not via Homebrew. On macOS, see what output you have after you call this command: "nodeenv env". If you see certificate error, try to fix it with the following command: | |
| 1755 | + | ||
| 1756 | + | ```text | |
| 1757 | + | /Applications/Python\ 3.10/Install\ Certificates.command | |
| 1758 | + | ``` | |
| 1759 | + | ||
| 1760 | + | 2\. Create config (CudaText)/settings/lsp_pyright.json: | |
| 1761 | + | ||
| 1762 | + | ``` json | |
| 1763 | + | { | |
| 1764 | + | "lexers": { | |
| 1765 | + | "Python": "python" | |
| 1766 | + | }, | |
| 1767 | + | "cmd_windows": ["pyright-langserver.exe", "--stdio"], | |
| 1768 | + | "cmd_unix": ["/home/user/.local/bin/pyright-langserver", "--stdio"], | |
| 1769 | + | "cmd_macos": ["/Library/Frameworks/Python.framework/Versions/3.10/bin/pyright-langserver", "--stdio"], | |
| 1770 | + | "log_stderr": true | |
| 1771 | + | } | |
| 1772 | + | ``` | |
| 1773 | + | ||
| 1774 | + | 3\. To disable type checking (which may be confusing), add key "settings" to the above config: | |
| 1775 | + | ||
| 1776 | + | ``` json | |
| 1777 | + | "settings": { | |
| 1778 | + | "python.analysis": { | |
| 1779 | + | "typeCheckingMode": "off" | |
| 1780 | + | } | |
| 1781 | + | } | |
| 1782 | + | ``` | |
| 1783 | + | ||
| 1784 | + | ## LSP server for JavaScript/ReactJS | |
| 1785 | + | ||
| 1786 | + | - Install lexer for ReactJS: "JavaScript Babel", from "Addons Manager". | |
| 1787 | + | - Install TypeScript and the LSP server. In Terminal: | |
| 1788 | + | ||
| 1789 | + | ```text | |
| 1790 | + | npm install -g typescript typescript-language-server | |
| 1791 | + | ``` | |
| 1792 | + | ||
| 1793 | + | - Create CudaText LSP config: file "settings/lsp_js.json" with such content: | |
| 1794 | + | ||
| 1795 | + | ``` json | |
| 1796 | + | { | |
| 1797 | + | "name": "JavaScript", | |
| 1798 | + | "lexers": { | |
| 1799 | + | "JavaScript": "javascript", | |
| 1800 | + | "JavaScript Babel": "javascriptreact" | |
| 1801 | + | }, | |
| 1802 | + | "cmd_unix": [ | |
| 1803 | + | "typescript-language-server", | |
| 1804 | + | "--stdio" | |
| 1805 | + | ], | |
| 1806 | + | "cmd_windows": [ | |
| 1807 | + | "typescript-language-server.cmd", | |
| 1808 | + | "--stdio" | |
| 1809 | + | ] | |
| 1810 | + | } | |
| 1811 | + | ``` | |
| 1812 | + | ||
| 1813 | + | This assumes that "typescript-language-server" is in the PATH (it is true on Ubuntu). For Windows, you need to find the folder of "typescript-language-server.cmd" and add it to PATH. | |
| 1814 | + | ||
| 1815 | + | ## LSP server for TypeScript | |
| 1816 | + | ||
| 1817 | + | - Install TypeScript lexer from "Addons Manager". | |
| 1818 | + | - Install TypeScript and the LSP server. In Terminal: | |
| 1819 | + | ||
| 1820 | + | ```text | |
| 1821 | + | npm install -g typescript typescript-language-server | |
| 1822 | + | ``` | |
| 1823 | + | ||
| 1824 | + | - Create CudaText LSP config: file "settings/lsp_ts.json" with such content: | |
| 1825 | + | ||
| 1826 | + | ``` json | |
| 1827 | + | { | |
| 1828 | + | "lexers": { | |
| 1829 | + | "TypeScript": "ts" | |
| 1830 | + | }, | |
| 1831 | + | "cmd_unix": [ | |
| 1832 | + | "typescript-language-server", | |
| 1833 | + | "--stdio" | |
| 1834 | + | ], | |
| 1835 | + | "cmd_windows": [ | |
| 1836 | + | "typescript-language-server.cmd", | |
| 1837 | + | "--stdio" | |
| 1838 | + | ] | |
| 1839 | + | } | |
| 1840 | + | ``` | |
| 1841 | + | ||
| 1842 | + | This assumes that "typescript-language-server" is in the PATH (it is true on Ubuntu). For Windows, you need to find the folder of "typescript-language-server.cmd" and add it to PATH. | |
| 1843 | + | ||
| 1844 | + | According to <https://www.zeusedit.com/lsp/typescript.html>, sometimes more complex config file may be needed. Here it is on Ubuntu: | |
| 1845 | + | ||
| 1846 | + | ``` json | |
| 1847 | + | { | |
| 1848 | + | "lexers": { | |
| 1849 | + | "TypeScript": "ts" | |
| 1850 | + | }, | |
| 1851 | + | "cmd_unix": [ | |
| 1852 | + | "typescript-language-server", | |
| 1853 | + | "--stdio", | |
| 1854 | + | "--log-level=4", | |
| 1855 | + | "--tsserver-log-verbosity=verbose", | |
| 1856 | + | "--tsserver-path=/usr/local/lib/node_modules/typescript/lib/" | |
| 1857 | + | ], | |
| 1858 | + | "cmd_windows": [ | |
| 1859 | + | "typescript-language-server.cmd", | |
| 1860 | + | "--stdio", | |
| 1861 | + | "--log-level=4", | |
| 1862 | + | "--tsserver-log-verbosity=verbose", | |
| 1863 | + | "--tsserver-path=\"%APPDATA%\\npm\\node_modules\\typescript\\lib\\\"" | |
| 1864 | + | ] | |
| 1865 | + | } | |
| 1866 | + | ``` | |
| 1867 | + | ||
| 1868 | + | How did I get the last path? It may be different on different Linux'es. It is from the "node_modules" dir which contains the **globally installed** Node.js modules. I found it by running "which typescript-language-server", it gave "/usr/local/bin/typescript-language-server". Then I checked symlink target for "/usr/local/bin/typescript-language-server" - it points to the sub-dir of needed "node_modules". | |
| 1869 | + | ||
| 1870 | + | Test the auto-completion on this "test.ts" file (with TypeScript lexer): | |
| 1871 | + | ||
| 1872 | + | ```text | |
| 1873 | + | document.body.g | |
| 1874 | + | ``` | |
| 1875 | + | ||
| 1876 | + | ## LSP server for C/C++ | |
| 1877 | + | ||
| 1878 | + | Install one of the servers following the instructions: | |
| 1879 | + | ||
| 1880 | + | - clangd: <https://clangd.llvm.org/installation.html> | |
| 1881 | + | - For Windows, you need to download "clangd-windows-x.x.x.zip" from <https://github.com/clangd/clangd/releases> . You need to add folder of "clangd.exe" to the OS PATH in Windows settings. | |
| 1882 | + | - ccls: <https://github.com/MaskRay/ccls/wiki/Build> + <https://github.com/MaskRay/ccls/wiki/Install> | |
| 1883 | + | ||
| 1884 | + | To use the server in LSP Client, create a file "lsp_c.json" in the "settings" directory with such content: | |
| 1885 | + | ||
| 1886 | + | ``` json | |
| 1887 | + | { | |
| 1888 | + | "lexers": { | |
| 1889 | + | "C++": "cpp", | |
| 1890 | + | "C": "c" | |
| 1891 | + | }, | |
| 1892 | + | "cmd_unix": [ | |
| 1893 | + | "clangd-12", | |
| 1894 | + | ], | |
| 1895 | + | "cmd_windows": [ | |
| 1896 | + | "clangd", | |
| 1897 | + | ], | |
| 1898 | + | } | |
| 1899 | + | ``` | |
| 1900 | + | ||
| 1901 | + | Replace "clangd*" with "ccls" if it was chosen. | |
| 1902 | + | ||
| 1903 | + | On Windows: you must add the "bin" directory of mingw64 to the PATH so clangd is in the PATH. | |
| 1904 | + | ||
| 1905 | + | ## LSP server for C# | |
| 1906 | + | ||
| 1907 | + | First, install C# lexer from "Addons Manager". | |
| 1908 | + | ||
| 1909 | + | 1\. Get OmniSharp server from GitHub <https://github.com/OmniSharp/omnisharp-roslyn/releases> . For Windows 64-bit it is the package "omnisharp-win-x64.zip" or "omnisharp-win-x64-net6.0.zip". Unzip this package to the folder "C:\OmniSharp", for example. It's not required to add that folder to system PATH. | |
| 1910 | + | ||
| 1911 | + | 2\. You need to install MSBuild. As of May 2022, OmniSharp does not include MSBuild. Download link can be found at the bottom of this page: <https://visualstudio.microsoft.com/downloads/?q=build+tools> - see "Build Tools for Visual Studio 2022". In the installation check the following option: ".NET desktop build tools". If you won't install MSBuild, OmniSharp server will fail, see more info here: <https://github.com/OmniSharp/omnisharp-vscode/issues/5120> . | |
| 1912 | + | ||
| 1913 | + | 3\. Create LSP config file: (CudaText)/settings/lsp_cs.json: | |
| 1914 | + | ||
| 1915 | + | ``` json | |
| 1916 | + | { | |
| 1917 | + | "lexers": { | |
| 1918 | + | "C#": "csharp" | |
| 1919 | + | }, | |
| 1920 | + | "cmd_windows": [ | |
| 1921 | + | "C:\\OmniSharp\\OmniSharp.exe", "-lsp", "-z" | |
| 1922 | + | ] | |
| 1923 | + | } | |
| 1924 | + | ``` | |
| 1925 | + | ||
| 1926 | + | Note that backslashes must be doubled (because of JSON format). | |
| 1927 | + | ||
| 1928 | + | 4\. To test that server works: create a file "test.cs" (with C# lexer active). Call auto-completion after "date.A". | |
| 1929 | + | ||
| 1930 | + | ``` csharp | |
| 1931 | + | using System; | |
| 1932 | + | ||
| 1933 | + | public class DateExample | |
| 1934 | + | { | |
| 1935 | + | public static void Main() | |
| 1936 | + | { | |
| 1937 | + | DateTime date; | |
| 1938 | + | date.A | |
| 1939 | + | } | |
| 1940 | + | } | |
| 1941 | + | ``` | |
| 1942 | + | ||
| 1943 | + | ## LSP server for CSS/SCSS/LESS | |
| 1944 | + | ||
| 1945 | + | The CSS (and SCSS, LESS) server is not easy to install, so here is the instruction, from the author of LSP Client: | |
| 1946 | + | ||
| 1947 | + | - Download the repository of VSCode: <https://github.com/microsoft/vscode> | |
| 1948 | + | - From the repository, get the folder "extensions/css-language-features/server" and enter in it. | |
| 1949 | + | - Replace the file "tsconfig.json" with content: | |
| 1950 | + | ||
| 1951 | + | ``` json | |
| 1952 | + | { | |
| 1953 | + | "compilerOptions": { | |
| 1954 | + | "target": "es2018", | |
| 1955 | + | "lib": [ | |
| 1956 | + | "es2018" | |
| 1957 | + | ], | |
| 1958 | + | "module": "commonjs", | |
| 1959 | + | "strict": true, | |
| 1960 | + | "alwaysStrict": true, | |
| 1961 | + | "noImplicitAny": true, | |
| 1962 | + | "noImplicitReturns": true, | |
| 1963 | + | "noImplicitOverride": true, | |
| 1964 | + | "noUnusedLocals": true, | |
| 1965 | + | "noUnusedParameters": true, | |
| 1966 | + | "forceConsistentCasingInFileNames": true, | |
| 1967 | + | ||
| 1968 | + | "outDir": "./out" | |
| 1969 | + | }, | |
| 1970 | + | "files": [ | |
| 1971 | + | "src/node/cssServerMain.ts" | |
| 1972 | + | ] | |
| 1973 | + | } | |
| 1974 | + | ``` | |
| 1975 | + | ||
| 1976 | + | - Install dependencies and TypeScript. In Terminal: | |
| 1977 | + | ||
| 1978 | + | ```text | |
| 1979 | + | npm install | |
| 1980 | + | npm install -g typescript | |
| 1981 | + | ``` | |
| 1982 | + | ||
| 1983 | + | - Compile it. In Terminal: | |
| 1984 | + | ||
| 1985 | + | ```text | |
| 1986 | + | npx tsc | |
| 1987 | + | ``` | |
| 1988 | + | ||
| 1989 | + | Server should be compiled. | |
| 1990 | + | ||
| 1991 | + | Create config file (CudaText)/settings/lsp_css.json: | |
| 1992 | + | ||
| 1993 | + | ``` json | |
| 1994 | + | { | |
| 1995 | + | "name": "vsc-css", | |
| 1996 | + | "lexers": { | |
| 1997 | + | "CSS": "css", | |
| 1998 | + | "SCSS": "scss", | |
| 1999 | + | "Sass": "sass", | |
| 2000 | + | "LESS": "less", | |
| 2001 | + | }, | |
| 2002 | + | "cmd_unix": [ | |
| 2003 | + | "node", | |
| 2004 | + | "path_to_server/server/out/node/cssServerMain.js", | |
| 2005 | + | "--stdio" | |
| 2006 | + | ] | |
| 2007 | + | } | |
| 2008 | + | ``` | |
| 2009 | + | ||
| 2010 | + | ## LSP server for HTML | |
| 2011 | + | ||
| 2012 | + | CudaText does not support built-in HTML auto-completion when caret is inside style="..." blocks. But LSP server supports it. Install server using Node.js: | |
| 2013 | + | ||
| 2014 | + | ```text | |
| 2015 | + | npm install --global vscode-html-ls-bin | |
| 2016 | + | ``` | |
| 2017 | + | ||
| 2018 | + | Make config file (CudaText)/settings/lsp_html.json: | |
| 2019 | + | ||
| 2020 | + | ``` json | |
| 2021 | + | { | |
| 2022 | + | "lexers": { | |
| 2023 | + | "HTML": "html", | |
| 2024 | + | }, | |
| 2025 | + | "cmd_windows": ["html-ls.cmd", "--stdio"], | |
| 2026 | + | "cmd_unix": ["html-ls", "--stdio"] | |
| 2027 | + | } | |
| 2028 | + | ``` | |
| 2029 | + | ||
| 2030 | + | Make sure the script "html-ls" ("html-ls.cmd" on Windows) is in the PATH. | |
| 2031 | + | ||
| 2032 | + | You may see wrong sorting of CSS properties in the auto-completion list, when auto-completion is called for CSS prop with dash char. To fix that, you need to remove dash char "-" from the "nonword_chars" option. Do it via lexer-specific config for HTML. | |
| 2033 | + | ||
| 2034 | + | ## LSP server for Java | |
| 2035 | + | ||
| 2036 | + | **Part 1. Information for Windows.** | |
| 2037 | + | ||
| 2038 | + | - Install lexer "Java" from Addons Manager. | |
| 2039 | + | ||
| 2040 | + | - Install [Java SE Development Kit 19](https://www.oracle.com/java/technologies/downloads/#jdk19-windows) or later. If you have usual Java (JRE) then better remove it first. Then run in Console: | |
| 2041 | + | ||
| 2042 | + | ```text | |
| 2043 | + | java -version | |
| 2044 | + | ``` | |
| 2045 | + | ||
| 2046 | + | It must show something like this: | |
| 2047 | + | ||
| 2048 | + | ```text | |
| 2049 | + | java version "19.0.1" 2022-10-18 | |
| 2050 | + | Java(TM) SE Runtime Environment (build 19.0.1+10-21) | |
| 2051 | + | Java HotSpot(TM) 64-Bit Server VM (build 19.0.1+10-21, mixed mode, sharing) | |
| 2052 | + | ``` | |
| 2053 | + | ||
| 2054 | + | - Download package "jdt-language-server-1.9.0-2022*.tar.gz" from [Eclipse JDT Language Server milestone builds](https://download.eclipse.org/jdtls/milestones/?d) and extract it to "C:\Java\jdt-language-server". | |
| 2055 | + | ||
| 2056 | + | - Create "C:\Java\jLSP.cmd" batch file with the following contents (edit if necessary): | |
| 2057 | + | ||
| 2058 | + | ```batch | |
| 2059 | + | @echo off | |
| 2060 | + | echo. | |
| 2061 | + | echo Usage: jLSP.cmd CacheDir | |
| 2062 | + | echo where "CacheDir" is an absolute path to your data directory. eclipse.jdt.ls stores workspace specific information in it. This should be unique per workspace/project. | |
| 2063 | + | echo. | |
| 2064 | + | ||
| 2065 | + | :: language server installation folder (adjust to suit) | |
| 2066 | + | set Directory=C:/Java/jdt-language-server | |
| 2067 | + | :: language server jar file (update based on version file of jar) | |
| 2068 | + | set JarFile=%Directory%/plugins/org.eclipse.equinox.launcher_1.6.400.v20210924-0641.jar | |
| 2069 | + | :: language server config folder location | |
| 2070 | + | set Config=%Directory%/config_win | |
| 2071 | + | ||
| 2072 | + | set CacheDir=%~1 | |
| 2073 | + | echo Directory: %Directory% | |
| 2074 | + | echo JarFile: %JarFile% | |
| 2075 | + | echo Config: %Config% | |
| 2076 | + | echo CacheDir: %CacheDir% | |
| 2077 | + | ||
| 2078 | + | java -Dosgi.bundles.defaultStartLevel=4 -Declipse.product=org.eclipse.jdt.ls.core.product -Dlog.level=ALL -noverify -Xmx1G -jar %JarFile% -configuration %Config% --add-modules=ALL-SYSTEM --add-opens java.base/java.util=ALL-UNNAMED --add-opens java.base/java.lang=ALL-UNNAMED -data %CacheDir% | |
| 2079 | + | ``` | |
| 2080 | + | ||
| 2081 | + | - Create LSP config file: (CudaText)/settings/lsp_java.json: | |
| 2082 | + | ||
| 2083 | + | ``` json | |
| 2084 | + | { | |
| 2085 | + | "lexers": { | |
| 2086 | + | "Java": "java" | |
| 2087 | + | }, | |
| 2088 | + | "cmd_windows": ["C:\\Java\\jLSP.cmd", "./cache_for_proj1"] | |
| 2089 | + | } | |
| 2090 | + | ``` | |
| 2091 | + | ||
| 2092 | + | Use testing file "test.java". Place caret on last code line after "System.g" and call auto-completion. | |
| 2093 | + | ||
| 2094 | + | ``` java | |
| 2095 | + | public class Example { | |
| 2096 | + | public static void main(String[] args) { | |
| 2097 | + | System.g | |
| 2098 | + | } | |
| 2099 | + | } | |
| 2100 | + | ``` | |
| 2101 | + | ||
| 2102 | + | **Part 2. Information for Linux.** | |
| 2103 | + | ||
| 2104 | + | - Install lexer "Java" from Addons Manager. | |
| 2105 | + | ||
| 2106 | + | - Install "Java SE Development Kit" from [Oracle website](https://www.oracle.com/java/technologies/downloads/#jdk19-linux) or from OS package manager. If you have usual Java (JRE) then better remove it first. | |
| 2107 | + | ||
| 2108 | + | On Ubuntu this command works (2022 year): | |
| 2109 | + | ||
| 2110 | + | ```text | |
| 2111 | + | sudo apt install openjdk-17-jre-headless | |
| 2112 | + | ``` | |
| 2113 | + | ||
| 2114 | + | Then run in Console: | |
| 2115 | + | ||
| 2116 | + | ```text | |
| 2117 | + | java -version | |
| 2118 | + | ``` | |
| 2119 | + | ||
| 2120 | + | It must show something like this: | |
| 2121 | + | ||
| 2122 | + | ```text | |
| 2123 | + | openjdk version "17.0.4" 2022-07-19 | |
| 2124 | + | OpenJDK Runtime Environment (build 17.0.4+8-Ubuntu-120.04) | |
| 2125 | + | OpenJDK 64-Bit Server VM (build 17.0.4+8-Ubuntu-120.04, mixed mode, sharing) | |
| 2126 | + | ``` | |
| 2127 | + | ||
| 2128 | + | - Download package "jdt-language-server-1.9.0-2022*.tar.gz" from [Eclipse JDT Language Server milestone builds](https://download.eclipse.org/jdtls/milestones/?d) and extract it to "~\jdt-language-server". | |
| 2129 | + | ||
| 2130 | + | - Create "~\jLSP.sh" shell script with the following contents, and make it executable: | |
| 2131 | + | ||
| 2132 | + | ``` bash | |
| 2133 | + | #!/bin/bash | |
| 2134 | + | echo | |
| 2135 | + | echo Usage: jLSP.sh CacheDir | |
| 2136 | + | echo where "CacheDir" is an absolute path to your data directory. eclipse.jdt.ls stores workspace specific information in it. This should be unique per workspace/project. | |
| 2137 | + | echo | |
| 2138 | + | ||
| 2139 | + | # language server installation folder (adjust to suit) | |
| 2140 | + | Directory=~/jdt-language-server | |
| 2141 | + | # language server jar file (update based on version file of jar) | |
| 2142 | + | JarFile=$Directory/plugins/org.eclipse.equinox.launcher_1.6.400.v20210924-0641.jar | |
| 2143 | + | # language server config folder location | |
| 2144 | + | Config=$Directory/config_linux | |
| 2145 | + | ||
| 2146 | + | CacheDir=$1 | |
| 2147 | + | echo Directory: $Directory | |
| 2148 | + | echo JarFile: $JarFile | |
| 2149 | + | echo Config: $Config | |
| 2150 | + | echo CacheDir: $CacheDir | |
| 2151 | + | ||
| 2152 | + | java -Dosgi.bundles.defaultStartLevel=4 -Declipse.product=org.eclipse.jdt.ls.core.product -Dlog.level=ALL -noverify -Xmx1G -jar $JarFile -configuration $Config --add-modules=ALL-SYSTEM --add-opens java.base/java.util=ALL-UNNAMED --add-opens java.base/java.lang=ALL-UNNAMED -data $CacheDir | |
| 2153 | + | ``` | |
| 2154 | + | ||
| 2155 | + | - Create LSP config file: (CudaText)/settings/lsp_java.json: | |
| 2156 | + | ||
| 2157 | + | ``` json | |
| 2158 | + | { | |
| 2159 | + | "lexers": { | |
| 2160 | + | "Java": "java", | |
| 2161 | + | }, | |
| 2162 | + | "cmd_unix": ["~/jLSP.sh", "./cache_for_proj1"], | |
| 2163 | + | } | |
| 2164 | + | ``` | |
| 2165 | + | ||
| 2166 | + | Use testing file "test.java". Place caret on last code line after "System.g" and call auto-completion. | |
| 2167 | + | ||
| 2168 | + | ``` java | |
| 2169 | + | public class Example { | |
| 2170 | + | public static void main(String[] args) { | |
| 2171 | + | System.g | |
| 2172 | + | } | |
| 2173 | + | } | |
| 2174 | + | ``` | |
| 2175 | + | ||
| 2176 | + | ## LSP server for Nim | |
| 2177 | + | ||
| 2178 | + | Server from <https://github.com/PMunch/nimlsp> works good. | |
| 2179 | + | ||
| 2180 | + | Config file (CudaText)/settings/lsp_nim.json: | |
| 2181 | + | ||
| 2182 | + | ``` json | |
| 2183 | + | { | |
| 2184 | + | "name": "nim-lsp", | |
| 2185 | + | "lexers": { | |
| 2186 | + | "Nim": "nim" | |
| 2187 | + | }, | |
| 2188 | + | "cmd_unix": [ | |
| 2189 | + | "~/.nimble/bin/nimlsp" | |
| 2190 | + | ] | |
| 2191 | + | } | |
| 2192 | + | ``` | |
| 2193 | + | ||
| 2194 | + | ## LSP server for Rust | |
| 2195 | + | ||
| 2196 | + | RLS server ( <https://github.com/rust-lang/rls> ) has been deprecated and is no longer supported. It has been replaced with Rust-analyzer. Users are encouraged to uninstall RLS and follow the instructions in the Rust-analyzer manual to install it. User needs to download binary file for his system: <https://github.com/rust-lang/rust-analyzer#quick-start> | |
| 2197 | + | ||
| 2198 | + | Create config (CudaText)/settings/lsp_rust.json: | |
| 2199 | + | ||
| 2200 | + | ``` json | |
| 2201 | + | { | |
| 2202 | + | "lexers": { | |
| 2203 | + | "Rust": "rust" | |
| 2204 | + | }, | |
| 2205 | + | "cmd_windows": ["rust-analyzer-x86_64-pc-windows-msvc.exe"], | |
| 2206 | + | "cmd_unix": ["rust-analyzer-x86_64-unknown-linux-gnu"] | |
| 2207 | + | } | |
| 2208 | + | ``` | |
| 2209 | + | ||
| 2210 | + | ## LSP server for AutoHotkey | |
| 2211 | + | ||
| 2212 | + | - Download the repository of AutoHotkey2: <https://github.com/thqby/vscode-autohotkey2-lsp> | |
| 2213 | + | - Extract and enter the directory: "vscode-autohotkey2-lsp-main" | |
| 2214 | + | - Install dependencies and TypeScript. In Terminal: | |
| 2215 | + | ||
| 2216 | + | ```text | |
| 2217 | + | npm install | |
| 2218 | + | npm install -g typescript | |
| 2219 | + | ``` | |
| 2220 | + | ||
| 2221 | + | - Enter the directory "server", and compile the server. In Terminal: | |
| 2222 | + | ||
| 2223 | + | ```text | |
| 2224 | + | npx tsc | |
| 2225 | + | ``` | |
| 2226 | + | ||
| 2227 | + | Server should be compiled now. To use the server in LSP Client, create the file "lsp_ahk.json" in the "settings" with such content: | |
| 2228 | + | ||
| 2229 | + | ``` json | |
| 2230 | + | { | |
| 2231 | + | "name": "AutoHotkey2", | |
| 2232 | + | "lexers": { | |
| 2233 | + | "AutoHotkey": "ahk" | |
| 2234 | + | }, | |
| 2235 | + | "cmd_unix": [ | |
| 2236 | + | "node", | |
| 2237 | + | "path_to_server/server/out/server.js", | |
| 2238 | + | "--stdio" | |
| 2239 | + | ] | |
| 2240 | + | } | |
| 2241 | + | ``` | |
| 2242 | + | ||
| 2243 | + | ## LSP server for Red | |
| 2244 | + | ||
| 2245 | + | 1\) On Linux x64. | |
| 2246 | + | ||
| 2247 | + | - Install Red. Download "red" binary, "chmod +x red", then copy it to PATH dir (/usr/bin on Ubuntu). Command "red" must work from Terminal. Red release 0.6.4 may give errors with the LSP server, so better install build from 30-Sep-2021. | |
| 2248 | + | - Install server from <https://github.com/bitbegin/redlangserver>, put the repo e.g. to ~/redlangserver. | |
| 2249 | + | - Create file "redlangserver.sh" and put it to some PATH dir. Content: | |
| 2250 | + | ||
| 2251 | + | ``` bash | |
| 2252 | + | #!/bin/bash | |
| 2253 | + | red ~/redlangserver/server.red | |
| 2254 | + | ``` | |
| 2255 | + | ||
| 2256 | + | - Create file (CudaText)/settings/lsp_red.json with content: | |
| 2257 | + | ||
| 2258 | + | ``` json | |
| 2259 | + | { | |
| 2260 | + | "lexers": { | |
| 2261 | + | "Red": "red" | |
| 2262 | + | }, | |
| 2263 | + | "cmd_unix": ["redlangserver.sh"], | |
| 2264 | + | "cmd_windows": ["c:\\red\\red.exe", "--cli", "c:\\red\\redlangserver\\server.red"] | |
| 2265 | + | } | |
| 2266 | + | ``` | |
| 2267 | + | ||
| 2268 | + | Server should work now. It gives: mouse hover tooltips (Ctrl + mouse hovering over names), go to definition. | |
| 2269 | + | ||
| 2270 | + | 2\) On Windows 10 x64. | |
| 2271 | + | ||
| 2272 | + | - Install Red to "c:\Red". Tested the build from 02-Oct-2021. | |
| 2273 | + | - Install server from <https://github.com/bitbegin/redlangserver>, put the repo to "c:\Red\redlangserver". | |
| 2274 | + | - Run once the command "c:\red\red.exe --cli", it will print "Compiling Red console..." with the big pause. | |
| 2275 | + | - Create file (CudaText)\settings\lsp_red.json with the same content as for Unix. Adjust path to Red folder, if needed. | |
| 2276 | + | ||
| 2277 | + | Server should work now. It gives: mouse hover tooltips (Ctrl + mouse hovering over names), go to definition (works not always, logic when it works is unclear). | |
| 2278 | + | ||
| 2279 | + | Note: don't create .bat or .cmd file with the "red.exe" calling, because it does not work in LSP Client for some reason. | |
| 2280 | + | ||
| 2281 | + | ## LSP server for PHP | |
| 2282 | + | ||
| 2283 | + | 1\. Install PHP, Composer. PHP versions 7.4.3 and 8.1 are OK. | |
| 2284 | + | ||
| 2285 | + | 2\. Install php-dom extension. php-dom extension is the only needed for this server to work, and it must be installed before you run "composer update". | |
| 2286 | + | ||
| 2287 | + | 3\. Clone Git repo <https://github.com/zobo/php-language-server> , and get the full path to the file "php-language-server.php", it will be needed in the next step. See readme "Installation" part, you must do some steps with Composer first, e.g. "composer update" inside php-language-server directory. | |
| 2288 | + | ||
| 2289 | + | 4\. Create LSP config (CudaText)/settings/lsp_php.json: | |
| 2290 | + | ||
| 2291 | + | ``` json | |
| 2292 | + | { | |
| 2293 | + | "name": "PHP", | |
| 2294 | + | "lexers": { | |
| 2295 | + | "PHP": "php" | |
| 2296 | + | }, | |
| 2297 | + | "tcp_port": 12345, | |
| 2298 | + | "cmd_unix": [ | |
| 2299 | + | "php", | |
| 2300 | + | "folder_of_server/bin/php-language-server.php", | |
| 2301 | + | "--tcp-server=127.0.0.1:12345" | |
| 2302 | + | ], | |
| 2303 | + | "cmd_windows": [ | |
| 2304 | + | "php", | |
| 2305 | + | "D:\\programm\\php\\php-language-server\\bin\\php-language-server.php", | |
| 2306 | + | "--tcp-server=127.0.0.1:12345" | |
| 2307 | + | ] | |
| 2308 | + | } | |
| 2309 | + | ``` | |
| 2310 | + | ||
| 2311 | + | Server should work now. It gives these features: <https://github.com/zobo/php-language-server#features> . | |
| 2312 | + | ||
| 2313 | + | Auto-completion works, it is not working if you open .php file that is outside of current CudaText project directory. In LSP Client config there is a parameter named "root_dir_source". For zobo's server to index .php files they must be inside this dir. In CudaText Project Manager you must save your project file to your php project location, otherwise the root_dir will be wrong. | |
| 2314 | + | ||
| 2315 | + | Note: on Windows, in rare cases hanging php.exe process can prevent LSP server from starting. If you see "ReadLoopError" in Console, try to kill all "php" processes and try again. | |
| 2316 | + | ||
| 2317 | + | ## LSP server for Bash | |
| 2318 | + | ||
| 2319 | + | - Install Node.js, see readme here: <https://github.com/nodesource/distributions/blob/master/README.md> | |
| 2320 | + | - Install Bash server, see readme here: <https://github.com/bash-lsp/bash-language-server> | |
| 2321 | + | - Install Shellcheck from <https://www.shellcheck.net/> - "We strongly recommend that you install shellcheck to enable linting" | |
| 2322 | + | - On Windows, maybe you need to add folder of "bash-language-server.cmd" to system PATH. | |
| 2323 | + | - Create file (CudaText)/settings/lsp_bash.json with content: | |
| 2324 | + | ||
| 2325 | + | ``` json | |
| 2326 | + | { | |
| 2327 | + | "lexers": { | |
| 2328 | + | "Bash script": "bash" | |
| 2329 | + | }, | |
| 2330 | + | "cmd_windows": ["bash-language-server.cmd", "start"], | |
| 2331 | + | "cmd_unix": ["bash-language-server", "start"] | |
| 2332 | + | } | |
| 2333 | + | ``` | |
| 2334 | + | ||
| 2335 | + | ## LSP server for D | |
| 2336 | + | ||
| 2337 | + | First, install D lexer from "Addons Manager". | |
| 2338 | + | ||
| 2339 | + | 1\. Install DLang into "C:\D", for example. For 64-bit compiler, add folder "C:\D\dmd2\windows\bin64" to system PATH. Check that "dmd" and "dub" commands run OK from Windows console. | |
| 2340 | + | ||
| 2341 | + | 2\. Install the LSP server, run from console: | |
| 2342 | + | ||
| 2343 | + | ```text | |
| 2344 | + | dub fetch dls | |
| 2345 | + | ``` | |
| 2346 | + | ||
| 2347 | + | This must show output like | |
| 2348 | + | ||
| 2349 | + | ```text | |
| 2350 | + | C:\D>dub fetch dls | |
| 2351 | + | Fetching dls 0.26.2... | |
| 2352 | + | Please note that you need to use `dub run <pkgname>` or add it to dependencies of your package to actually use/run it. dub does not do actual installation of packages outside of its own ecosystem. | |
| 2353 | + | ``` | |
| 2354 | + | ||
| 2355 | + | 3\. Compile the LSP server, run from console: | |
| 2356 | + | ||
| 2357 | + | ```text | |
| 2358 | + | dub run dls:bootstrap | |
| 2359 | + | ``` | |
| 2360 | + | ||
| 2361 | + | This must show output like | |
| 2362 | + | ||
| 2363 | + | ```text | |
| 2364 | + | C:\D>dub run dls:bootstrap | |
| 2365 | + | Building package dls:bootstrap in C:\Users\user\AppData\Local\dub\packages\dls-0.26.2\dls\bootstrap\ | |
| 2366 | + | Running pre-generate commands for dls:i18n... | |
| 2367 | + | Performing "debug" build using C:\D\dmd2\windows\bin64\dmd.exe for x86_64. | |
| 2368 | + | dls:protocol 0.26.2: building configuration "library"... | |
| 2369 | + | dls:i18n 0.26.2: building configuration "library"... | |
| 2370 | + | dls:bootstrap 0.26.2: building configuration "application"... | |
| 2371 | + | Linking... | |
| 2372 | + | Running ../Users/user/AppData/Local/dub/packages/dls-0.26.2/dls/bootstrap/dls_bootstrap.exe | |
| 2373 | + | C:\Users\user\AppData\Local\dub\packages\.bin\dls-latest\dls.exe | |
| 2374 | + | ``` | |
| 2375 | + | ||
| 2376 | + | Copy to clipboard the last printed filename with dls.exe. | |
| 2377 | + | ||
| 2378 | + | 4\. Create the CudaText LSP config: (CudaText)/settings/lsp_d.json. The dls.exe filename is from the previous step. Note: backslashes must be doubled (because of JSON format). | |
| 2379 | + | ||
| 2380 | + | ``` json | |
| 2381 | + | { | |
| 2382 | + | "lexers": { | |
| 2383 | + | "D": "dlang" | |
| 2384 | + | }, | |
| 2385 | + | "cmd_windows": [ | |
| 2386 | + | "C:\\Users\\user\\AppData\\Local\\dub\\packages\\.bin\\dls-latest\\dls.exe", "--stdio" | |
| 2387 | + | ] | |
| 2388 | + | } | |
| 2389 | + | ``` | |
| 2390 | + | ||
| 2391 | + | 5\. Create test file "test.d" (with lexer D). Test that auto-completion works after "b.": | |
| 2392 | + | ||
| 2393 | + | ``` d | |
| 2394 | + | class A {int a; int a2;} | |
| 2395 | + | class B: A {int a3;} | |
| 2396 | + | ||
| 2397 | + | void foo(B b) | |
| 2398 | + | { | |
| 2399 | + | b. | |
| 2400 | + | } | |
| 2401 | + | ``` | |
| 2402 | + | ||
| 2403 | + | ## LSP server for Go | |
| 2404 | + | ||
| 2405 | + | Install lexer Go from "Addons Manager". | |
| 2406 | + | ||
| 2407 | + | 1\. Install Go. Make sure that Go binary is in the system PATH, and GOPATH variable is also set. | |
| 2408 | + | ||
| 2409 | + | 2\. Install the LSP server: | |
| 2410 | + | ||
| 2411 | + | ```text | |
| 2412 | + | go install golang.org/x/tools/gopls@latest | |
| 2413 | + | ``` | |
| 2414 | + | ||
| 2415 | + | In Ubuntu, this must create binary "gopls" in the folder "~/go/bin" (on Windows it may be "C:\Go\bin"), which is in the PATH. Check that "gopls" runs: | |
| 2416 | + | ||
| 2417 | + | ```text | |
| 2418 | + | gopls version | |
| 2419 | + | ``` | |
| 2420 | + | ||
| 2421 | + | It must give output like: | |
| 2422 | + | ||
| 2423 | + | ```text | |
| 2424 | + | golang.org/x/tools/gopls v0.9.5 | |
| 2425 | + | golang.org/x/tools/gopls@v0.9.5 h1:F3TO5th6TUg40FHrpxZfMkMlVaaTmByeEvylgVHGH2A= | |
| 2426 | + | ``` | |
| 2427 | + | ||
| 2428 | + | 3\. Create CudaText LSP config (CudaText)/settings/lsp_go.json: | |
| 2429 | + | ||
| 2430 | + | ``` json | |
| 2431 | + | { | |
| 2432 | + | "lexers": { | |
| 2433 | + | "Go": "go" | |
| 2434 | + | }, | |
| 2435 | + | "cmd_unix": [ | |
| 2436 | + | "gopls" | |
| 2437 | + | ], | |
| 2438 | + | "cmd_windows": [ | |
| 2439 | + | "gopls.exe" | |
| 2440 | + | ] | |
| 2441 | + | } | |
| 2442 | + | ``` | |
| 2443 | + | ||
| 2444 | + | 4\. See the content of GOPATH env variable, and create file "test.go" (with lexer Go) in that folder. Check that auto-completion works after "fmt.F": | |
| 2445 | + | ||
| 2446 | + | ``` go | |
| 2447 | + | package aa | |
| 2448 | + | import ("fmt") | |
| 2449 | + | ||
| 2450 | + | func main() { | |
| 2451 | + | fmt.F | |
| 2452 | + | } | |
| 2453 | + | ``` | |
| 2454 | + | ||
| 2455 | + | ## LSP server for Lua | |
| 2456 | + | ||
| 2457 | + | 1\. Install server for the command line from <https://github.com/sumneko/lua-language-server> . Find the full path of the file "lua-language-server" ("lua-language-server.exe" on Windows). | |
| 2458 | + | ||
| 2459 | + | 2\. Create LSP config (CudaText)/settings/lsp_lua.json: | |
| 2460 | + | ||
| 2461 | + | ``` json | |
| 2462 | + | { | |
| 2463 | + | "lexers": { | |
| 2464 | + | "Lua": "lua" | |
| 2465 | + | }, | |
| 2466 | + | "log_stderr": true, | |
| 2467 | + | "cmd_windows": ["D:\\Programs\\lua-lsp\\bin\\lua-language-server.exe"], | |
| 2468 | + | "cmd_unix": ["/path/to/lua-language-server"] | |
| 2469 | + | } | |
| 2470 | + | ``` | |
| 2471 | + | ||
| 2472 | + | ## LSP server for Scala | |
| 2473 | + | ||
| 2474 | + | Install lexer "Scala" from Addons Manager. Information for Windows. | |
| 2475 | + | ||
| 2476 | + | 1\. Install Coursier: <https://get-coursier.io/docs/cli-installation> | |
| 2477 | + | ||
| 2478 | + | 2\. Install Metals. Make sure "metals.bat" is in the system PATH. | |
| 2479 | + | ||
| 2480 | + | ```text | |
| 2481 | + | cs install metals | |
| 2482 | + | ``` | |
| 2483 | + | ||
| 2484 | + | 3\. Create LSP config file (CudaText)/settings/lsp_scala.json: | |
| 2485 | + | ||
| 2486 | + | ``` json | |
| 2487 | + | { | |
| 2488 | + | "lexers": { | |
| 2489 | + | "Scala": "scala" | |
| 2490 | + | }, | |
| 2491 | + | "cmd_windows": ["metals.bat"] | |
| 2492 | + | } | |
| 2493 | + | ``` | |
| 2494 | + | ||
| 2495 | + | Testing file for auto-completion: | |
| 2496 | + | ||
| 2497 | + | ``` pascal | |
| 2498 | + | object Hello extends App { | |
| 2499 | + | println("Hello, world") | |
| 2500 | + | } | |
| 2501 | + | ``` | |
| 2502 | + | ||
| 2503 | + | ## LSP server for Fortran | |
| 2504 | + | ||
| 2505 | + | Install lexer "Fortran" from Addons Manager. Steps show how to use server on Linux (Ubuntu 20.04) with Python 3 installed. | |
| 2506 | + | ||
| 2507 | + | 1\. Install the LSP server: | |
| 2508 | + | ||
| 2509 | + | ```text | |
| 2510 | + | pip install fortran-language-server | |
| 2511 | + | ``` | |
| 2512 | + | ||
| 2513 | + | Check that command runs OK: | |
| 2514 | + | ||
| 2515 | + | ```text | |
| 2516 | + | fortls -? | |
| 2517 | + | ``` | |
| 2518 | + | ||
| 2519 | + | And check its full path: | |
| 2520 | + | ||
| 2521 | + | ```text | |
| 2522 | + | which fortls | |
| 2523 | + | ``` | |
| 2524 | + | ||
| 2525 | + | Here it prints: "/home/user/.local/bin/fortls". We will need that full path in the next step, because short program name "fortls" gave errors for me. | |
| 2526 | + | ||
| 2527 | + | 2\. Create LSP config file: (CudaText)/settings/lsp_fortran.json: | |
| 2528 | + | ||
| 2529 | + | ``` json | |
| 2530 | + | { | |
| 2531 | + | "lexers": { | |
| 2532 | + | "Fortran": "fortran" | |
| 2533 | + | }, | |
| 2534 | + | "cmd_unix": [ | |
| 2535 | + | "/home/user/.local/bin/fortls" | |
| 2536 | + | ] | |
| 2537 | + | } | |
| 2538 | + | ``` | |
| 2539 | + | ||
| 2540 | + | 3\. Make test file "test.for" (with Fortran lexer). Test auto-completion after "CALL myv". | |
| 2541 | + | ||
| 2542 | + | ``` fortran | |
| 2543 | + | PROGRAM myprog | |
| 2544 | + | USE test_free, ONLY: scaled_vector | |
| 2545 | + | TYPE(scaled_vector) :: myvec | |
| 2546 | + | CALL myv | |
| 2547 | + | END PROGRAM | |
| 2548 | + | ``` | |
| 2549 | + | ||
| 2550 | + | ## LSP server for Markdown | |
| 2551 | + | ||
| 2552 | + | 1\. Get precompiled Marksman LSP server from GitHub: <https://github.com/artempyanykh/marksman/releases> | |
| 2553 | + | ||
| 2554 | + | 2\. On Windows, copy "marksman.exe" to some folder in PATH. On Linux, copy "marksman-linux" to this recommended folder in PATH: ~/.local/bin. Set executable permission for Linux binary. | |
| 2555 | + | ||
| 2556 | + | ```text | |
| 2557 | + | chmod +x marksman-linux | |
| 2558 | + | ``` | |
| 2461 | 2559 | ||
| 2462 | 2560 | 3\. Create config file (CudaText)/settings/lsp_md.json: | |
| 2463 | 2561 | ||
| 2464 | 2562 | ``` json | |
| 2465 | 2563 | { | |
| 2466 | 2564 | "lexers": { | |
| 2467 | 2565 | "Markdown": "markdown" | |
| 2468 | 2566 | }, | |
| 2469 | 2567 | "cmd_windows": ["marksman.exe"], | |
| 2470 | 2568 | "cmd_unix": ["marksman-linux"] | |
| 2471 | 2569 | } | |
| 2472 | 2570 | ``` | |
| 2473 | 2571 | ||
| 2474 | 2572 | Now auto-completion / goto-definition / hover-tooltip must work on this "test.md" file: | |
| 2475 | 2573 | ||
| 2476 | 2574 | ``` md | |
| 2477 | 2575 | [reference][abcd] | |
| 2478 | 2576 | [reference][a123] | |
| 2479 | 2577 | ||
| 2480 | 2578 | Some text. | |
| 2481 | 2579 | ||
| 2482 | 2580 | [abcd]: url "title" | |
| 2483 | 2581 | [a123]: url "title2" | |
| 2484 | 2582 | ``` | |
| 2485 | 2583 | ||
| 2486 | 2584 | ## LSP server for V | |
| 2487 | 2585 | ||
| 2488 | 2586 | - Install V lexer (from "Addons Manager / Plugins / Install") | |
| 2489 | 2587 | - Install V language | |
| 2490 | 2588 | - Install v-analyzer binary from <https://github.com/v-analyzer/v-analyzer> to a folder (that is included in PATH) | |
| 2491 | 2589 | - Create "lsp_v.json" in CudaText's "settings" folder with the following content: | |
| 2492 | 2590 | ||
| 2493 | 2591 | ``` json | |
| 2494 | 2592 | { | |
| 2495 | 2593 | "lexers": { | |
| 2496 | 2594 | "V": "v" | |
| 2497 | 2595 | }, | |
| 2498 | 2596 | "cmd_windows": ["v-analyzer.exe"], | |
| 2499 | 2597 | "cmd_unix": ["v-analyzer"], | |
| 2500 | 2598 | "cmd_macos": ["v-analyzer"] | |
| 2501 | 2599 | } | |
| 2502 | 2600 | ``` | |
| 2503 | 2601 | ||
| 2504 | 2602 | ## LSP server Vale | |
| 2505 | 2603 | ||
| 2506 | 2604 | Steps for Windows OS. | |
| 2507 | 2605 | ||
| 2508 | 2606 | - Install Vale server. Add path of "vale-ls.exe" to system PATH. | |
| 2509 | 2607 | - Create "lsp_vale.json" in CudaText's "settings" folder. Specify empty lexer name. | |
| 2510 | 2608 | ||
| 2511 | 2609 | ``` json | |
| 2512 | 2610 | { | |
| 2513 | 2611 | "lexers": { | |
| 2514 | 2612 | "": "" | |
| 2515 | 2613 | }, | |
| 2516 | 2614 | ||
| 2517 | 2615 | "cmd_windows": ["vale-ls.exe"], | |
| 2518 | 2616 | "log_stderr": true, | |
| 2519 | 2617 | "settings": { | |
| 2520 | 2618 | "configPath": "" | |
| 2521 | 2619 | } | |
| 2522 | 2620 | } | |
| 2523 | 2621 | ``` | |
| 2524 | 2622 | ||
| 2525 | 2623 | - You need to put config file to %UserProfile% folder. For example: "C:\Users\john\\.vale.ini". | |
| 2526 | 2624 | - Do not forget to run: "vale sync". | |
| 2527 | 2625 | - Vale server did not support filenames with spaces on Windows OS. To fix it, update Vale to 0.3.7 or newer. | |
| 2528 | 2626 | ||
| 2529 | 2627 | --- | |
| 2530 | 2628 | *From the Free Pascal wiki, page "CudaText plugins", as it stood on 2024-05-05 after a change by Alextp, out of the wiki's dump of 2024-05-26. Copyright stays with the author who wrote it, according to the old wiki's [[Licensing]] page. If you have concerns about this material, [message the admin](/wiki-contact).* | |
| 2531 | 2629 | Category: CudaText |