

BGRABitmap tutorial 2: what changed
Revision 1 to 2. Removed lines have a minus sign; added lines have a plus sign.
| Old | New | Line | |
|---|---|---|---|
| 1 | 1 | This tutorial shows you how to load an image and draw it on a form. | |
| 2 | 2 | ||
| 3 | 3 | ### Create a new project | |
| 4 | 4 | ||
| 5 | 5 | Create a new project and add a reference to [[BGRABitmap]], the same way as in [[BGRABitmap tutorial|the first tutorial]]. | |
| 6 | 6 | ||
| 7 | 7 | ### Load the bitmap | |
| 8 | 8 | ||
| 9 | 9 | Copy an image into your project directory. Let's suppose it's name is *image.png*. | |
| 10 | 10 | ||
| 11 | 11 | Add a private variable to the main form to store the image: | |
| 12 | 12 | ||
| 13 | 13 | ``` pascal | |
| 14 | 14 | TForm1 = class(TForm) | |
| 15 | 15 | private | |
| 16 | 16 | { private declarations } | |
| 17 | 17 | image: TBGRABitmap; | |
| 18 | 18 | public | |
| 19 | 19 | { public declarations } | |
| 20 | 20 | end; | |
| 21 | 21 | ``` | |
| 22 | 22 | ||
| 23 | 23 | Load the image when the form is created. To do this, double-click on the form, a procedure should appear in the code editor. Add the following [[TBGRACustomBitmap and IBGRAScanner|loading instruction]] (and don't forget to destroy the image at the end): | |
| 24 | 24 | ||
| 25 | 25 | ``` pascal | |
| 26 | 26 | procedure TForm1.FormCreate(Sender: TObject); | |
| 27 | 27 | begin | |
| 28 | 28 | image := TBGRABitmap.Create('image.png'); | |
| 29 | 29 | end; | |
| 30 | 30 | ||
| 31 | 31 | procedure TForm1.FormDestroy(Sender: TObject); | |
| 32 | 32 | begin | |
| 33 | 33 | image.Free; | |
| 34 | 34 | end; | |
| 35 | 35 | ``` | |
| 36 | 36 | ||
| 37 | 37 | ### Draw the bitmap | |
| 38 | 38 | ||
| 39 | 39 | Add an OnPaint handler. To do this, select the main form, then go to the object inspector, in the event tab, and double-click on the OnPaint line. Then, add the drawing code: | |
| 40 | 40 | ||
| 41 | 41 | ``` pascal | |
| 42 | 42 | procedure TForm1.FormPaint(Sender: TObject); | |
| 43 | 43 | begin | |
| 44 | 44 | image.Draw(Canvas,0,0,True); | |
| 45 | 45 | end; | |
| 46 | 46 | ``` | |
| 47 | 47 | ||
| 48 | 48 | Notice that the last parameter is set to True, which means opaque. If you want to take transparent pixels into account, encoded in the alpha channel, you must use False instead. But it can be slow to use transparent drawing on standard canvas, so if it is not necessary, use opaque drawing only. | |
| 49 | 49 | ||
| 50 | 50 | ### Code | |
| 51 | 51 | ||
| 52 | 52 | Finally you should have something like: | |
| 53 | 53 | ||
| 54 | 54 | ``` pascal | |
| 55 | 55 | unit UMain; | |
| 56 | 56 | ||
| 57 | 57 | {$mode objfpc}{$H+} | |
| 58 | 58 | ||
| 59 | 59 | interface | |
| 60 | 60 | ||
| 61 | 61 | uses | |
| 62 | 62 | Classes, SysUtils, FileUtil, LResources, Forms, Controls, Graphics, Dialogs, | |
| 63 | 63 | BGRABitmap, BGRABitmapTypes; | |
| 64 | 64 | ||
| 65 | 65 | type | |
| 66 | 66 | { TForm1 } | |
| 67 | 67 | ||
| 68 | 68 | TForm1 = class(TForm) | |
| 69 | 69 | procedure FormCreate(Sender: TObject); | |
| 70 | 70 | procedure FormDestroy(Sender: TObject); | |
| 71 | 71 | procedure FormPaint(Sender: TObject); | |
| 72 | 72 | private | |
| 73 | 73 | { private declarations } | |
| 74 | 74 | image: TBGRABitmap; | |
| 75 | 75 | public | |
| 76 | 76 | { public declarations } | |
| 77 | 77 | end; | |
| 78 | 78 | ||
| 79 | 79 | var | |
| 80 | 80 | Form1: TForm1; | |
| 81 | 81 | ||
| 82 | 82 | implementation | |
| 83 | 83 | ||
| 84 | 84 | { TForm1 } | |
| 85 | 85 | ||
| 86 | 86 | procedure TForm1.FormCreate(Sender: TObject); | |
| 87 | 87 | begin | |
| 88 | 88 | image := TBGRABitmap.Create('image.png'); | |
| 89 | 89 | end; | |
| 90 | 90 | ||
| 91 | 91 | procedure TForm1.FormDestroy(Sender: TObject); | |
| 92 | 92 | begin | |
| 93 | 93 | image.free; | |
| 94 | 94 | end; | |
| 95 | 95 | ||
| 96 | 96 | procedure TForm1.FormPaint(Sender: TObject); | |
| 97 | 97 | begin | |
| 98 | 98 | image.Draw(Canvas,0,0,True); | |
| 99 | 99 | end; | |
| 100 | 100 | ||
| 101 | 101 | initialization | |
| 102 | 102 | {$I UMain.lrs} | |
| 103 | 103 | ||
| 104 | 104 | end. | |
| 105 | 105 | ``` | |
| 106 | 106 | ||
| 107 | 107 | ### Run the program | |
| 108 | 108 | ||
| 109 | 109 | You should see a form with an image drawn in it at the upper-left corner. | |
| 110 | 110 | ||
| 111 | - | ||
| 112 | - | ||
| 113 | - | ||
| 114 | - | ||
| 111 | + | 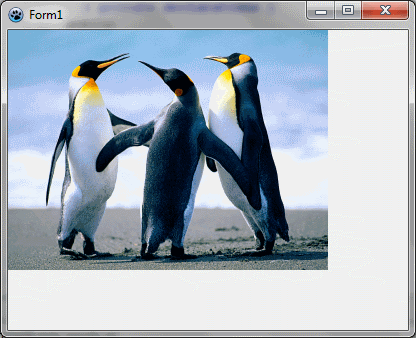 | |
| 115 | 112 | ||
| 116 | 113 | ### Center the image | |
| 117 | 114 | ||
| 118 | 115 | You may want to center the image on the form. To do this, modify the FormPaint procedure: | |
| 119 | 116 | ||
| 120 | 117 | ``` pascal | |
| 121 | 118 | procedure TForm1.FormPaint(Sender: TObject); | |
| 122 | 119 | var ImagePos: TPoint; | |
| 123 | 120 | begin | |
| 124 | 121 | ImagePos := Point( (ClientWidth - Image.Width) div 2, | |
| 125 | 122 | (ClientHeight - Image.Height) div 2 ); | |
| 126 | 123 | ||
| 127 | 124 | // test for negative position | |
| 128 | 125 | if ImagePos.X < 0 then ImagePos.X := 0; | |
| 129 | 126 | if ImagePos.Y < 0 then ImagePos.Y := 0; | |
| 130 | 127 | ||
| 131 | 128 | image.Draw(Canvas,ImagePos.X,ImagePos.Y,True); | |
| 132 | 129 | end; | |
| 133 | 130 | ``` | |
| 134 | 131 | ||
| 135 | 132 | To compute the position, we need to calculate the space between the image and the left border (X coordinate) and the space between the image and the top border (Y coordinate). The expression ClientWidth - Image.Width returns the available horizontal space, and we divide it by 2 to obtain the left margin. | |
| 136 | 133 | ||
| 137 | 134 | The result can be negative if the image is bigger than the client width. In this case, the margin is just set to zero. | |
| 138 | 135 | ||
| 139 | 136 | You can run the program and see if it works. Notice what happens if we remove the test for negative position. | |
| 140 | 137 | ||
| 141 | 138 | ### Stretch the image | |
| 142 | 139 | ||
| 143 | 140 | To stretch the image, we need to create a temporary stretched image: | |
| 144 | 141 | ||
| 145 | 142 | ``` pascal | |
| 146 | 143 | procedure TForm1.FormPaint(Sender: TObject); | |
| 147 | 144 | var stretched: TBGRABitmap; | |
| 148 | 145 | begin | |
| 149 | 146 | stretched := image.Resample(ClientWidth, ClientHeight) as TBGRABitmap; | |
| 150 | 147 | stretched.Draw(Canvas,0,0,True); | |
| 151 | 148 | stretched.Free; | |
| 152 | 149 | end; | |
| 153 | 150 | ``` | |
| 154 | 151 | ||
| 155 | 152 | By default, it uses fine resample, but you can precise if you want to use simple stretch instead (faster): | |
| 156 | 153 | ||
| 157 | 154 | ``` pascal | |
| 158 | 155 | stretched := image.Resample(ClientWidth, ClientHeight, rmSimpleStretch) as TBGRABitmap; | |
| 159 | 156 | ``` | |
| 160 | 157 | ||
| 161 | 158 | You can also specify the interpolation filter with the [[TBGRACustomBitmap and IBGRAScanner|ResampleFilter]] property: | |
| 162 | 159 | ||
| 163 | 160 | ``` pascal | |
| 164 | 161 | image.ResampleFilter := rfMitchell; | |
| 165 | 162 | stretched := image.Resample(ClientWidth, ClientHeight) as TBGRABitmap; | |
| 166 | 163 | ``` | |
| 167 | 164 | ||
| 168 | 165 | [[BGRABitmap tutorial 1|First tutorial]] \| [[BGRABitmap tutorial 3|Next tutorial (drawing with the mouse)]] | |
| 169 | 166 | ||
| 170 | 167 | --- | |
| 171 | 168 | *From the Free Pascal wiki, page "BGRABitmap tutorial 2", as it stood on 2023-02-13 after a change by Wp, out of the wiki's dump of 2024-05-26. Copyright stays with the author who wrote it, according to the old wiki's [[Licensing]] page. If you have concerns about this material, [message the admin](/wiki-contact).* | |
| 172 | 169 | Category: BGRABitmap | |
| 173 | 170 | Category: Graphics |