

Arduino: what changed
Revision 1 to 2. Removed lines have a minus sign; added lines have a plus sign.
| Old | New | Line | |
|---|---|---|---|
| 1 | 1 | *(Arduino only)* | |
| 2 | 2 | ||
| 3 | 3 | Many [Arduino](https://en.wikipedia.org/wiki/Arduino) projects have the need to send data to a PC running a program for data aquisition and visualisation. Lazarus is highly suitable for developing such programs, i.e. to build the PC-sided counterpart of an Arduino project. | |
| 4 | 4 | ||
| 5 | 5 | For Lazarus developers Arduino opens a whole new world of smart physical sensors and actuators for monitoring, control and data acquisition. | |
| 6 | 6 | ||
| 7 | 7 | The fpc compiler is even capable to compile programs for Arduino boards itself. | |
| 8 | 8 | ||
| 9 | - | ||
| 10 | - | ||
| 11 | - | ||
| 12 | - | ||
| 9 | + | 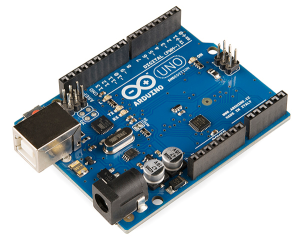 | |
| 13 | 10 | ||
| 14 | 11 | # FPC on Arduino | |
| 15 | 12 | ||
| 16 | 13 | Currently (2017) most Arduino boards carry microcontrollers of the AVR family (Atmega). An other popular arduino board carries a STM32 (ARM Cortex). For both microcontroller families there are fpc compilers available. Programming Arduino with FPC of course doesn't mean to use the arduino ecosystem with just a different language. Nevertheless arduino libs (C++) can be used in fpc programms, but mixing languages obviously is an advanced topic. While compilation the fpc creates a .hex-file (binary), this can be loaded to the microcontroller, arduino board respectively, using a programming software by choice. AVRDude e.g. also supports program upload using the Arduino bootloader. | |
| 17 | 14 | ||
| 18 | 15 | There are further wiki pages for programing AVR microcontrollers: [[AVR]], [[AVR Programming]] | |
| 19 | 16 | ||
| 20 | 17 | There is also a tutorial on how to use Lazarus on a AtMega328p (Arduino Uno/Nano) in German language: [[AVR Embedded Tutorial/de]] | |
| 21 | 18 | ||
| 22 | 19 | # Communication between a Lazarus application and Arduino | |
| 23 | 20 | ||
| 24 | 21 | The following section describes how your Lazarus/FPC application can communicate with Arduino boards, no matter whether fpc or arduino is running on the arduino board. | |
| 25 | 22 | ||
| 26 | 23 | ## One-way serial communication example using Synaser | |
| 27 | 24 | ||
| 28 | 25 | Here we show how to communicate with your board through serial communication channel. | |
| 29 | 26 | ||
| 30 | 27 | ### Lazarus side serial application | |
| 31 | 28 | ||
| 32 | 29 | There are many ways for [[Hardware Access|serial]] communication in Lazarus and FPC. | |
| 33 | 30 | ||
| 34 | 31 | #### Minimal Lazarus Synaser serial example | |
| 35 | 32 | ||
| 36 | 33 | We will use [Synaser](http://synapse.ararat.cz/doc/help/synaser.html) from [Synapse library](http://www.ararat.cz/synapse/doku.php) in this example. Create Lazarus application with one form and two buttons. Include Synaser unit and add [[Synapse|Synapse package]] as a new requirement to your project (you do this in Project Inspector). In OnClick event of both buttons put something like this: | |
| 37 | 34 | ||
| 38 | 35 | ``` pascal | |
| 39 | 36 | procedure TForm1.Button1Click(Sender: TObject); | |
| 40 | 37 | var | |
| 41 | 38 | ser: TBlockSerial; | |
| 42 | 39 | begin | |
| 43 | 40 | ser := TBlockSerial.Create; | |
| 44 | 41 | try | |
| 45 | 42 | ser.Connect('COM1'); // write here Arduino COM port number (on linux it's something like '/dev/ttyUSB0') | |
| 46 | 43 | Sleep(250); | |
| 47 | 44 | ser.config(9600, 8, 'N', SB1, False, False); | |
| 48 | 45 | ser.SendString('on'); // button 2 should have 'off' here | |
| 49 | 46 | finally | |
| 50 | 47 | ser.free; | |
| 51 | 48 | end; | |
| 52 | 49 | end; | |
| 53 | 50 | ``` | |
| 54 | 51 | ||
| 55 | 52 | ### Arduino side serial application | |
| 56 | 53 | ||
| 57 | 54 | You can program your Arduino in several languages. | |
| 58 | 55 | ||
| 59 | 56 | #### Minimal Arduino C sketch serial example | |
| 60 | 57 | ||
| 61 | 58 | You can follow [this](http://www.chrisbrand.co.za/2013/06/30/arduino-serial-port/) nice step by step tutorial. In short, you need to add a led with proper resistor to your input pin 13, compile this sketch in your [Arduino IDE](https://www.arduino.cc/en/Main/Software), and download it to your board: | |
| 62 | 59 | ||
| 63 | 60 | ``` cpp | |
| 64 | 61 | int led = 13; // Pin 13 | |
| 65 | 62 | ||
| 66 | 63 | void setup() | |
| 67 | 64 | { | |
| 68 | 65 | pinMode(led, OUTPUT); // Set pin 13 as digital out | |
| 69 | 66 | ||
| 70 | 67 | // Start up serial connection | |
| 71 | 68 | Serial.begin(9600); // baud rate | |
| 72 | 69 | Serial.flush(); | |
| 73 | 70 | } | |
| 74 | 71 | ||
| 75 | 72 | void loop() | |
| 76 | 73 | { | |
| 77 | 74 | String input = ""; | |
| 78 | 75 | ||
| 79 | 76 | // Read any serial input | |
| 80 | 77 | while (Serial.available() > 0) | |
| 81 | 78 | { | |
| 82 | 79 | input += (char) Serial.read(); // Read in one char at a time | |
| 83 | 80 | delay(5); // Delay for 5 ms so the next char has time to be received | |
| 84 | 81 | ||
| 85 | 82 | if (input == "on") | |
| 86 | 83 | { | |
| 87 | 84 | digitalWrite(led, HIGH); // on | |
| 88 | 85 | } | |
| 89 | 86 | else if (input == "off") | |
| 90 | 87 | { | |
| 91 | 88 | digitalWrite(led, LOW); // off | |
| 92 | 89 | } | |
| 93 | 90 | } | |
| 94 | 91 | } | |
| 95 | 92 | ``` | |
| 96 | 93 | ||
| 97 | 94 | #### Minimal Arduino mikroPascal serial example | |
| 98 | 95 | ||
| 99 | 96 | [mikroPascal for AVR](https://www.mikroe.com/mikropascal/) can be used to develop Arduino programs. TBD. | |
| 100 | 97 | ||
| 101 | 98 | #### Minimal Arduino E-Lab AvrCo serial example | |
| 102 | 99 | ||
| 103 | 100 | [E-Lab AvrCo Multitasking Pascal](http://e-lab.de/AVRco/index_en.html) can be used to develop Arduino programs. TBD. | |
| 104 | 101 | ||
| 105 | 102 | #### Minimal Arduino FPC serial example | |
| 106 | 103 | ||
| 107 | 104 | Yes, your Arduino 8-bit AVR board [[AVR Programming|can be programmed with FPC]] too. TBD. | |
| 108 | 105 | ||
| 109 | 106 | ## Bidirectional serial communication example using SDPO | |
| 110 | 107 | ||
| 111 | 108 | The single directional example is based on synaser, which is not a visual component. SDPO provides a visual wrapper around Synaser, and some people may find this method easier. The following example requires the SDPO package (currently 0.4.0) to be installed in Lazarus. There are other tutorials to show you how to install package. If you cannot find the SDPO component on your component palette, this example will not work. | |
| 112 | 109 | ||
| 113 | 110 | #### Lazarus Side of Bidirectional SDPO serial example | |
| 114 | 111 | ||
| 115 | 112 | Open a new project, and add the following to a form: (Names are the default names) | |
| 116 | 113 | ||
| 117 | 114 | 1. the SDPO port (under the SDPO tab after you have installed it). | |
| 118 | 115 | 2. four buttons. Caption as follows: Button1 SEND; Button2 CLEAR; Button3 UP; Button4 DOWN; | |
| 119 | 116 | 3. a memo. Used to display what is sent and received. | |
| 120 | 117 | 4. a panel. Used to display which number is being sent. | |
| 121 | 118 | ||
| 122 | 119 | Configure the Sdposerial1 properties to match the Arduino with the object inspector. | |
| 123 | 120 | ||
| 124 | 121 | - Baudrate = br__9600; | |
| 125 | 122 | - Device = YourSerialPort ( mine is /dev/ttyUSB0 ). This is probably the same port you use to program your Arduino. | |
| 126 | 123 | - FlowControl = fcNone; | |
| 127 | 124 | - Parity = pNone; | |
| 128 | 125 | - StopBits = sbOne; | |
| 129 | 126 | - SynSer = (TBlockSerial); (notice this from the previous example?) | |
| 130 | 127 | - Tag = 0; | |
| 131 | 128 | ||
| 132 | 129 | Using the code window, find the spot under var where it defines **Form1: Tform;** , and add the next three variables: | |
| 133 | 130 | ||
| 134 | 131 | ``` pascal | |
| 135 | 132 | var | |
| 136 | 133 | Form1: TForm1; | |
| 137 | 134 | incomingstring: String; | |
| 138 | 135 | completestring: String; | |
| 139 | 136 | messagenum: integer; | |
| 140 | 137 | ``` | |
| 141 | 138 | ||
| 142 | 139 | Add the following events (code is shown below) | |
| 143 | 140 | ||
| 144 | 141 | - OnCreate for Form1 | |
| 145 | 142 | - OnDestroy for Form1 | |
| 146 | 143 | - OnRxData for Sdposerial1 | |
| 147 | 144 | - OnClick for each button (4 events) | |
| 148 | 145 | ||
| 149 | 146 | In the empty code blocks for each event, add the following code. | |
| 150 | 147 | ||
| 151 | 148 | ``` pascal | |
| 152 | 149 | procedure TForm1.SdpoSerial1RxData(Sender: TObject); | |
| 153 | 150 | begin | |
| 154 | 151 | // add whatever is in the serial buffer to the incoming string | |
| 155 | 152 | incomingstring := incomingstring + SdpoSerial1.ReadData; | |
| 156 | 153 | // arduino terminates a serial.println transmission with a CR (#13) and a LF (#10). | |
| 157 | 154 | // check to see if our incming string is terminated by a linefeed | |
| 158 | 155 | if (incomingstring[Length(incomingstring)] = #10 ) then | |
| 159 | 156 | begin | |
| 160 | 157 | // the string ends a linefeed, so the whole string from the arduino is here. | |
| 161 | 158 | // remove the extra two characters before adding the incoming string to the memo (adds extra lines if you dont) | |
| 162 | 159 | completestring := LeftStr(incomingstring,Length(incomingstring)-2); // trim two places | |
| 163 | 160 | Memo1.Lines.add(completestring); // echo the new string to the memo | |
| 164 | 161 | incomingstring := ''; // clear the incoming string so we can start again | |
| 165 | 162 | end; | |
| 166 | 163 | end; | |
| 167 | 164 | ||
| 168 | 165 | procedure TForm1.FormCreate(Sender: TObject); | |
| 169 | 166 | begin | |
| 170 | 167 | incomingstring := ''; | |
| 171 | 168 | SdpoSerial1.open; | |
| 172 | 169 | SdpoSerial1.Active := true; | |
| 173 | 170 | end; | |
| 174 | 171 | ||
| 175 | 172 | procedure TForm1.Button3Click(Sender: TObject); | |
| 176 | 173 | // request to go higher | |
| 177 | 174 | begin | |
| 178 | 175 | // check to see if we have reached the upper limit | |
| 179 | 176 | if (messagenum < 12) then | |
| 180 | 177 | begin | |
| 181 | 178 | messagenum := messagenum + 1; // increase the number | |
| 182 | 179 | panel1.caption := inttostr(messagenum); // display the new number | |
| 183 | 180 | end; | |
| 184 | 181 | // if we have reached the limit, this won't do anything | |
| 185 | 182 | end; | |
| 186 | 183 | ||
| 187 | 184 | procedure TForm1.Button2Click(Sender: TObject); | |
| 188 | 185 | begin | |
| 189 | 186 | memo1.lines.clear; // clear the memo | |
| 190 | 187 | end; | |
| 191 | 188 | ||
| 192 | 189 | procedure TForm1.Button1Click(Sender: TObject); | |
| 193 | 190 | // send a request to the arduino | |
| 194 | 191 | begin | |
| 195 | 192 | memo1.lines.add(panel1.caption); // echo the request to the memo | |
| 196 | 193 | SdpoSerial1.WriteData(panel1.caption + #13#10); | |
| 197 | 194 | end; | |
| 198 | 195 | ||
| 199 | 196 | procedure TForm1.Button4Click(Sender: TObject); | |
| 200 | 197 | // request to go lower | |
| 201 | 198 | begin | |
| 202 | 199 | // check to see if we have reached the lower limit | |
| 203 | 200 | if (messagenum > 0) then | |
| 204 | 201 | begin | |
| 205 | 202 | messagenum := messagenum - 1; // decrease the number | |
| 206 | 203 | panel1.caption := inttostr(messagenum); // display the new number | |
| 207 | 204 | end; | |
| 208 | 205 | // if we have reached the limit, this won't do anything | |
| 209 | 206 | end; | |
| 210 | 207 | ||
| 211 | 208 | procedure TForm1.FormDestroy(Sender: TObject); | |
| 212 | 209 | begin | |
| 213 | 210 | SdpoSerial1.Active := false; | |
| 214 | 211 | SdpoSerial1.close; | |
| 215 | 212 | end; | |
| 216 | 213 | ||
| 217 | 214 | ``` | |
| 218 | 215 | ||
| 219 | 216 | Test the program, and verify that it compiles. | |
| 220 | 217 | ||
| 221 | 218 | ### Arduino side of Bidirectional serial example application | |
| 222 | 219 | ||
| 223 | 220 | The following code has been tested on a Arduino Mega 2560 clone board. Feel free to alter it as you see fit. It is provided as one block to avoid adding your own strings. | |
| 224 | 221 | ||
| 225 | 222 | ``` cpp | |
| 226 | 223 | //** This program is to demo simple bidirectional serial communication | |
| 227 | 224 | //** between an Arduino a computer running Lazarus. This is one side | |
| 228 | 225 | //** of the tutorial. See https://wiki.freepascal.org/Arduino for more | |
| 229 | 226 | //** details. Tested on Linux Mint with off-brand Arduino mega 2560. | |
| 230 | 227 | //** Program draws heavily on the work of others. Use program freely, | |
| 231 | 228 | //** but at your own risk. | |
| 232 | 229 | ||
| 233 | 230 | char incoming; | |
| 234 | 231 | String textnum; | |
| 235 | 232 | int number; | |
| 236 | 233 | String txt[12]; | |
| 237 | 234 | ||
| 238 | 235 | void setup() | |
| 239 | 236 | { | |
| 240 | 237 | // Start up serial connection | |
| 241 | 238 | Serial.begin(9600); // baud rate | |
| 242 | 239 | Serial.flush(); | |
| 243 | 240 | delay(1000); // give the port time to work | |
| 244 | 241 | txt[ 0] = "You asked for message 0."; | |
| 245 | 242 | txt[ 1] = "You asked for message 1."; | |
| 246 | 243 | txt[ 2] = "You asked for message 2."; | |
| 247 | 244 | txt[ 3] = "You asked for message 3."; | |
| 248 | 245 | txt[ 4] = "You asked for message 4."; | |
| 249 | 246 | txt[ 5] = "You asked for message 5."; | |
| 250 | 247 | txt[ 6] = "You asked for message 6."; | |
| 251 | 248 | txt[ 7] = "You asked for message 7."; | |
| 252 | 249 | txt[ 8] = "You asked for message 8."; | |
| 253 | 250 | txt[ 9] = "You asked for message 9."; | |
| 254 | 251 | txt[10] = "You asked for message 10."; | |
| 255 | 252 | txt[11] = "You asked for message 11."; | |
| 256 | 253 | txt[12] = "ERROR - SOMETHING WENT WRONG"; | |
| 257 | 254 | } | |
| 258 | 255 | ||
| 259 | 256 | void loop() | |
| 260 | 257 | { | |
| 261 | 258 | textnum = ""; // clear the number | |
| 262 | 259 | number = 12; // set the number to give the error message | |
| 263 | 260 | ||
| 264 | 261 | // Read any serial input | |
| 265 | 262 | while (Serial.available() > 0) | |
| 266 | 263 | { | |
| 267 | 264 | incoming = (char) Serial.read(); // Read in one char | |
| 268 | 265 | if (isdigit(incoming)) textnum += incoming; | |
| 269 | 266 | delay(50); // Delay for 50 ms so the next char has time to be received | |
| 270 | 267 | } | |
| 271 | 268 | ||
| 272 | 269 | if (textnum != "") | |
| 273 | 270 | { | |
| 274 | 271 | number = String(textnum).toInt(); // convert the incoming string to a number | |
| 275 | 272 | Serial.println(txt[number]); // send the appropriate string back | |
| 276 | 273 | } | |
| 277 | 274 | ||
| 278 | 275 | ||
| 279 | 276 | } | |
| 280 | 277 | ``` | |
| 281 | 278 | ||
| 282 | 279 | Compile and upload this code to your board. You should be able to test the program by opening the Serial Monitor in Arduino, and sending a number from 0 to 32 to the Arduino. It should respond by "insulting" you with the appropriate numbered insult. No error checking is provided, so keep your requests in range. | |
| 283 | 280 | ||
| 284 | 281 | ### Connecting the Two Sides | |
| 285 | 282 | ||
| 286 | 283 | Serial Ports cannot be opened by more than one program at a time - particularly when a program grabs the port and hogs it like this simple example does. Make sure you close the Arduino Serial Monitor before attempting to run the Lazarus program. Your Arduino should be plugged in and powered up. If you are working under Linux, you may need to run the program as a superuser, or you may need to add your user to the dialout group. In any case, once the Arduino is up and running, you can run the program. It must be able to connect with the Arduino when it creates the main window, and it will hog the port until you properly close the application. Depending on your computer, sleeping or hibernating may mess up your communications. | |
| 287 | 284 | ||
| 288 | 285 | ## Ethernet communication | |
| 289 | 286 | ||
| 290 | 287 | Here we show how to communicate with your board through ethernet communication channel. | |
| 291 | 288 | ||
| 292 | 289 | ### Lazarus side ethernet application | |
| 293 | 290 | ||
| 294 | 291 | TBD | |
| 295 | 292 | ||
| 296 | 293 | ### Arduino side ethernet application | |
| 297 | 294 | ||
| 298 | 295 | TBD | |
| 299 | 296 | ||
| 300 | 297 | ## Wiki Resources | |
| 301 | 298 | ||
| 302 | 299 | - [[Portal:Embedded|Embedded Portal]] | |
| 303 | 300 | - [[AVR]] | |
| 304 | 301 | - [[AVR Programming]] | |
| 305 | 302 | ||
| 306 | 303 | ## External Resources | |
| 307 | 304 | ||
| 308 | 305 | - [Forum topic that started this article](http://forum.lazarus.freepascal.org/index.php?topic=36885) | |
| 309 | 306 | - [Raspberry Pi Lazarus application talking to Arduino over serial](https://bigdanzblog.wordpress.com/2014/11/07/serial-communications-usb-between-a-raspberry-pi-and-an-arduino-using-lazarus-free-pascal/) | |
| 310 | 307 | - [FPC application talking to ESP8266 over TCP](https://bigdanzblog.wordpress.com/2016/02/14/using-lazarus-free-pascal-to-communicate-with-esp8266/) | |
| 311 | 308 | - [FPC application talking to Arduino Nano over TCP](https://bigdanzblog.wordpress.com/2014/11/19/tcp-communications-between-a-pc-and-an-arduino-nano-using-lazarus-free-pascal/) | |
| 312 | 309 | - [Arduino projects](https://www.allaboutcircuits.com/projects/category/arduino/) | |
| 313 | 310 | ||
| 314 | 311 | --- | |
| 315 | 312 | *From the Free Pascal wiki, page "Arduino", as it stood on 2023-08-22 after a change by AllPascal, out of the wiki's dump of 2024-05-26. Copyright stays with the author who wrote it, according to the old wiki's [[Licensing]] page. If you have concerns about this material, [message the admin](/wiki-contact).* |