

Arduino/es: what changed
Revision 1 to 2. Removed lines have a minus sign; added lines have a plus sign.
| Old | New | Line | |
|---|---|---|---|
| 1 | 1 | Este artículo describe la manera de comunicar tu aplicación Lazarus/FPC con [Placas Arduino](https://en.wikipedia.org/wiki/Arduino). Esto abre un mundo completamente nuevo de sensores y actuadores físicos inteligentes para monitorización, control y adquisición de datos. | |
| 2 | 2 | ||
| 3 | - | ||
| 4 | - | ||
| 5 | - | ||
| 6 | - | ||
| 3 | + | 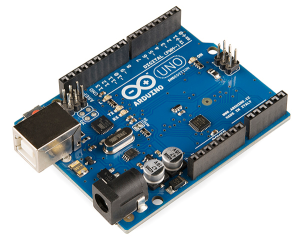 | |
| 7 | 4 | ||
| 8 | 5 | ## Comunicación serie | |
| 9 | 6 | ||
| 10 | 7 | Aquí se muestra como comunicar con tu placa a través del canal de comunicación serie. | |
| 11 | 8 | ||
| 12 | 9 | ### Lazarus side serial application | |
| 13 | 10 | ||
| 14 | 11 | Existen varias posibilidades para comunicaciones [[Hardware Access|serie]] en Lazarus/FPC. | |
| 15 | 12 | ||
| 16 | 13 | #### Minimal Lazarus Synaser serial example | |
| 17 | 14 | ||
| 18 | 15 | We will use [Synaser](http://synapse.ararat.cz/doc/help/synaser.html) from [Synapse library](http://www.ararat.cz/synapse/doku.php) in this example. Create Lazarus application with one form and two buttons. Include Synaser unit and add [[Synapse|Synapse package]] as a new requirement to your project. In OnClick event of both buttons put something like this: | |
| 19 | 16 | ||
| 20 | 17 | ``` pascal | |
| 21 | 18 | procedure TForm1.Button1Click(Sender: TObject); | |
| 22 | 19 | var | |
| 23 | 20 | ser: TBlockSerial; | |
| 24 | 21 | begin | |
| 25 | 22 | ser := TBlockSerial.Create; | |
| 26 | 23 | try | |
| 27 | 24 | ser.Connect('COM1'); // Escribe aquí el puerto COM asociado a la comunicación con Arduino(en linux es algo así como | |
| 28 | 25 | '/dev/ttyUSB0') | |
| 29 | 26 | Sleep(250); | |
| 30 | 27 | ser.config(9600, 8, 'N', SB1, False, False); // Establecemos los parámetros para la conexión Serie. | |
| 31 | 28 | ser.SendString('on'); // Enviamos la cadena 'on', El pulsador 2 debería tener aquí 'off' | |
| 32 | 29 | finally | |
| 33 | 30 | ser.free; // Liberamos los recursos tomados para TBlockSerial. | |
| 34 | 31 | end; | |
| 35 | 32 | end; | |
| 36 | 33 | ``` | |
| 37 | 34 | ||
| 38 | 35 | ### Arduino side serial application | |
| 39 | 36 | ||
| 40 | 37 | You can program your Arduino in several languages. | |
| 41 | 38 | ||
| 42 | 39 | #### Minimal Arduino C sketch serial example | |
| 43 | 40 | ||
| 44 | 41 | You can follow [this](http://www.chrisbrand.co.za/2013/06/30/arduino-serial-port/) nice step by step tutorial. In short, you need to add a led with proper resistor to your input pin 13, compile this sketch in your [Arduino IDE](https://www.arduino.cc/en/Main/Software), and download it to your board: | |
| 45 | 42 | ||
| 46 | 43 | ``` cpp | |
| 47 | 44 | int led = 13; // Pin 13 | |
| 48 | 45 | ||
| 49 | 46 | void setup() | |
| 50 | 47 | { | |
| 51 | 48 | pinMode(led, OUTPUT); // Set pin 13 as digital out | |
| 52 | 49 | ||
| 53 | 50 | // Start up serial connection | |
| 54 | 51 | Serial.begin(9600); // baud rate | |
| 55 | 52 | Serial.flush(); | |
| 56 | 53 | } | |
| 57 | 54 | ||
| 58 | 55 | void loop() | |
| 59 | 56 | { | |
| 60 | 57 | String input = ""; | |
| 61 | 58 | ||
| 62 | 59 | // Read any serial input | |
| 63 | 60 | while (Serial.available() > 0) | |
| 64 | 61 | { | |
| 65 | 62 | input += (char) Serial.read(); // Read in one char at a time | |
| 66 | 63 | delay(5); // Delay for 5 ms so the next char has time to be received | |
| 67 | 64 | } | |
| 68 | 65 | ||
| 69 | 66 | if (input == "on") | |
| 70 | 67 | { | |
| 71 | 68 | digitalWrite(led, HIGH); // on | |
| 72 | 69 | } | |
| 73 | 70 | else if (input == "off") | |
| 74 | 71 | { | |
| 75 | 72 | digitalWrite(led, LOW); // off | |
| 76 | 73 | } | |
| 77 | 74 | } | |
| 78 | 75 | ``` | |
| 79 | 76 | ||
| 80 | 77 | #### Minimal Arduino mikroPascal serial example | |
| 81 | 78 | ||
| 82 | 79 | [mikroPascal for AVR](https://www.mikroe.com/mikropascal/) can be used to develop Arduino programs. TBD. | |
| 83 | 80 | ||
| 84 | 81 | #### Minimal Arduino E-Lab AvrCo serial example | |
| 85 | 82 | ||
| 86 | 83 | [E-Lab AvrCo Multitasking Pascal](http://e-lab.de/AVRco/index_en.html) can be used to develop Arduino programs. TBD. | |
| 87 | 84 | ||
| 88 | 85 | #### Minimal Arduino FPC serial example | |
| 89 | 86 | ||
| 90 | 87 | Efectivamente, tu placa Arduino 8-bit AVR \[AVR Programming\|puede ser programada con FPC\]\] también. TBD. | |
| 91 | 88 | ||
| 92 | 89 | ## Comunicación Ethernet | |
| 93 | 90 | ||
| 94 | 91 | Aquí mostramos como comunicar con la placa a través del canal de comunicación Ethernet. | |
| 95 | 92 | ||
| 96 | 93 | ### Lazarus side ethernet application | |
| 97 | 94 | ||
| 98 | 95 | TBD | |
| 99 | 96 | ||
| 100 | 97 | ### Arduino side ethernet application | |
| 101 | 98 | ||
| 102 | 99 | TBD | |
| 103 | 100 | ||
| 104 | 101 | ## Resources | |
| 105 | 102 | ||
| 106 | 103 | [Forum topic that started this article](http://forum.lazarus.freepascal.org/index.php?topic=36885) | |
| 107 | 104 | ||
| 108 | 105 | [[AVR]] | |
| 109 | 106 | ||
| 110 | 107 | [[AVR Programming]] | |
| 111 | 108 | ||
| 112 | 109 | [Raspberry Pi Lazarus application talking to Arduino over serial](https://bigdanzblog.wordpress.com/2014/11/07/serial-communications-usb-between-a-raspberry-pi-and-an-arduino-using-lazarus-free-pascal/) | |
| 113 | 110 | ||
| 114 | 111 | [FPC application talking to ESP8266 over TCP](https://bigdanzblog.wordpress.com/2016/02/14/using-lazarus-free-pascal-to-communicate-with-esp8266/) | |
| 115 | 112 | ||
| 116 | 113 | [FPC application talking to Arduino Nano over TCP](https://bigdanzblog.wordpress.com/2014/11/19/tcp-communications-between-a-pc-and-an-arduino-nano-using-lazarus-free-pascal/) | |
| 117 | 114 | ||
| 118 | 115 | --- | |
| 119 | 116 | *From the Free Pascal wiki, page "Arduino/es", as it stood on 2020-02-09 after a change by GAN, out of the wiki's dump of 2024-05-26. Copyright stays with the author who wrote it, according to the old wiki's [[Licensing]] page. If you have concerns about this material, [message the admin](/wiki-contact).* |