

ARM Embedded Tutorial - Raspberry Pi Pico saying Hello via UART
Introduction
UART Interfaces are often used for debugging output, the pico is no exception to this rule.
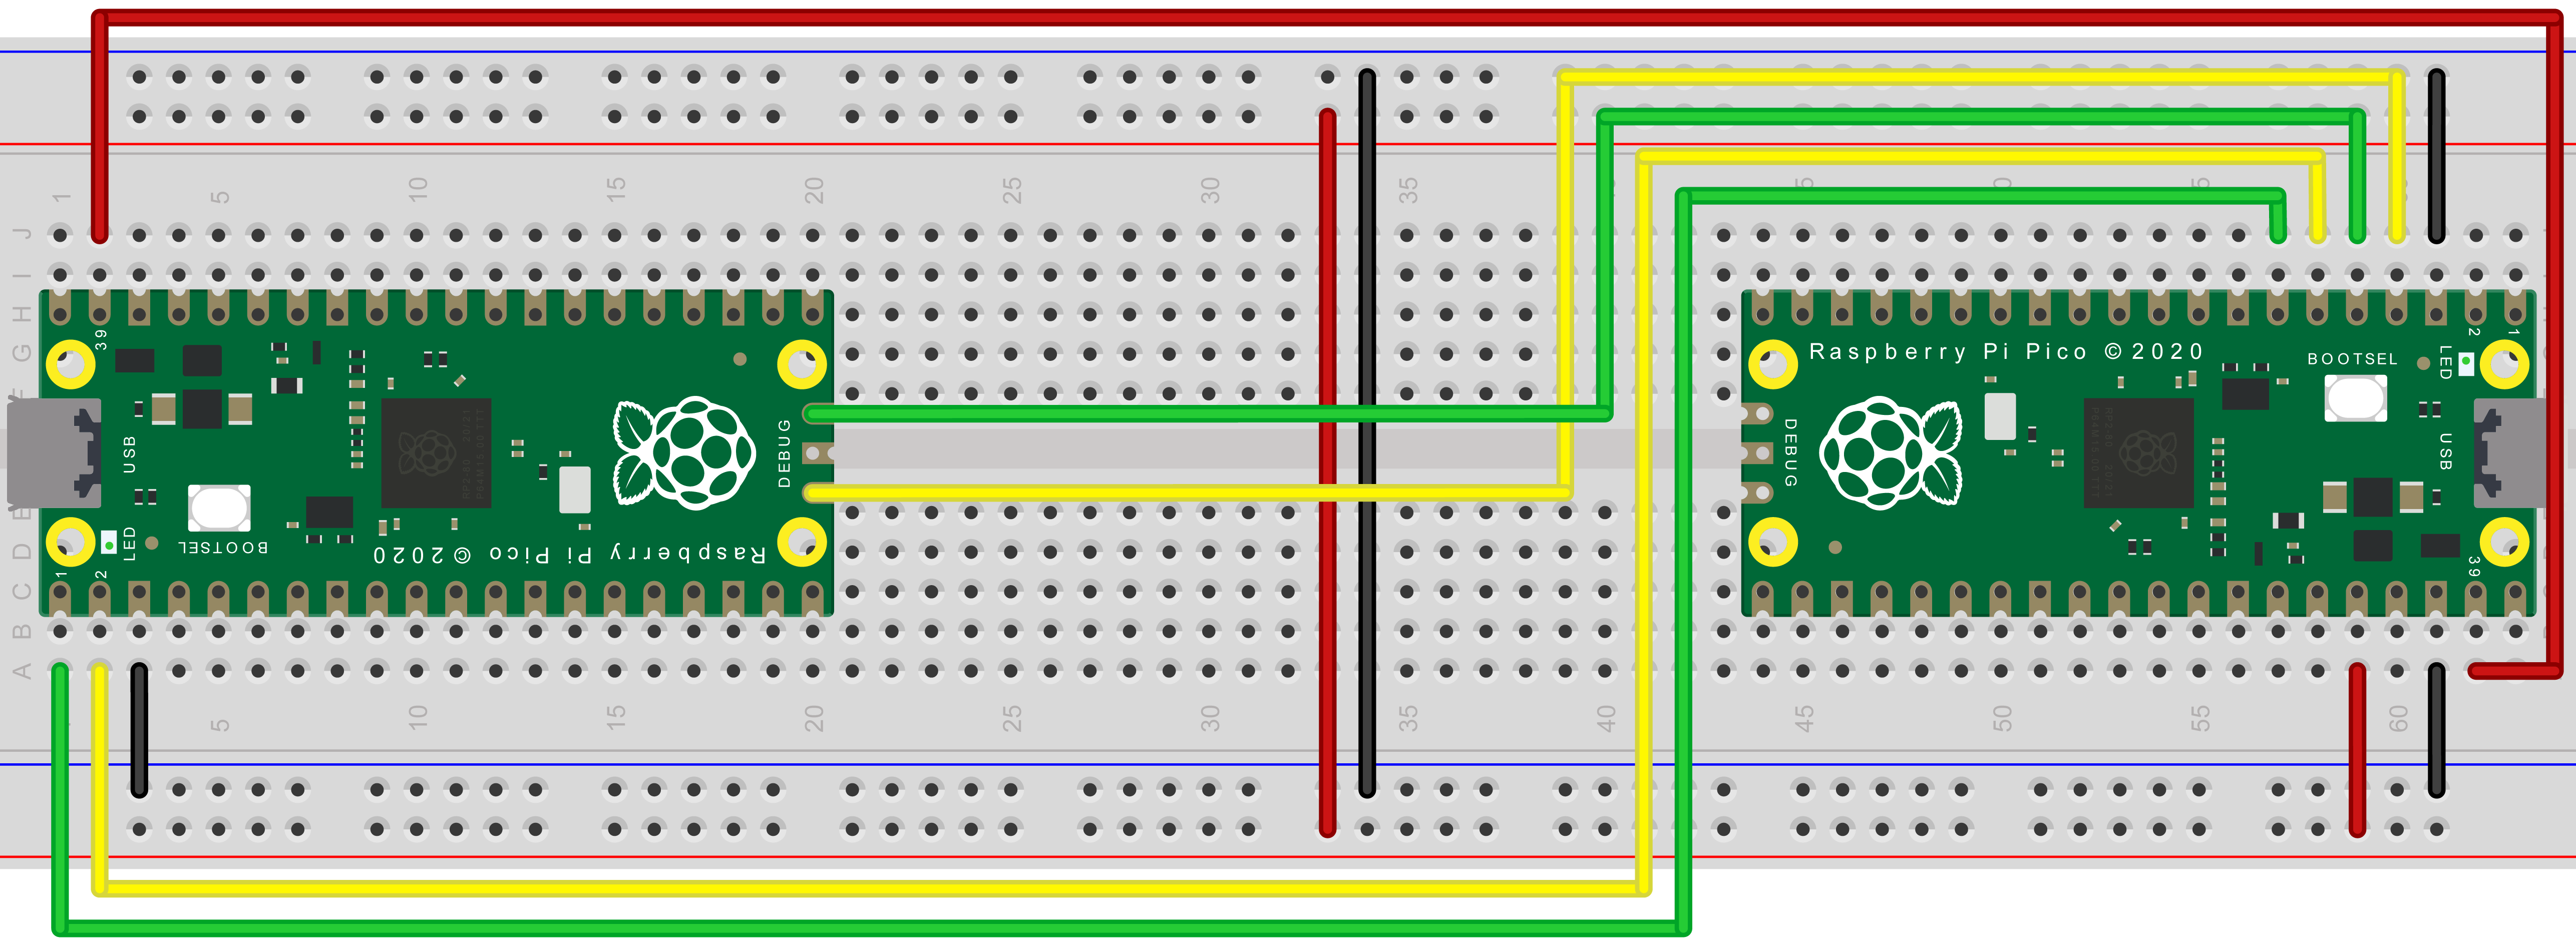
This application is best tested with picoprobe, when you connect it to your development board as described in the Getting Started Guide chapter then the GPIO pins 0 and 1 are connected to the debug probe which makes them visible as a serial interface on your computer.
Here's again our debugging setup on a breadboard, the picoprobe is on the right, the pico that will run our code is on the left:
program uart;
{$MODE OBJFPC}
{$H+}
{$MEMORY 10000,10000}

uses
  pico_uart_c,
  pico_gpio_c,
  pico_timer_c;
const
  BAUD_RATE=115200;
begin
  gpio_init(TPicoPin.LED);
  gpio_set_dir(TPicoPin.LED,TGPIODirection.GPIO_OUT);
  uart_init(uart0, BAUD_RATE);
  gpio_set_function(TPicoPin.GP0_UART0_TX, TGPIOFunction.GPIO_FUNC_UART);
  gpio_set_function(TPicoPin.GP1_UART0_RX, TGPIOFunction.GPIO_FUNC_UART);
  repeat
    gpio_put(TPicoPin.LED,true);
    uart_puts(uart0, 'Hello, UART!'+#13+#10);
    busy_wait_us_32(500000);
    gpio_put(TPicoPin.LED,false);
    busy_wait_us_32(500000);
  until 1=0;
end.
Connect your terminal program to the UART port and enjoy the message from your Pico. In this example we are using ansistrings, so the $MEMORY setting is important as we will use dynamically allocated AnsiStrings. To visually get confirmation that the app is running we additionally blink the LED on each turn of the main loop.
See also
From the Free Pascal wiki, page "ARM Embedded Tutorial - Raspberry Pi Pico saying Hello via UART", as it stood on 2021-12-30 after a change by Trev, out of the wiki's dump of 2024-05-26. Copyright stays with the author who wrote it, according to the old wiki's Licensing page. If you have concerns about this material, message the admin.
Talk about this page
Nobody has opened a bench for this page yet. Sign in to open one.